In this article we will focus on building a universal (web, iOS, Android) web3 social network app on Lens Protocol with React Native. If you need a standard web3 cross-platform setup, see this guide for more in-depth explanation:
Special thanks to Nader Dabit and Vivek Suthar for reviewing the final repository regarding Lens Protocol best practices.
What is Lens Protocol?
Lens Protocol is the building blocks for building web3 social applications. It is a web3 social graph on the Polygon blockchain, and it seeks to solve major problems with existing social networks, which all have their centralized databases and fight for your attention and content.
In Lens, users own their data. Since users’ profiles, publications, and reactions live in the protocol, they can read and write content to any application built on top of the protocol, and it will be available everywhere. Each application built on Lens benefits the whole ecosystem, and developers can design meaningful social experiences without the need to turn to feedback mechanisms to lock in the user's attention.
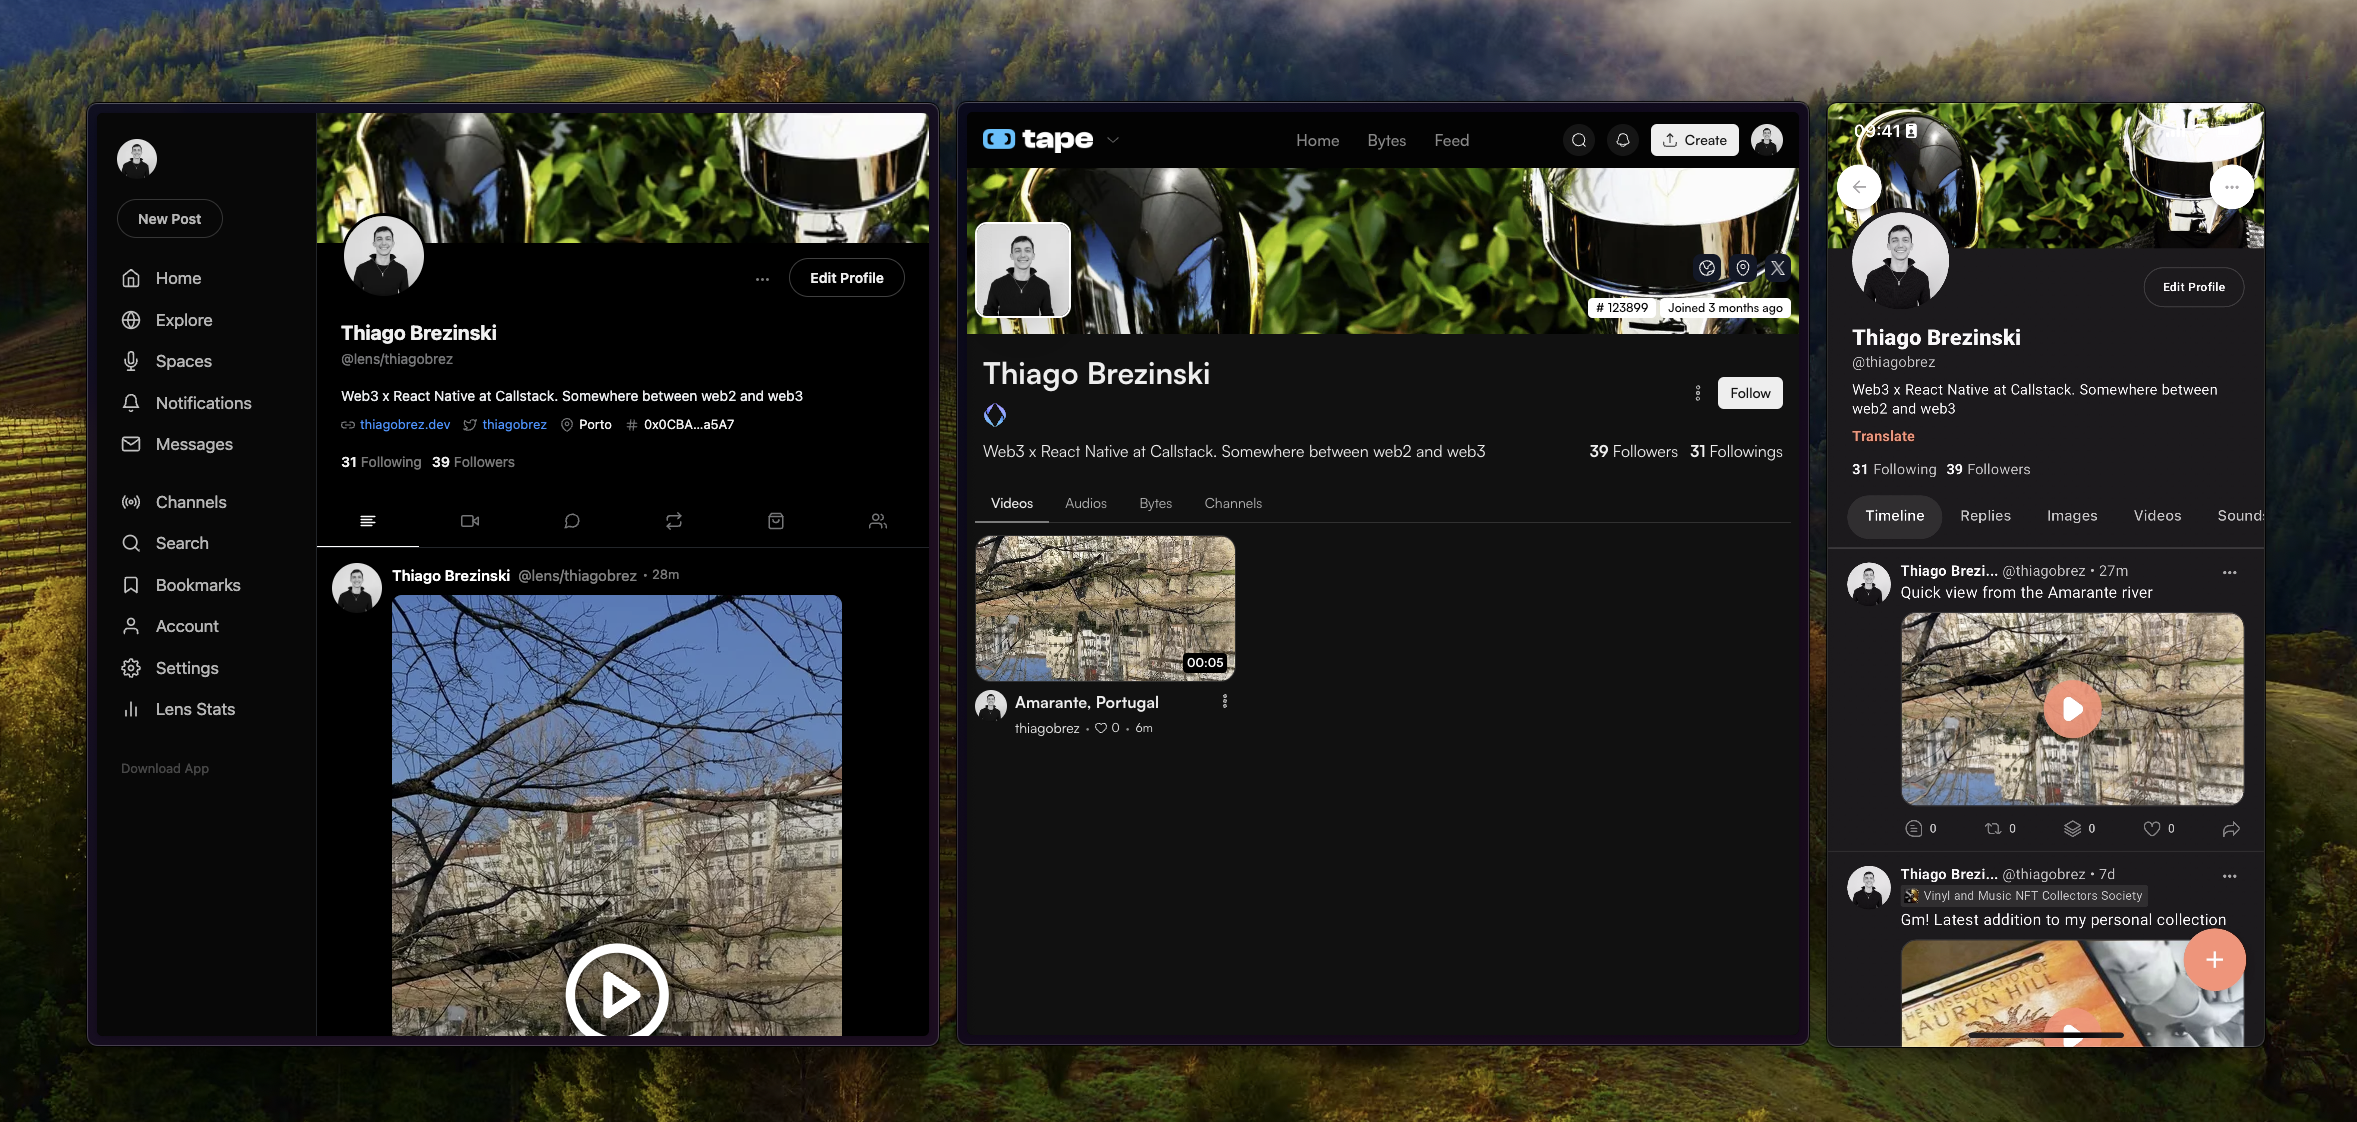
For example, Orb is a client focused on the mobile experience, communities and creators. Buttrfly is an explorer for both web and mobile. And Tape is a platform focused on video content. While all of them share your data on the Lens Protocol, each have their own set of features and tailored experience.
This is how my profile looks on each of them. They share the data but optimize the UX according to each app's focus.
Building a universal social app
We’ll start off from a web3 cross-platform setup similar to what we've built previously in the article mentioned above. This will save us time from setting up custom navigation for each platform (sidebar on web, tabs on mobile) and setting up Web3Modal on both platforms to connect the wallet.
If you want to check the final result directly, see the final code.
To follow along with this article, download the final code and switch to the article-start branch, which is a clean state branch without the social app features we will build in the following sections.
git checkout article-start
Our setup uses Expo to create a cross-platform app, WalletConnect Web3Modal to connect the wallet and Wagmi for useful Ethereum hooks. You may want to read the article on how to set up cross-platform web3 apps first to understand the reasoning behind this setup.
In the end, you’ll have a universal social app with a simple feed and profile page, running on native and web.
Installing the Lens SDK
Let's start by installing the Lens Protocol SDK. The SDK reference is here, and you can read more about all Lens concepts in the docs.
Notice that you don't need to install ethers@legacy-v5 as suggested in the SDK reference because we will be using Viem instead.
Also install Expo SecureStore - a safe alternative to AsyncStorage - so we can safely store our SDK access tokens.
With the packages installed, we're ready to create a cross-platform module. Similar to src/lib/web3modal, we’ll create a src/lib/lens-sdk module and use Platform-specific file extensions so the Metro bundler can import either the web or native SDK conditionally based on the platform the code is running on.
In src/lib/lens-sdk/index.ts add the code that is going to run on native:
In src/lib/lens-sdk/index.web.ts add the code that is going to run on web:
Notice that both are very similar, with the major difference being that we change the SDK that we are importing on the first line, and on native we are using SecureStore as the storage mechanism.
Since these index files are going to be imported conditionally depending on the platform, we need to export the exact same variables otherwise the application might crash during runtime if it’s trying to access something that doesn't exist.
To finalize the Lens SDK setup, we just need to add the LensProvider to our App.tsx.
Remember to import everything related to Lens from our recently-created lens-sdk module, so imports are resolved correctly depending on the platform.
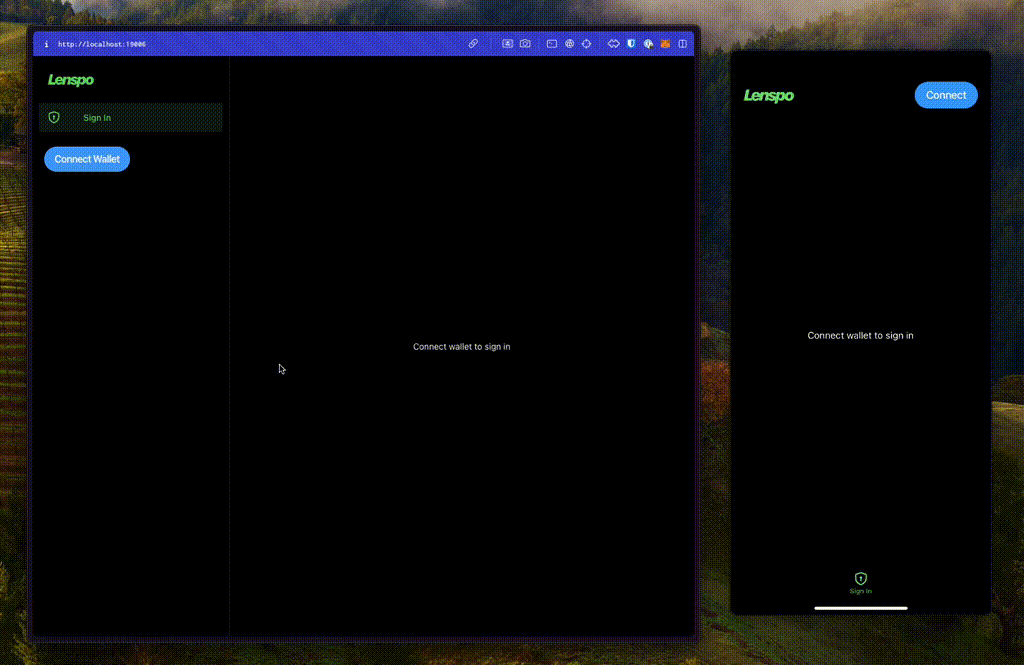
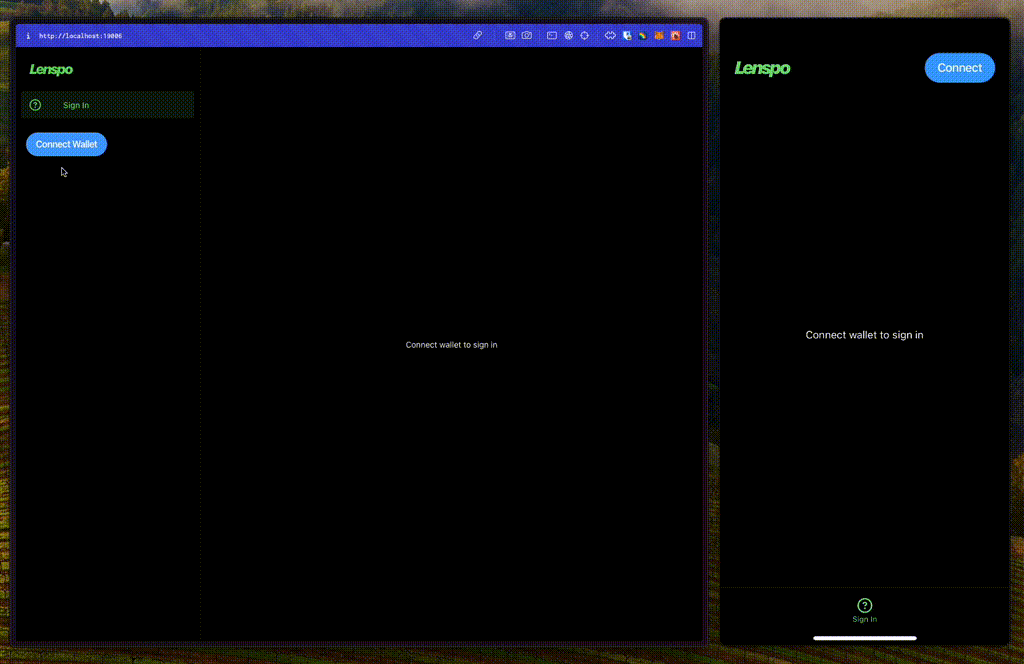
Easy enough, if you run the app at this point, you should see a blank template. We are going to add the new screens in the next section.
.png)
Sign-in flow
Now that we have the Lens SDK ready to use, let's build the sign-in flow.
Each wallet can manage multiple Lens profiles, dictated by the presence of Lens profile NFTs or by delegating the permissions to another wallet. So we need to connect the wallet, query the available profiles, and display an interface for the user to choose which one to log in with.
First, in src/lib/navigation/RootNavigator.tsx, let's block our routes. If the user is authenticated, render all the routes normally, otherwise render the SignInScreen.
To make TypeScript happy, we need to go back to src/lib/navigation/index.ts and add a SignIn key to the ParamList type, so our router knows that it is a possible route.
And finally, let's build the actual SignInScreen in src/features/sign-in/SignInScreen.tsx.
Here's the breakdown of what is happening in this screen:
- Using the Wagmi hook useAccount(), we get the connected wallet address
- Using the Lens SDK hook useProfilesManaged(), we get all the profiles managed by that wallet address
- Using the Lens SDK hook useLastLoggedInProfile(), as the name suggests, we get the last profile used to sign in by that wallet address
- Then, to achieve a better UX, we sort the profiles to put the last one used on top of the list
- And finally, we render a ProfileCard for each profile, displaying the name, handle, and a button to sign in.
Next we need to create the missing ProfileCard component. In src/features/sign-in/ProfileCard.tsx, add this:
The component receives the actual profile and a boolean isLastLoggedInProfile as props. Deconstructing the profile, we display the name via profile.metadata.displayName and handle via profile.handle?.localName. Inside the metadata you can also find the URIs for the cover image - rendered as the background of the card - and avatar image, rendered to the left.
In the end, we just need something to show the essential information and a button to sign in when pressed. You can style it any way you want.
Speaking of the button to sign in, the last remaining piece is creating the LensButton component. In src/components/LensButton/index.tsx, add the following:
See that it's just a wrapper on top of the generic Button component. When pressed, it uses the Lens SDK hook useLogin() to authenticate with Lens Protocol using the wallet address and profileId.
If you run the app at this point, we should be able to see our profile cards, connect with a profile, and see the protected routes.
Claiming a testnet profile
In order to test the sign in flow like above, you will need a Lens Profile. While in production Lens Profiles are currently in closed beta and are invite-only, profiles on the testnet are free and available for anyone to grab, perfect for builders.
To claim a testnet profile, go to testnet.hey.xyz, connect your wallet, press “Login” and then “Create a testnet account” and enter your desired handle.
.png)
Profile page
Now let's build the Profile page, to show the authenticated profile followers and following count as well as a way for the user to log out.
In src/features/profile/ProfileScreen.tsx, add:
- Similarly to the ProfileCard built before, we get the profile information from the metadata.
- Then extract from profile.stats to get the followers and following count.
- Finally, get the logout handler from the useLogout() hook and attach it to a button.
After adding that, navigate to the profile tab. You should see something like this:
.png)
Feed of publications
For the last part, we're going to build the most important component of a social application, the home feed. Luckily, Lens makes this very easy with the useFeed() hook.
In src/features/home/HomeScreen.tsx, add this:
For the HomeScreen, it's going to be as simple as that. We query the feed using the Lens SDK hook useFeed() and pass it to FeedList. If there is no data, the feed is either loading or empty (user is not following anyone), so we display a message.
In the same directory, create FeedList.tsx:
No mystery here too, this component just renders a FlatList in which each item is a PublicationItem, so let's create it next.
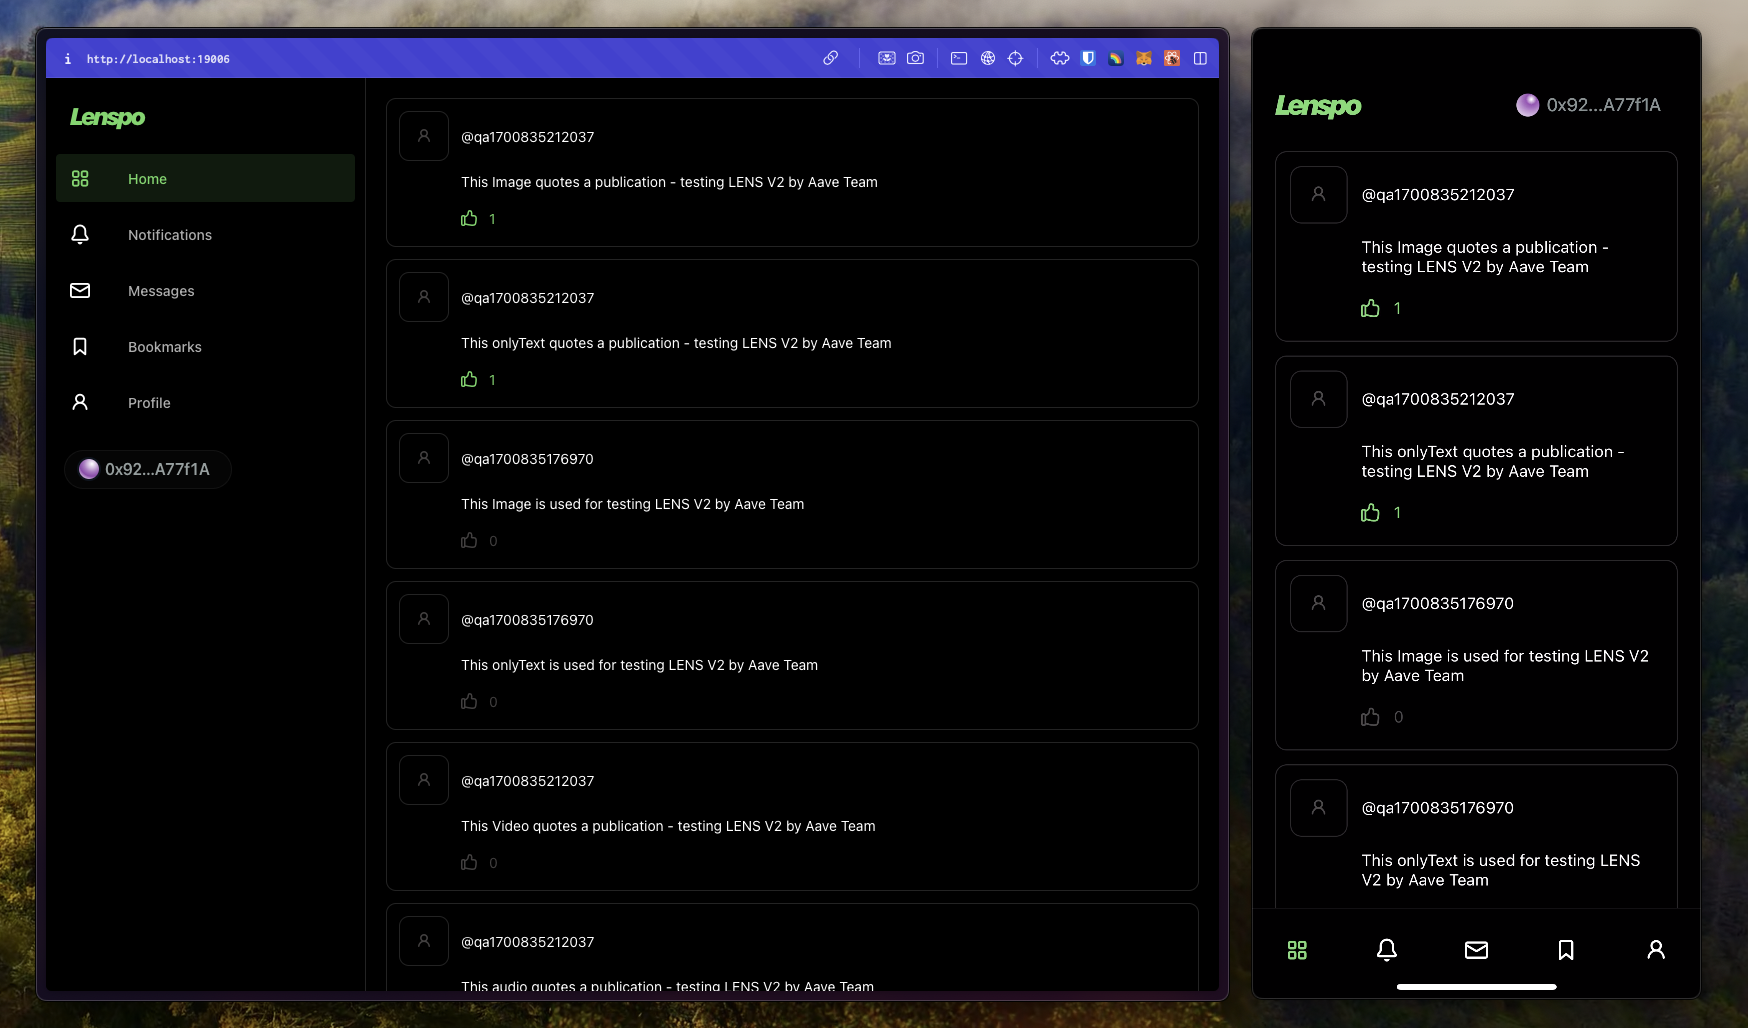
Each PublicationItem looks like what you would expect from a social media post. A card with the author info and publication content:
In the same directory, create PublicationItem.tsx:
For simplicity, we're filtering certain types of publications. We're also ignoring media such as pictures or videos.
As we've seen in the image above, this component displays the profile information that posted the publication, the actual publication content text, and the amount of upvotes (likes) the publication has, alongside a button to toggle the reaction.
We're almost there! The last remaining pieces are creating the two missing components:
- PublicationProfile, to take care of the upper part of the card with the autor info
- PublicationReactions, to take care of showing the total upvotes and a button to toggle the reaction
Still in the same directory, create PublicationProfile.tsx:
Then, in PublicationReactions.tsx, add the following:
And that's it! Run the app and you should see the final result:
Summary
Congrats! You now have a cross-platform web3 social app running on the Lens Protocol.
Most of the magic relies on the platform specific modules we created, both for the Lens SDK and for Web3Modal. That allows us to leverage different SDKs depending on the platform.
By combining the power of the Expo APIs and React Native for Web, teams building web3 experiences can start targeting cross-platform users right from the start. This not only caters to a broader audience. It also makes development smoother by preparing the app architecture for multiple platforms early on instead of having to plug-in in a complex system later. We hope to see your next app on-chain!


Learn more about Web3
Here's everything we published recently on this topic.