This article focuses on the ability to build cross-platform (web, iOS, Android) web3 dApps with React Native. If you need a more basic setup like implementing Viem, Wagmi, or WalletConnect in a React Native app, you're better off with these articles:
- Build Modern Web3 dApps on Ethereum With React Native and Viem
- Best DX for React Native Web3 dApps With Web3Modal and Wagmi
What is a cross-platform app?
A cross-platform application is an application developed to work on various platforms, including browsers and operating systems. It was popularized by frameworks such as React Native, which allowed developers to build native apps using JavaScript for both iOS and Android.
Embracing a cross-platform approach proves beneficial, especially if your team already manages a React web application and aims to develop a native mobile version. Why maintain separate codebases when React Native for Web offers a streamlined solution?
Within the same React Native codebase that powers your iOS and Android applications, React Native for Web will transpile your <View /> into a <div />, keeping your native features, and your components’ behavior, accessibility, and styles.
The current dApp situation
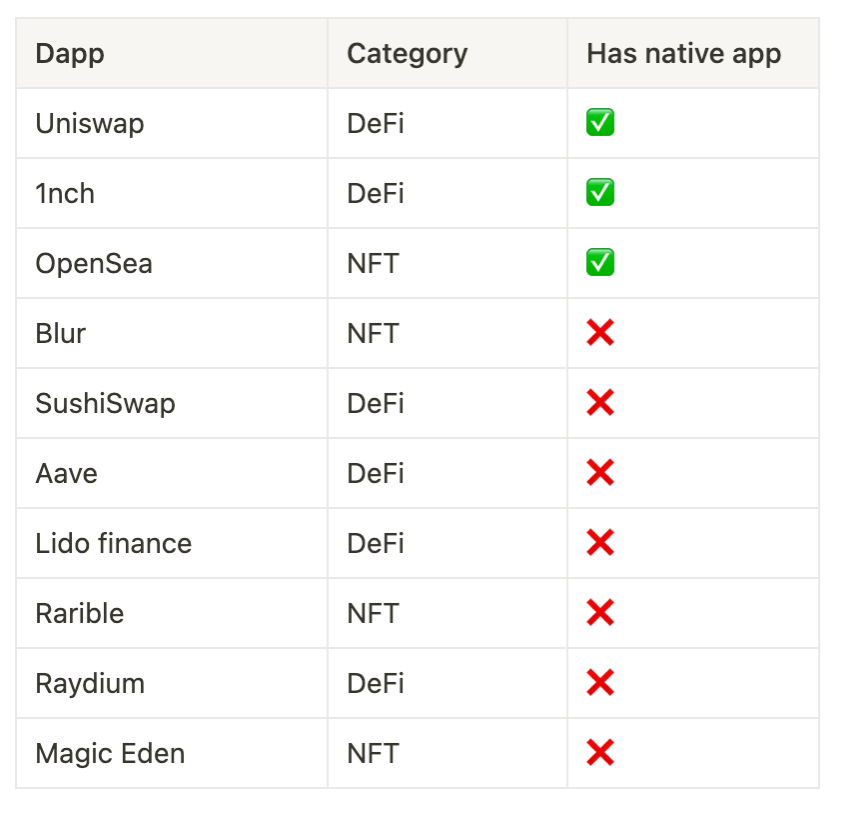
Currently, the dApp market is dominated by web apps. Looking at some of the top decentralized apps across multiple chains in DappRadar, it's easy to notice that only a select few (mostly big players for a long time) have their respective native mobile experiences. Smaller and younger apps are still going for a good enough responsive web experience instead.
And they're not wrong. Historically, it was difficult to spin up a Web3 mobile app due to the number of issues one would encounter when trying to install Web3 libraries, which were made primarily for the web.
For example, MetaMask SDK - the most used Ethereum wallet - requires installing several browser polyfills and patching it with rn-nodeify, which will traverse modules in node_modules and manually change files. The security implications are concerning, to say the least, especially for Web3 apps dealing with sensitive information.
Here's a quick comparison:
On the other hand, it's nice to notice that some newer dApps on Lens Protocol (such as Orb and LensPlay) are going for a mobile-first approach, with LensPlay being built with React Native. But then, the web experience is missing.
I strongly believe that the next generation of Web3 dApps will use the same codebase for web, iOS, and Android, and will do it through Expo + React Native for Web.
Previous feasibility
Yes, Expo and React Native for Web aren't newcomers to the scene. If you've been following the React Native ecosystem over the past few years, you know it's not a new thing. Even the X (formerly Twitter) web app is built on React Native for Web.
So why wasn't it used before? The missing pieces of the puzzle held developers back.
When you're building a dApp, you’ll usually need three base pieces:
- A low-level library to interact with the blockchain, like Viem, Ethers, or web3.js
- A library to help connect to wallets: Web3Modal, RainbowKit, and ConnectKit are a few of the most famous ones
- and a collection of hooks, for better DX. Wagmi is the go-to, but there are alternatives like web3-react
The problem is that it was difficult to combine these three pieces and also make it work on both the web and React Native, while also maintaining design consistency between all platforms.
WalletConnect already had Web3Modal working great on the web but with their recent release of Web3Modal for React Native, this gap is closed.
Web3Modal is built on top of Wagmi (which is consequently built on Viem). Having options for both the web and native makes it easy to conditionally use both depending on the platform, while also maintaining the design/branding consistency that a production application needs.
Building a cross-platform app with React Native
We're going to be using Expo, which allows us to create cross-platform React Native apps in a breeze (on top of React Native for Web), and also has a ton of curated APIs available.
You can check the final code in the repository.
At the end, you’ll have a cross-platform dApp looking like this:

Requirements
- Expo environment setup (Node.js, Git, Watchman)
- A WalletConnect Cloud project ID
- Expo Go app installed on your smartphone
- One or more web3 wallets installed in your smartphone and browser (e.g. MetaMask, Rainbow Wallet, Trust Wallet, etc.)
Creating a new Expo app
Start by creating a new Expo app:
And then, install the dependencies required for the web development:
npx expo install is a special command that install the dependencies respecting the versions that are supported by the version of the Expo SDK you're using
After, rename the App.js file to App.tsx. Expo will know we're trying to use TypeScript and will ask you to install the dependencies when you try to run the app.
In two different terminal sessions, run the app on your mobile platform of choice and on the web.
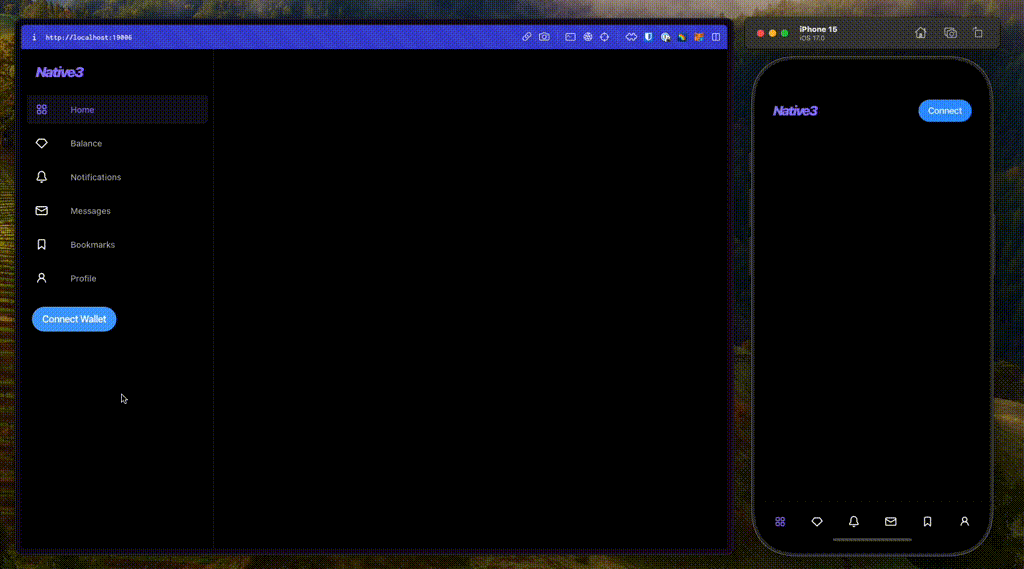
If everything is working correctly you should see a blank app:
.png)
Setting up navigation
We want navigation to be best adapted to each platform. On native we’ll go for Tabs while using a fixed Drawer on web.
For that, we’ll use React Navigation, the default navigation method in React Native, also maintained by Callstack.
Install React Navigation:
Notice that we're using the @next flag. This will install the latest version of the library, React Navigation 7, which is needed because it contains fixes related to gesture handling on web.
and dependencies for Expo-managed projects:
Then, install the Tab Navigator:
And finally, install the Drawer Navigator:
The Drawer Navigator depends on Gesture Handler and Reanimated, so we need to finish setting them up.
At the very top of App.tsx, import Gesture Handler:
And in babel.config.js, we need to add the Reanimated plugin:
Done with the installation, let's define our routes. To keep things organized, create a /src/navigation directory.
In src/navigation/index.ts, create both the TabNavigator and the DrawerNavigator:
With the ParamList type, we're telling the navigators that those keys will be their route names, and undefined means that none of those routes can receive parameters when navigating to them.
In your app, you might change the route names as you prefer and also pass complex types to the route parameters as they fit best.
Now, let's define the navigator structure. Create src/navigation/RootNavigator.tsx and add the following:
Here, notice how we're rendering different navigators based on the result of Platform.OS. We do this due to the fact that mobile and web apps use different navigation patterns.
The actual screens are defined in the screens array on top and iterated on each navigator. For now, the screen components are empty but we will implement them later on.
Now, we must wrap our navigator with NavigationContainer to display it on the screen. In App.tsx, add this:
And if you run the app at this stage, you should see something like this:
.png)
But we're not done yet. We need to improve a few things to be closer to what a user would expect from a production application.
First, theming. Create src/theme.ts and override React Navigation’s colors for a dark theme. I chose a tone of purple as the primary color, but you can use whatever colors you prefer.
Then apply it on App.tsx:
And all your navigation components should now be in dark mode with a purple accent.
.png)
Then we need to make the drawer a fixed sidebar (instead of clicking to open) and customize the navigation icons.
To do that, let's first create a new component to encapsulate the navigation icons. Create a new src/components/NavIcon.tsx and add the following:
This component simply renders an icon from the Octicons pack with a little breathing room. The getIconForRoute() function chooses an icon name for each route.
Going back to RootNavigator.tsx, let's use the new icon component and add a few more options.
Notice the options added indicated by the comments. In the Drawer navigator, we're removing the header (as it looks too mobile-ish), making the drawer a fixed sidebar, and using the new icon component we just created. In the Tab navigator, we're hiding the tab labels and also using the new icon component.
After adding these changes, your app should look like this. It's a great starting point for building the rest of our features!
.png)
Installing Web3Modal
Start by installing Wagmi and Viem, as they are dependencies for the Web3Modal SDK. Then, install Web3Modal both for web and native.
In the upcoming configuration, we are going to use environment variables. Usually in Expo, you can just define variables in your .env starting with EXPO_PUBLIC and they will be available to use as process.env.EXPO_PUBLIC_MY_VARIABLE, but there is currently an issue with Expo web that we need to resolve.
Expo web is not replacing process.env variables, causing the values to be undefined at runtime. To solve that, create a new file called app.config.js to the root and add this:
This logic filters entries in process.env that start with EXPO_PUBLIC and re-exports them in Expo Config Extra field, making it available through Constants.expoConfig.extra.EXPO_PUBLIC_MY_VARIABLE.
Now, we need to conditionally import each Web3Modal SDK based on the running platform. To do that, we’ll create a src/web3modal directory and use Platform-specific file extensions, where index.ts will be imported when running on native, and index.web.ts will be imported when running on web.
Let's start by defining common variables for both. In src/web3modal/common.ts, add the following:
Here, notice the following:
- The projectId comes from your WalletConnect Cloud project settings. It's free, and you can create one on your own. Create a .env file and add the value to a variable called EXPO_PUBLIC_WALLETCONNECT_CLOUD_PROJECT_ID.
- metadata is the information that will be passed to the wallet client when trying to connect the dApp
- chains is the list of chains that will be supported by the dApp
After that, create src/web3modal/index.ts:
Here we just initiated the Web3Modal React Native SDK using the common variables previously defined and re-exported the components we are going to use later.
Now let's create src/web3modal/index.web.ts:
See that, since the Web3Modal web SDK uses Web Components, they are globally available and don't need to be imported.
But since these index files are going to be imported conditionally depending on the platform, we need to export the exact same variables otherwise the application will crash during runtime.
So, on web, we define components with the same name as in the native SDK and re-export using the globally-available web components. That's why you don't see a <w3m-button /> being imported from anywhere.
Using the same platform-specific file extension concept, we will add polyfills necessary for when running on native.
To the root of your project, add polyfills.web.ts, and fill in with a comment:
Even though there are no polyfills needed for the web implementation, we need to add a dummy file so the Metro bundler can resolve the module correctly according to the platform.
Then, on polyfills.ts, add the real polyfill:
Now that we have the base Web3Modal implementation ready, go to App.tsx, import the polyfills, and render the Wagmi provider and Web3Modal:
Preparing base components
Before we move on, let's get some basic components ready so we can use them in the next sections.
First, we need a custom Text component with a default white color, since we're using dark theme to avoid having to pass color: 'white' on every usage.
In src/components/Text/index.tsx, add this:
Create a Logo component so we can get a better production feel. It's nothing fancy, just stylized text. If you want, load an image or SVG.
In src/components/Logo/index.tsx, add this:
And last, we’re gonna need a Separator component for a list that will come later.
In src/components/Separator/index.tsx, add this:
Connecting the wallet
Finally, we need to render the actual button to connect the wallet. To be able to access it from everywhere, we’ll put it on the sidebar on web, and on the header on native. We’ll also add the Logo component created before.
Create a new file src/navigation/DrawerContent.tsx. We’ll override the Drawer navigator sidebar items, adding the Logo on top, and Connect Wallet button on the bottom.
Notice how we can import the W3mButton from the module we created before with Platform-specific file extensions. While on native it's importing the button from the Web3Modal native SDK, on web is importing the global Web Component.
For the header on native, we’ll keep the Logo on the left and the button on the right.
Create a new file src/navigation/TabHeader.tsx and add the following:
Here, see that we're using useSafeAreaInsets() to avoid the header getting cut off by a device notch or similar. To make it work, we need to add the SafeAreaProvider to the app root.
In App.tsx, add the provider:
And last, we need to actually use those new navigation components in our RootNavigator.tsx.
That was a lot. If you managed to follow through here, congrats! 🎉
Our dApp is in a good initial shape, and should be looking similar to this:
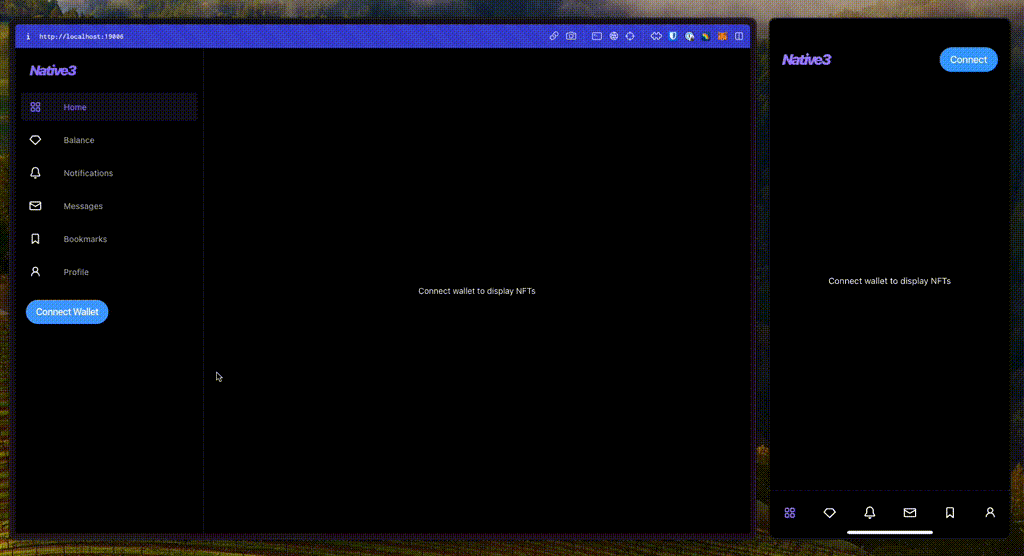
Displaying NFTs
Our Home screen will show a list of the NFTs owned by the connected wallet.
Start by creating a new file: src/features/home/HomeScreen.tsx.
Remember to import the Text component from our /components directory, created previously. If you use the standard Text from React Native, nothing will appear on the screen because the default color is black.
Notice that, since Web3Modal is built on top of Wagmi, we can leverage all Wagmi hooks!
Here's what is being done on this screen:
- Fetch whether the wallet isConnected by calling useAccount().
- If not connected, early return with a message.
- Fetch whether a message is signed, by calling useSignMessage(). This is usually done to check the user is the actual owner of the connected wallet.
- If the message is not signed, display a button to sign.
- If the message is signed, continue to the <NftList />.
Before we continue to the NFT list, we need to set up a custom provider from where we're going to query this data nicely indexed from the blockchain. We’ll use Alchemy, but you could use Zora or another provider of preference.
Install the Alchemy SDK:
Then, in polyfills.ts, add the polyfills for atob and btoa, two web APIs for encoding and decoding base64 to binary.
Now, under /src/services, create a new file called alchemy.ts:
At the top, we initiate the Alchemy SDK. To start with, you’ll need a free API key. Once you get it, create a custom hook called useNftsForAddress, which - as the name says - takes in an address and uses the SDK to fetch NFTs for that address.
After that, we're ready to build our NFT list.
In src/features/home/NftList.tsx, add the following:
We're finally using that Separator component we created before.
This will fetch the NFTs for the address using the hook we just created, and render a FlatList with one column on native, and four columns on web. We also show a loading indicator if the SDK hasn't returned yet, and an empty text if the address doesn't own any NFTs.
Create a src/constants.ts file and add OPENSEA_BASE_URL, the URL of the marketplace that we're going to link to when pressing the NFT item.
And then, create the actual list item, in src/features/home/NftListItem.tsx:
Nothing complex here - just building up a list item that looks like a card and opens the respective NFT in the marketplace when pressed.
Finally, to be able to see this in action, we need to tell RootNavigator.tsx that we want to render the home screen:
And you should end up with this:
If you have sharp eyes, you're probably wondering how I show the same NFTs on both web and native if I connected 2 different wallets. You're right, that shouldn't be possible. I hardcoded the address behind the scenes for presentation purposes.
Summary
That was a long guide, but we hope that you can get a grasp of what is possible by leveraging the cross-platform React Native ecosystem.
Using Expo and React Native for Web, you can tailor your experience for each platform, while also sharing most of your codebase. With WalletConnect’s Web3Modal, you can offer hundreds of wallets to connect to your dApp on every platform while maintaining consistent UX.
It's a huge win for maintainability with effective code re-usage. For users, it provides delightful UI and UX in whatever device they use.
And with minimal additional effort, dApps can start reaching a whole new market share!


Learn more about Web3
Here's everything we published recently on this topic.