A Step-By-Step Guide to Super App Development With Re.Pack 5

A React Native app can grow into many distinct product areas while still feeling like a single, cohesive application to the user. As the app expands, those areas do not necessarily need to be developed and shipped as one large JavaScript bundle. Instead, the native application can provide the shared shell, while individual features or mini apps are built separately and loaded when needed.
Re.Pack 5 makes this architecture possible in React Native through Module Federation. A mini app exposes a module, the host registers it as a remote, and the host imports it at runtime. This guide builds the smallest working version of that setup using two existing React Native applications
Let’s start by defining what you’re going to build.
What will you build?
The setup contains two roles:
HostAppis the main React Native application installed on the device. It owns the native project, navigation, and application shell.MiniAppis a separate React Native project that exposes a JavaScript module. It is not installed as a second application on the device.
By the end of the guide, MiniApp will expose its root component as a federated module, and HostApp will load that component when the user opens a dedicated screen.
We will build the setup in five stages:
- Verify that both applications work independently.
- Add Re.Pack to both applications.
- Expose a module from
MiniApp. - Register the mini app as a remote in
HostApp. - Load the remote module from the host application.
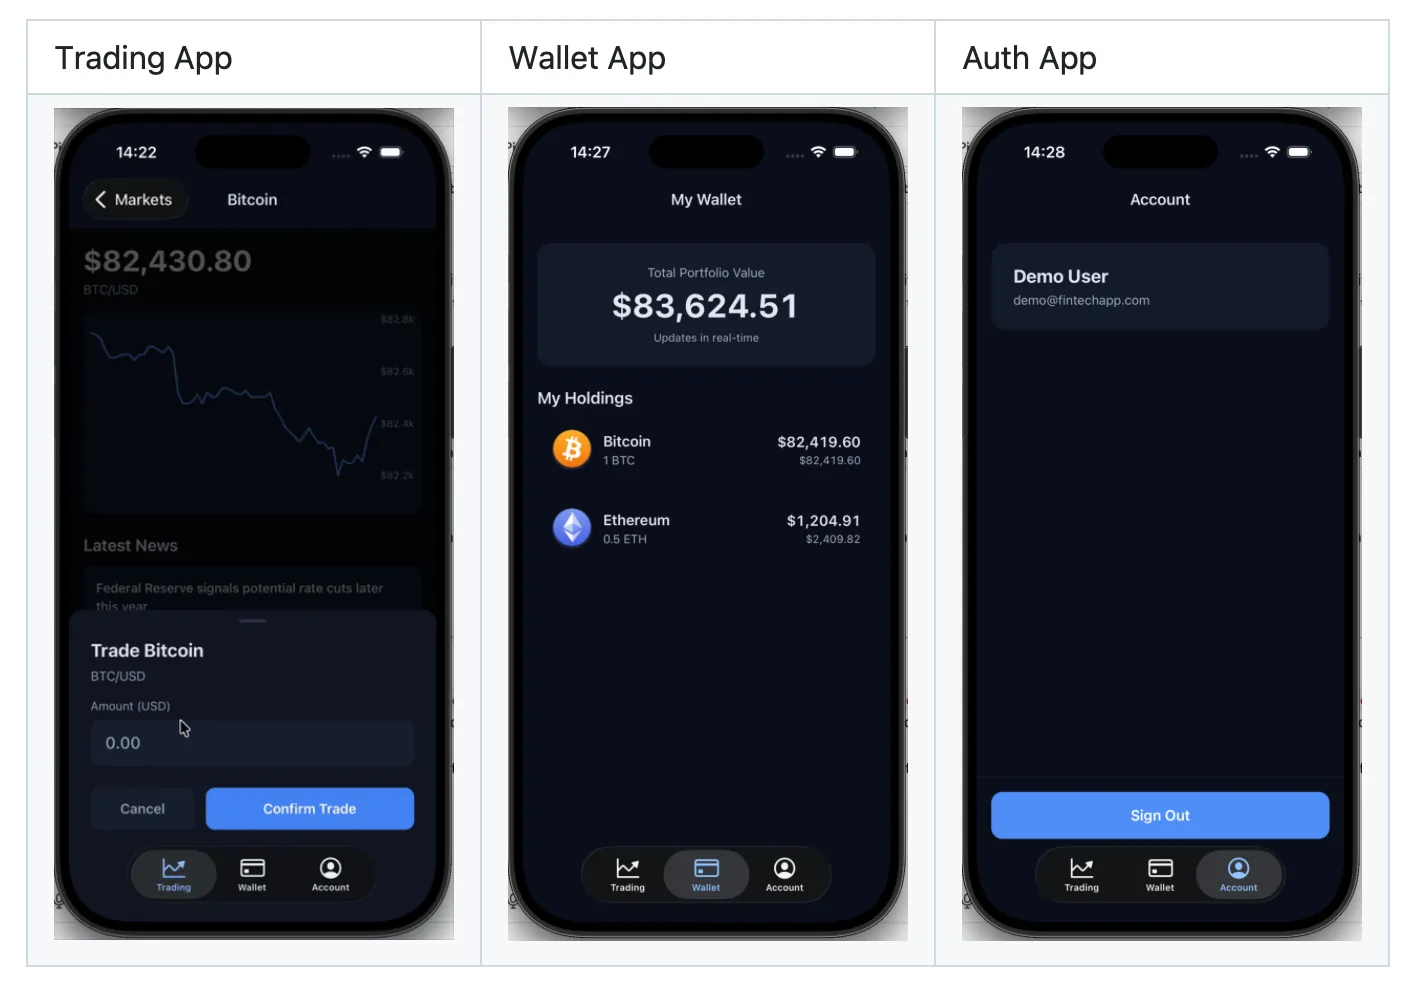
For a fuller reference implementation, see our Super App Showcase, which applies the same host-and-mini-app pattern to a multi-feature fintech application.
Prepare the two applications
Before connecting the applications, establish a working baseline and migrate both projects to Re.Pack. This gives each application a known-good starting point before Module Federation introduces a runtime dependency between them.
Check the prerequisites and project structure
Make sure your environment uses versions supported by Re.Pack 5:
- Node.js 20 or newer
- React Native 0.77 or newer
For real super-app projects, a monorepo is often the most practical starting point. It keeps the host application, mini apps, shared packages, types, and tooling close together. You can start with one of these guides on how to set up a monorepo:
This guide assumes that you already have two bare React Native applications in a monorepository like this:
your-project/
├── apps/
│   ├── HostApp/
│   └── MiniApp/
We're going to use the Yarn package manager in this guide, but you can use any package manager you prefer, as long as it supports workspaces.
You can also follow this guide using two independent React Native projects. In that case, run each command from the appropriate application directory.
Verify both applications
Before changing the bundler, make sure both applications work as standard React Native projects.
Run HostApp and confirm that it launches correctly. Then do the same for MiniApp.
Because each application will eventually run its own development server, they need to use different ports. In this guide, we will use:
HostApp: 8081
MiniApp: 8082
Starting from two working applications makes it easier to identify whether a later problem comes from the existing React Native setup or from the Re.Pack configuration.
Once both applications work independently, we can migrate them to Re.Pack.
Add Re.Pack to both applications
Start with the host application:
cd apps/HostApp
npx @callstack/repack-init
During the setup, select Rspack as the bundler.
The @callstack/repack-init command adds the Re.Pack configuration required by an existing React Native application. If the command cannot update your project automatically, refer to the manual migration guide.
After the migration, reinstall the project dependencies:
yarn installFor iOS, install the native dependencies again:
cd ios
pod install
Next, repeat the same process for the mini app:
cd ../MiniApp
npx @callstack/repack-init
Select the same Rspack configuration, then reinstall the dependencies and pod:
yarn install

cd ios
pod install
Both applications are now configured to use Re.Pack.
Before adding Module Federation, run a brief migration checkpoint: start each Re.Pack development server on its assigned port, then launch HostApp and confirm that it still runs as it did before the migration. The complete commands appear in the verification section, where you will run both servers together. This checkpoint separates bundler migration problems from federation problems.
At this point, they are still completely independent. The next step is to define the Module Federation contract between them.
We will begin with the mini app because it owns the module that the host will consume.
Connect the mini app to the host
MiniApp is the producer because it exposes the module. HostApp is the consumer because it locates and loads that module. Configuring them in that order keeps the contract explicit.
Expose the mini app
Open:
apps/MiniApp/rspack.config.mjsFirst, update the resolver configuration:
resolve: {
  ...Repack.getResolveOptions(env.platform, {
    enablePackageExports: true,
    preferNativePlatform: true,
  }),
},
The resolver options control how Rspack finds files and packages:
env.platformcontains the platform currently being bundled, such asiosorandroid.enablePackageExports: trueenables support for the modernexportsfield inpackage.json.preferNativePlatform: truetells the resolver to prefer React Native-specific files when they exist, such asButton.native.tsx.
The env argument is available when the configuration is defined through Repack.defineRspackConfig:
export default Repack.defineRspackConfig((env) => ({
  // configuration
}));
In this guide, we are going to use ModuleFederationPluginV2. If you get stuck at any point, you can refer to the official Re.Pack documentation for guidance.
First, install the official @module-federation/enhanced package, which is required by Re.Pack.
cd apps/HostApp
yarn add @module-federation/enhanced

cd ../MiniApp
yarn add @module-federation/enhanced
Then, add ModuleFederationPluginV2 to the plugins array:
plugins: [
  new Repack.RepackPlugin(),

  new Repack.plugins.ModuleFederationPluginV2({
    name: 'miniApp',
    filename: "miniApp.container.bundle",
    dts: false,
    exposes: {
      './App': './App',
    },
    shared: {
      react: {
        singleton: true,
        eager: true,
      },
      'react-native': {
        singleton: true,
        eager: true,
      },
      'react-native-safe-area-context': {
        singleton: true,
        eager: true,
      },
    },
  }),
],
The name: 'miniApp' option gives the remote container a stable federation name. The host uses that same name when it registers and imports the remote.
The important part of this configuration is the exposes block:
exposes: {
  './App': './App',
},
It makes the local App module available to other Module Federation containers.
The host will later import it using:
import('miniApp/App');You are not limited to exposing the root application component. A mini app can expose any module that the host needs, including:
- a screen,
- a component,
- a navigation route,
- a feature entry point,
- or a collection of utilities.
The shared block defines dependencies that should be reused by both applications:
singleton: trueensures that only one runtime instance of the dependency is used.eager: trueloads the shared dependency upfront instead of creating a separate asynchronous chunk.
Sharing React and React Native as singletons is particularly important. Running multiple copies of these packages in the same application can lead to runtime errors and inconsistent component behavior.
Finally, add a unique output name:
output: {
  uniqueName: 'miniApp',
},
The unique name prevents collisions between the runtime modules generated by different federation containers.
MiniApp now exposes its App component under the federated module name miniApp/App.
The next step is to tell HostApp where that module can be found.
Register the mini app in the host
Open:
apps/HostApp/rspack.config.mjsAdd a constant for the mini app development server port near the top of the file:
const MINI_APP_PORT = 8082;Keeping the port in a constant makes the remote address easier to find and update.
Update the resolver using the same options as the mini app:
resolve: {
  ...Repack.getResolveOptions(env.platform, {
    enablePackageExports: true,
    preferNativePlatform: true,
  }),
},
Next, add ModuleFederationPluginV2 to the host configuration:
plugins: [
  new Repack.RepackPlugin(),

  new Repack.plugins.ModuleFederationPluginV2({
    name: 'host',
    dts: false,
    remotes: {
      miniApp: `miniApp@http://localhost:${MINI_APP_PORT}/${env.platform}/mf-manifest.json`,
    },
    shared: {
      react: {
        singleton: true,
        eager: true,
      },
      'react-native': {
        singleton: true,
        eager: true,
      },
      'react-native-safe-area-context': {
        singleton: true,
        eager: true,
      },
    },
  }),
],
The name: 'host' option gives the host container its own stable federation name.
The remotes block tells the host where it can find other federation containers:
remotes: {
  miniApp: `miniApp@http://localhost:${MINI_APP_PORT}/${env.platform}/mf-manifest.json`,
},
There are two important names in this value:
- The
miniAppkey is the name used in imports such asminiApp/App. - The
miniApp@prefix must match thenameconfigured in the mini app’s federation plugin.
The URL points to the Module Federation manifest generated by the mini app development server.
The platform is included in the path because the server produces platform-specific bundles:
http://localhost:8082/ios/mf-manifest.jsonor
http://localhost:8082/android/mf-manifest.jsonThe host and mini app also use the same shared dependency configuration. This allows them to use the React and React Native instances already loaded by the host.
Finally, add a unique output name for the host:
output: {
  uniqueName: 'host',
},
The infrastructure-level connection is now complete:
MiniAppexposes./App.HostAppregistersMiniAppas a remote.- Both applications agree on which dependencies should be shared.
There is one networking detail to keep in mind during development.
The localhost address is resolved from the environment where the React Native application is running. Depending on your setup, it may not point to the computer running the mini app server.
If the host cannot fetch the mini app manifest, you may need to:
- use your computer’s local network IP address,
- configure
adb reversefor Android, - or change the development server host.
With the bundlers connected, we can now integrate the remote module into the host application’s user interface.
Load the mini app inside the host
The host needs a simple navigation flow so that the mini app is loaded only after the user opens its screen. This makes the lazy-loading behavior visible and gives us a place to display loading and error states.
Install the required packages in HostApp:
cd apps/HostApp

yarn add \
  @react-navigation/native \
  @react-navigation/native-stack \
  react-native-safe-area-context \
  react-native-screens \
  react-error-boundary
For iOS, install the pods again:
cd ios
pod install
cd ..
Rebuild the native application after installing the new dependencies.
For Android:
yarn androidFor iOS:
yarn iosNext, open:
apps/HostApp/App.tsxReplace its contents with the following code:
import React from 'react';
import {ErrorBoundary} from 'react-error-boundary';
import {NavigationContainer} from '@react-navigation/native';
import {
  createNativeStackNavigator,
  type NativeStackScreenProps,
} from '@react-navigation/native-stack';
import {
  ActivityIndicator,
  Button,
  StatusBar,
  StyleSheet,
  Text,
  useColorScheme,
  View,
} from 'react-native';
import {SafeAreaProvider} from 'react-native-safe-area-context';

type RootStackParamList = {
  Home: undefined;
  MiniApp: undefined;
};

const Stack = createNativeStackNavigator<RootStackParamList>();

const FederatedMiniApp = React.lazy(() => import('miniApp/App'));

function App() {
  return (
    <SafeAreaProvider>
      <NavigationContainer>
        <Stack.Navigator>
          <Stack.Screen
            name="Home"
            component={HomeScreen}
            options={{title: 'Host App'}}
          />

          <Stack.Screen
            name="MiniApp"
            component={MiniAppScreen}
            options={{title: 'Mini App'}}
          />
        </Stack.Navigator>
      </NavigationContainer>
    </SafeAreaProvider>
  );
}

function HomeScreen({
  navigation,
}: NativeStackScreenProps<RootStackParamList, 'Home'>) {
  const isDarkMode = useColorScheme() === 'dark';

  return (
    <>
      <StatusBar
        barStyle={isDarkMode ? 'light-content' : 'dark-content'}
      />

      <View style={styles.container}>
        <Text style={styles.title}>Host App</Text>

        <Button
          title="Go to Mini App"
          onPress={() => navigation.navigate('MiniApp')}
        />
      </View>
    </>
  );
}

function MiniAppScreen() {
  return (
    <ErrorBoundary fallback={<MiniAppErrorFallback />}>
      <React.Suspense fallback={<LoadingScreen />}>
        <FederatedMiniApp />
      </React.Suspense>
    </ErrorBoundary>
  );
}

function LoadingScreen() {
  return (
    <View style={styles.container}>
      <ActivityIndicator size="large" />
      <Text>Loading mini app...</Text>
    </View>
  );
}

function MiniAppErrorFallback() {
  return (
    <View style={styles.container}>
      <Text style={styles.errorTitle}>Mini app unavailable</Text>

      <Text style={styles.errorMessage}>
        Make sure the mini app development server is running and that the
        host can access its federation manifest.
      </Text>
    </View>
  );
}

const styles = StyleSheet.create({
  container: {
    flex: 1,
    justifyContent: 'center',
    alignItems: 'center',
    gap: 16,
    padding: 24,
  },
  title: {
    fontSize: 24,
    fontWeight: '600',
  },
  errorTitle: {
    fontSize: 20,
    fontWeight: '600',
  },
  errorMessage: {
    textAlign: 'center',
  },
});

export default App;
The connection between the host and the remote module happens on this line:
const FederatedMiniApp = React.lazy(() => import('miniApp/App'));The import contains the two parts configured earlier:
miniApp / AppminiApprefers to the remote registered in the host configuration.Apprefers to the module exposed by the mini app as./App.
React.lazy delays the import until the component is rendered. In this example, that happens only after the user navigates to the MiniApp screen.
The host does not need to include every feature in its initial JavaScript bundle. It can request a mini app when the user needs it.
The runtime sequence looks like this:
- The user opens the mini app screen.
React.lazyrequestsminiApp/App.- The host reads the mini app federation manifest.
- The required JavaScript bundle is downloaded.
React.Suspensedisplays the loading state while the request is in progress.- The mini app component is rendered inside the host application.
The error boundary covers a different part of the process:
<ErrorBoundary fallback={<MiniAppErrorFallback />}>It displays fallback content when the remote module cannot be loaded or when it throws an error while rendering.
Loading and error states are important in a super app architecture because remote modules may fail for reasons that do not affect the host itself. The remote server may be unavailable, the user may be offline, or an incompatible remote version may have been deployed.
The host should remain usable even when one mini app is unavailable.
Run and verify the complete setup
The host and mini app each need their own Re.Pack development server.
Open one terminal and start the host server:
cd apps/HostApp
yarn react-native start --port 8081
Open another terminal and start the mini app server:
cd apps/MiniApp
yarn react-native start --port 8082
Next, run the host application.
For iOS:
cd apps/HostApp
yarn ios
For Android:
cd apps/HostApp
yarn android
Only the host needs to be launched as a native application.
MiniApp runs its development server, but it does not need to be installed separately on the device.
When the host opens, press:
Go to Mini AppThe host should display the loading state briefly and then render the component exposed by MiniApp.
At this point, the complete flow is working:

The iOS host app opens a screen and loads the federated mini app.
The Android host app opens a screen and loads the federated mini app.
Prepare for production
The local setup proves that the host can discover and load the mini app. A production implementation also needs a bundle-delivery strategy, a clear native-code boundary, and a release process that follows store policies.
Create bundles manually
For release builds, Re.Pack is used automatically through the React Native build process. You can also create a JavaScript bundle for either application manually:
yarn react-native bundleThis runs the React Native CLI bundle command using Re.Pack as the configured bundler.
Manual bundling can be useful when you want to confirm that an application produces a static bundle without relying on the development server.
For a production super app, you will also need to decide:
- where remote bundles and manifests are hosted,
- how the host selects a remote version,
- how incompatible versions are rejected,
- how failed downloads are handled,
- and whether previously downloaded bundles should be cached.
The development server used in this guide demonstrates the federation flow, but it is not a production remote-delivery strategy.
Respect the native-code boundary
Mobile microfrontends are not the same as web microfrontends. On the web, a remote application can download most of the code it needs at runtime. In a mobile application, native code must already be included in the binary installed from the App Store or Google Play.
Module Federation can load JavaScript dynamically, but it cannot add a new native iOS framework, Android library, permission, or native module to an application that has already been installed.
This means that:
- the host must include every native module required by its mini apps,
- React and React Native versions should remain aligned,
- native dependency versions should remain compatible,
- and dynamically delivered modules should be treated as JavaScript-only updates.
For example, imagine that MiniApp uses a native camera package. The JavaScript code that calls the camera can be loaded remotely, but the camera package itself must already exist in the native HostApp build. If the host was released without that dependency, downloading new JavaScript will not make the native camera implementation available.
This is why teams working on mobile super apps need a clear native dependency policy. A mini app should not introduce arbitrary native dependencies without coordinating a new host release.
Follow App Store and Google Play policies
Dynamic JavaScript delivery must also comply with the policies of the App Store and Google Play. Re.Pack can:
- split features into separate bundles,
- defer loading code that is already part of the application,
- deliver fixes to existing JavaScript behavior,
- and adjust previously released functionality.
It should not be treated as a way to bypass the regular store review process for entirely new application functionality. If a change introduces functionality that users or reviewers would recognize as a new feature, include the required native support and product behavior in a regular store release first. After that release, teams can use Re.Pack to control how the corresponding JavaScript is loaded, divided, or updated.
Your exact release process should always be reviewed against the current requirements of the stores where the application is distributed.
Summary
In this guide, we created a minimal React Native super-app setup using Re.Pack 5 and Module Federation.
We started with two independent React Native applications and gave each one a clear responsibility:
HostAppowns the installed native application and user-facing navigation.MiniAppexposes a JavaScript feature module.
We then:
- added Re.Pack to both applications,
- exposed
MiniApp/App, - registered the mini app manifest in the host,
- shared the core React Native dependencies,
- loaded the remote module with
React.lazy, - and added loading and error states around the remote screen.
This is the smallest useful version of the architecture. A production implementation will usually add more layers, including:
- multiple mini apps,
- shared types and packages,
- version compatibility rules,
- production remote hosting,
- bundle signing or integrity checks,
- caching and rollback behavior,
- monitoring and error reporting,
- production asset handling,
- and ownership boundaries between teams.
Ready to take this two-app setup further? Explore:
- Super App Showcase: a runnable Re.Pack 5 reference app with federated Trading, Wallet, and Auth mini apps, plus shared runtime dependencies.
- Mobile Module Federation With Re.Pack: When Runtime Delivery Is Worth the Complexity: an article-guidance for deciding when independently delivered modules fit your product architecture.
Good luck!

Learn more about Super Apps
Here's everything we published recently on this topic.