.webp)

Testing in React Native apps
Building and deploying apps with confidence is a challenging task. However, verifying if everything actually works requires a lot of time and effort – no matter if it is automated or not. Having somebody who manually verifies that the software works as expected is vital for your product.
Unfortunately, this process doesn't scale well as the amount of your app functionalities grows. It also doesn't provide direct feedback to the developers who write the code. Because of that, it increases the time needed to spot and fix a bug.
Automated tests
So what do the developers do to make sure their software is always production-ready and doesn't rely on human testers? They write automated tests. And React Native is no exception. You can write a variety of tests both for your JS code – which contains the business logic and UI – and the native code that is used underneath.
You can do it by utilizing end-to-end testing frameworks, spinning up simulators, emulators, or even real devices. One of the great features of React Native is that it bundles to a native app bundle, so it allows you to employ all the end-to-end testing frameworks that you love and use in your native projects.
But beware, writing a test may be a challenging task on its own, especially if you lack experience. You might end up with a test that doesn't have a good coverage of your features. Or only to test positive behavior, without handling exceptions. It's very common to encounter low-quality tests that don't provide too much value and hence, won't boost your confidence in shipping the code.
Whichever kind of test you're going to write, be it unit, integration,or E2E (short for end-to-end), there's a golden rule that will save you from writing the bad ones. And the rule is to “avoid testing implementation details.” Stick to it and your test will start to provide value over time.
How tests (and lack of them) affect your app and your business
When you can’t move as fast as your competition, chances of regressions are high - your app can be removed from the app store when receiving bad reviews.
The main goal of testing your code is to deploy it with confidence by minimizing the number of bugs you introduce in your codebase. And not shipping bugs to the users is especially important for mobile apps, which are usually published in app stores.
Because of that, they are subject to a lengthy review process, which may take up to a few days. And the last thing you want is to frustrate your users with an update that makes your app faulty. That could lead to lower ratings and, in extreme cases, even taking the app down from the store.
Such scenarios may seem pretty rare, but they happen. Then, your team may become so afraid of having another regression and crash that it will lose its velocity and confidence.
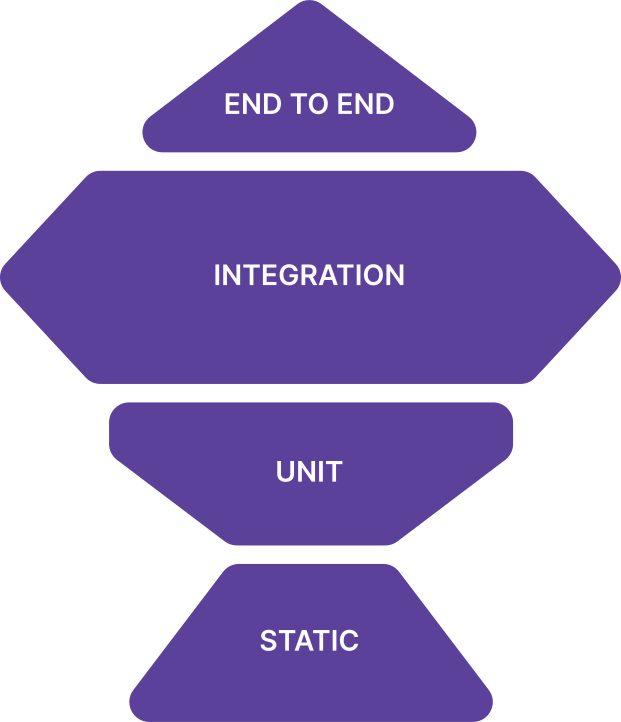
Don't aim at 100% coverage, focus on key pieces of the app. Test mostly integration.
Focus on testing the right thing
Running tests is not a question of “if” but “how”. You need to come up with a plan on how to get the best value for the time spent. It's very difficult to have 100% lines of your code and dependencies covered. Also, it's often quite impractical.
Most of the mobile apps out there don't need a full test coverage of the code they write. The exceptions are situations in which the client requires full coverage because of the government regulations they must abide by. But in such cases, you're probably already aware of the problem.
It's crucial for you to focus your time on testing the right thing. Learning to identify business-critical features and capabilities is usually more important than writing a test itself. After all, you want to boost confidence in your code, not write a test for the sake of it. Once you do that, all you need to do is decide on how to run it. You have quite a few options to choose from.
In React Native, your app consists of multiple layers of code, some written in JS, some in Java/Kotlin, some in Objective-C/Swift, and some even in C++, which is gaining adoption in the React Native core.
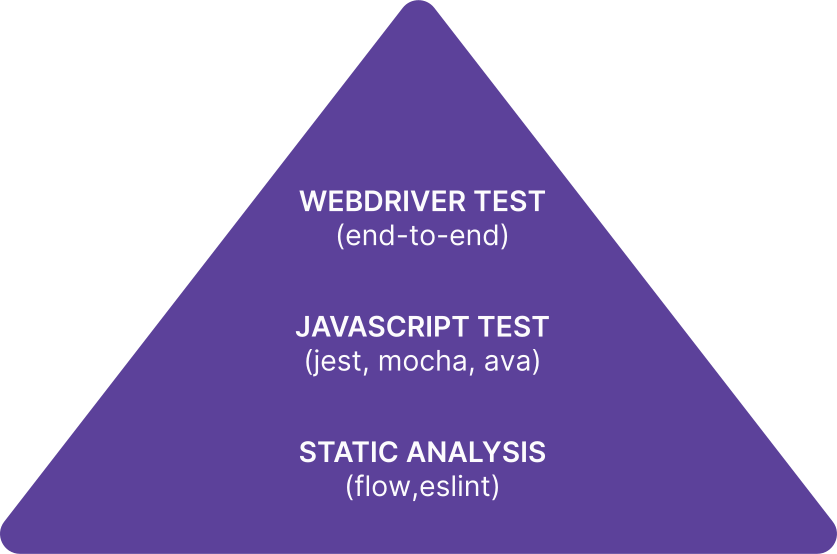
Therefore, for practical reasons, we can distinguish between:
- JavaScript testing – with the help of Jest framework. In the context of React Native, if you think about “unit” or “integration” tests, this is the category they eventually fall into. From a practical standpoint, there is no reason for distinguishing between those two groups.
- End-to-end app testing – with the help of Detox, Appium, or other mobile testing framework we’re familiar with.
Since most of your business code lives in JS, it makes sense to focus your efforts there.
JavaScript testing
Writing tests for utility functions should be pretty straightforward. To do so, you can use your favorite test runner. The most popular and recommended one within the React Native community is Jest.
For testing React components you need more advanced tools though. Let’s take the following component as an example:
It is a React component that displays a list of questions and allows for answering them. You need to make sure that its logic works by checking if the callback function is called with the set of answers provided by the user.
To do so, you can use an official react-test-renderer library from the React core team. It is a test renderer. In other words, it allows you to render your component and interact with its lifecycle without actually dealing with native APIs. Some people may find it intimidating and hard to work with, because of the low-level API.
That’s why the community around React Native came out with helper libraries, such as React Native Testing Library, providing us with a good set of helpers to productively write your high-quality tests. If you‘d like to learn more about this library, check out the episode of The React Native Show where Mike Grabowski and Michał Pierzchała discuss it in detail.
A great thing about this library is that its API forces you to avoid testing the implementation details of your components, making it more resilient to internal refactors.
A test for the QuestionsBoard component would look like this (taken from the official RNTL documentation):
You first render the QuestionsBoard component with your set of questions. Next, you query the tree by label text to access an array of questions, as displayed by the component. Finally, you set up the right answers and press the submit button.
If everything goes well, your assertion should pass, ensuring that the verifyQuestions function has been called with the right set of arguments.
Note: You may have heard of a technique called “snapshot testing” for JS. It can help you in some of the testing scenarios, e.g. when working with structured data that may change slightly between tests. The technique is widely adopted in the React ecosystem because of its built-in support from Jest.
If you’re into learning more about snapshot testing, check out the official documentation on the Jest website. Make sure to read it thoroughly as toMatchSnapshot and toMatchInlineSnapshot are low-level APIs that have many gotchas. They may help you and your team quickly add coverage to the project.
At the same time, snapshots make adding low-quality and hard-to-maintain tests too easy. Using helper tools like eslint-plugin-jest with its no-large-snapshots option, or snapshot-diff with its component snapshot comparison feature for focused assertions, is a must-have for any codebase that leverages this testing technique.
E2E tests
The cherry on top of our testing pyramid is a suite of end-to-end tests. It's good to start with a so-called “smoke test” – a test ensuring that your app doesn't crash on the first run. It's crucial to have a test like this, as it will help you avoid sending a faulty app to your users. Once you're done with the basics, you should use your E2E testing framework of choice to cover the most important functionalities of your apps.
These can be, for instance, logging in (successfully or not), logging out, accepting payments, and displaying lists of data you fetch from your or third-party servers.
Note: Beware that these tests are usually a bit harder to set up than JS tests.
Also, they are more likely to fail because of the issues related to e.g. networking, file system operations or storage or memory shortage. What's more, they provide you with little information on why they do it. This test's quality (not only the E2E ones) is called “flakiness” and should be avoided at all costs, as it lowers your confidence in the test suite. That's why it's so important to divide testing assertions into smaller groups, so it's easier to debug what went wrong.
In this article, we’ll be looking at Detox, the most popular E2E test runner within the React Native community.
Before going any further, you have to install Detox. This process requires you to take some additional “native steps” before you're ready to run your first suite. Follow the official documentation as the steps are likely to change in the future.
Once you have successfully installed and configured Detox, you’re ready to begin with your first test.
Before that assertion is executed, you should reload the React Native instance to make sure that no previous state is interfering with the results.
Note: When you’re dealing with multiple elements (e.g. in our case – a component renders multiple questions), it is a good practice to assign a suffix testID with the index of the element, to be able to query the specific one. This as well as some other interesting techniques are in the official Detox recommendations.
There are various matchers and expectations available to help you build your test suite the way you want.
Why is it worth testing your React Native app?
A high-quality test suite that provides enough coverage for your core features is an investment in your team's velocity. After all, you can move only as fast as your confidence allows you to. And the tests are all about making sure you're heading in the right direction.
The React Native community is working hard to make testing as easy and pleasant as possible – for both your team and the QA teams. Thanks to that, you can spend more time innovating and pleasing users with flashy new functionalities, and not squashing bugs and regressions over and over again.

