How to Build a Chrome Extension: A Step-by-Step Guide

Sometimes, the software we are using is not good enough for our needs, and we have to choose: search for a new alternative, try to improve the current one with suggestions and ideas for developers, or, in the case of Chrome, develop an extension. Building the Chrome extension can sound difficult, but in this article, we’ll prove it’s not rocket science.
How to build a feature-rich Pomodoro timer Chrome extension
As an example, we will be building the simple app Pomodoro timer for improving focus, but with additional elements: content scripts for blocking sites, making screenshots, implementing side panels, a settings page, and using storage. All the code can be found in the GitHub repo.
Chrome Extension file structure explanation
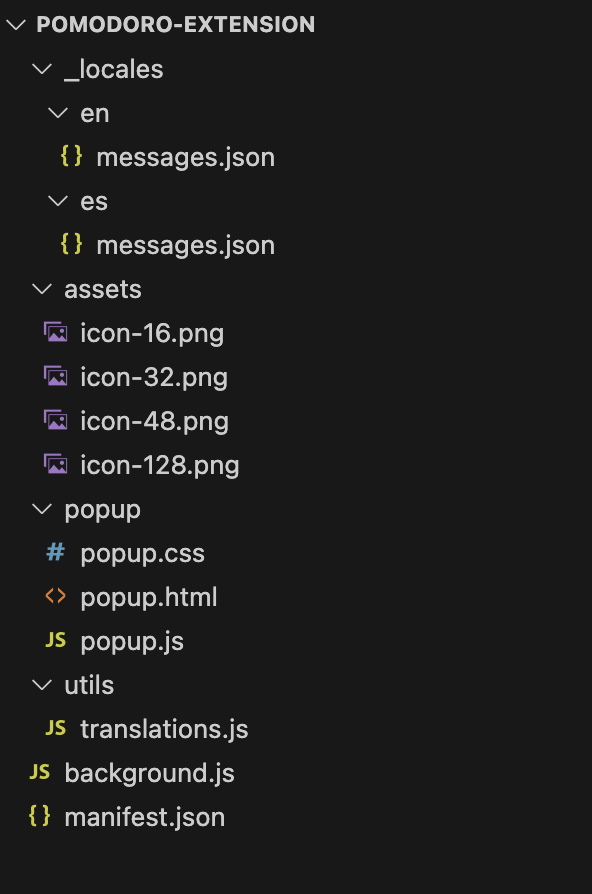
Like any other app, our app will initially show “Hello world!”. Our starting point will be creating a folder “Pomodo-extension” where we should have the main required file: manifest.json, the heart of the Chrome extension (the entry point), where we describe our configuration and scripts. The content of manifest.json should look like this:
For more details about all fields in manifest.json, check the docs; we’ll cover some parts of it later, though.
And that’s it; we are ready to add Chrome extension to our browser. Open it in Chrome chrome://extensions or reach it by pressing Chrome settings → Extensions → Manage extensions.
Turn on the Developer mode, and you will see the Load unpacked button. Press it and choose a folder that contains our manifest.json.
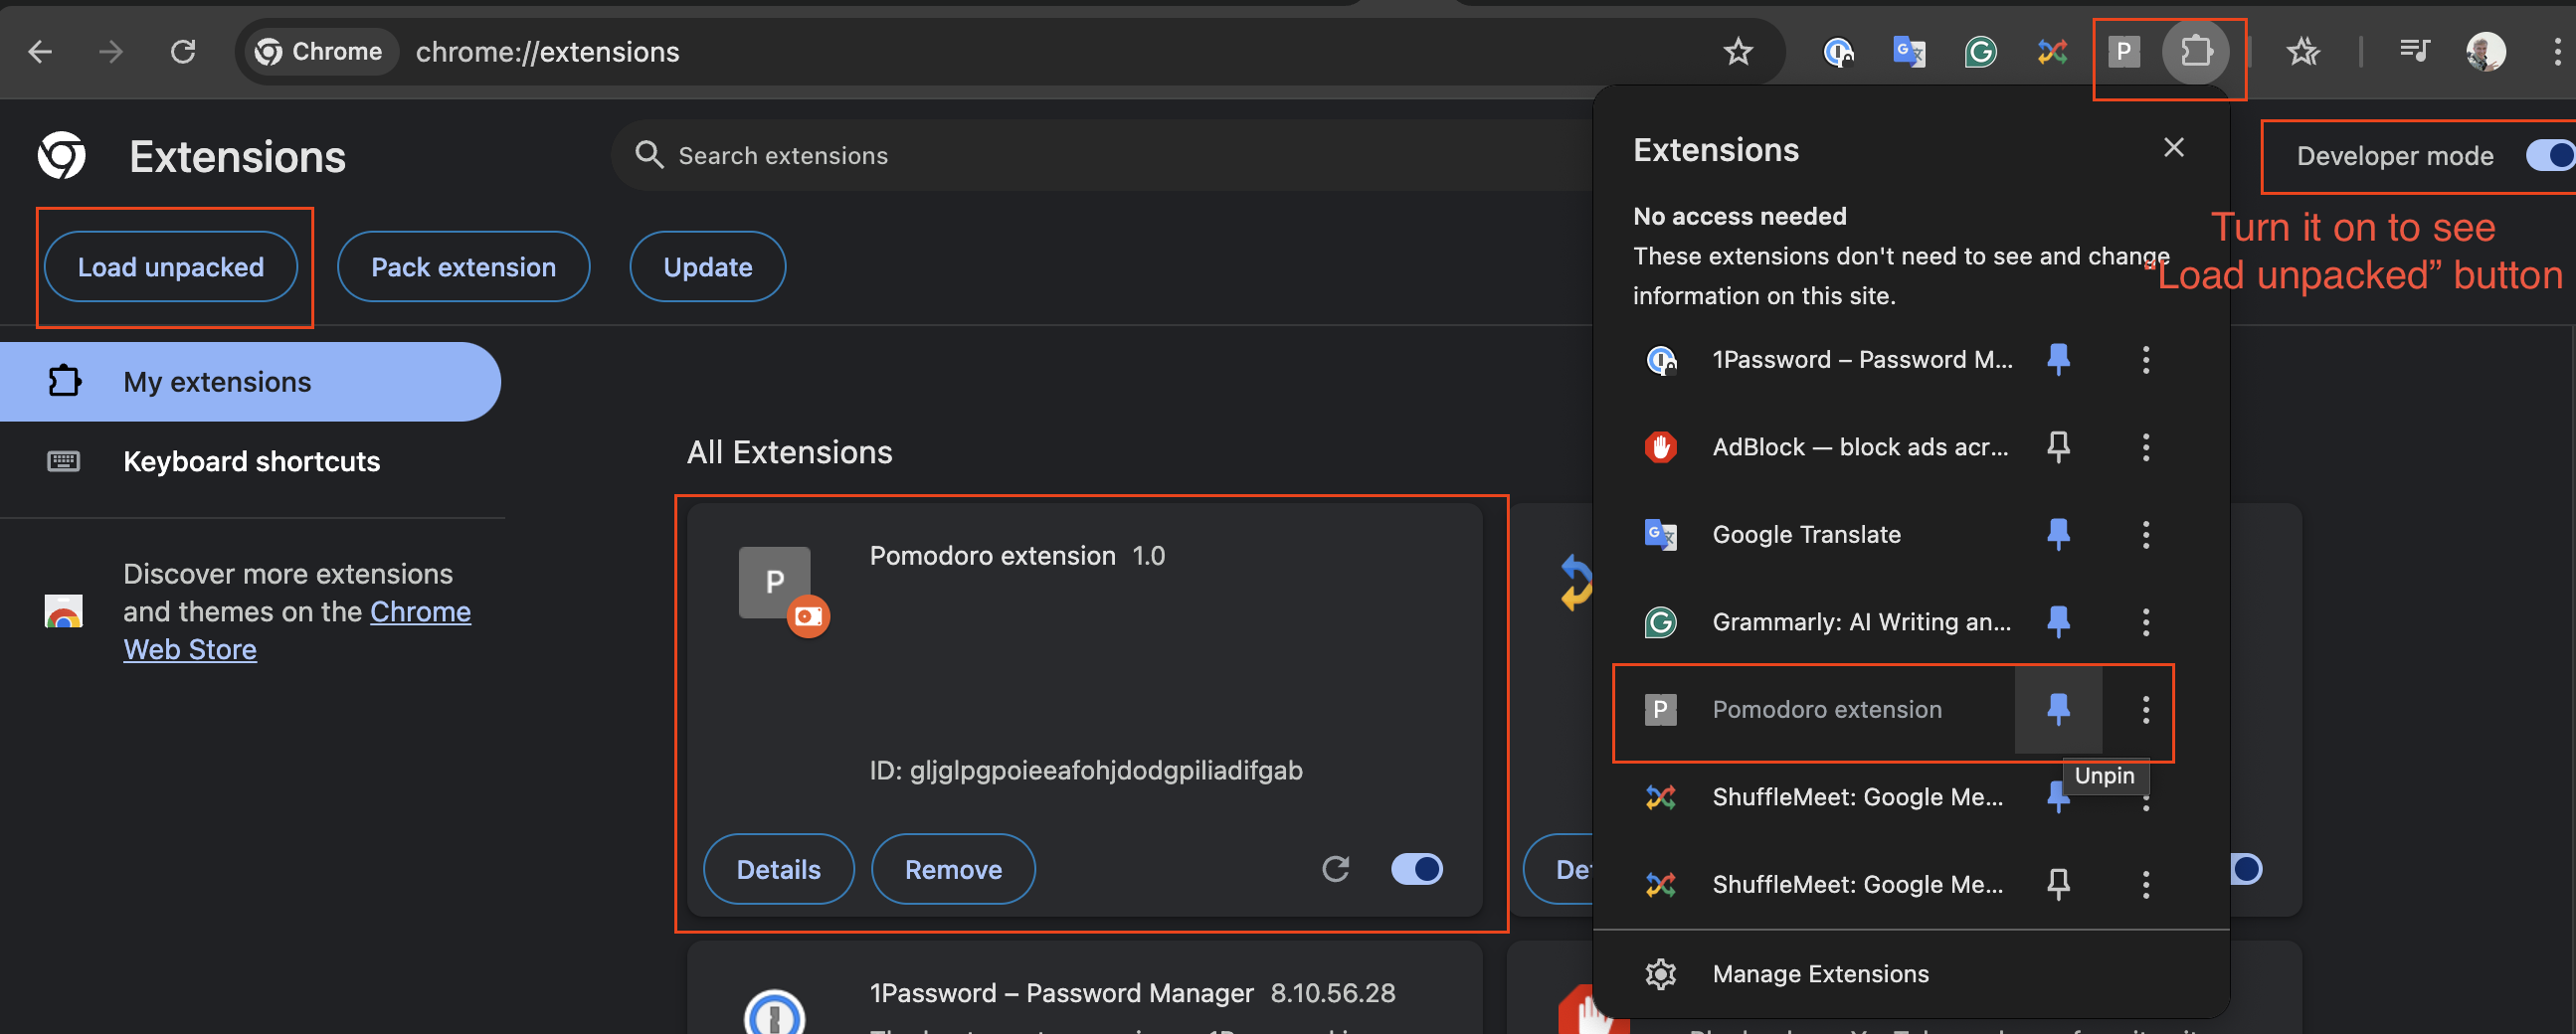
Your panel should look like this, with our extension on the list.
Now, let’s add “Hello world” in our extension description in manifest.json.
And now, to see the changes in our extension, you don’t need to upload it again; just refresh it with a button in the bottom right corner.
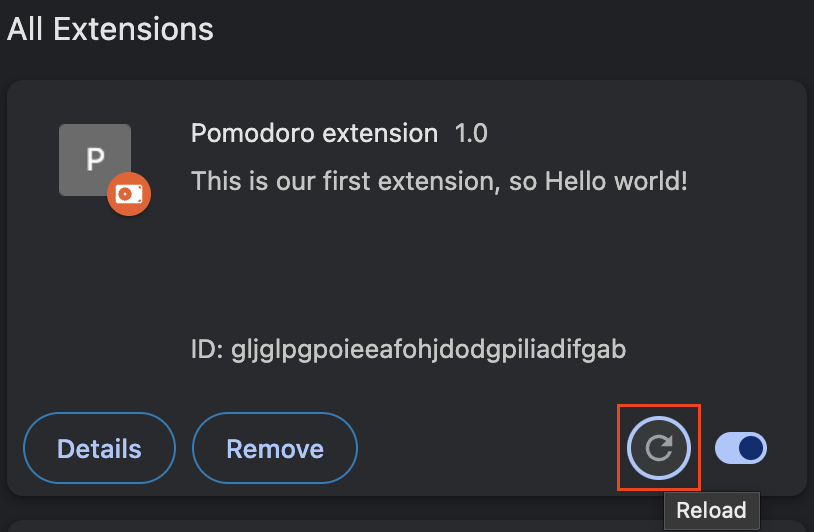
Reload is required when we change files: manifest, content scripts, and service worker.
Extension is added to the browser, but we cannot interact with it, so let’s create a popup that will appear when we press the extension icon. For this, we create a file called popup.html in our root folder:
and the popup.js file:
Now, we should link the popup to our extension by mentioning it in the manifest.json:
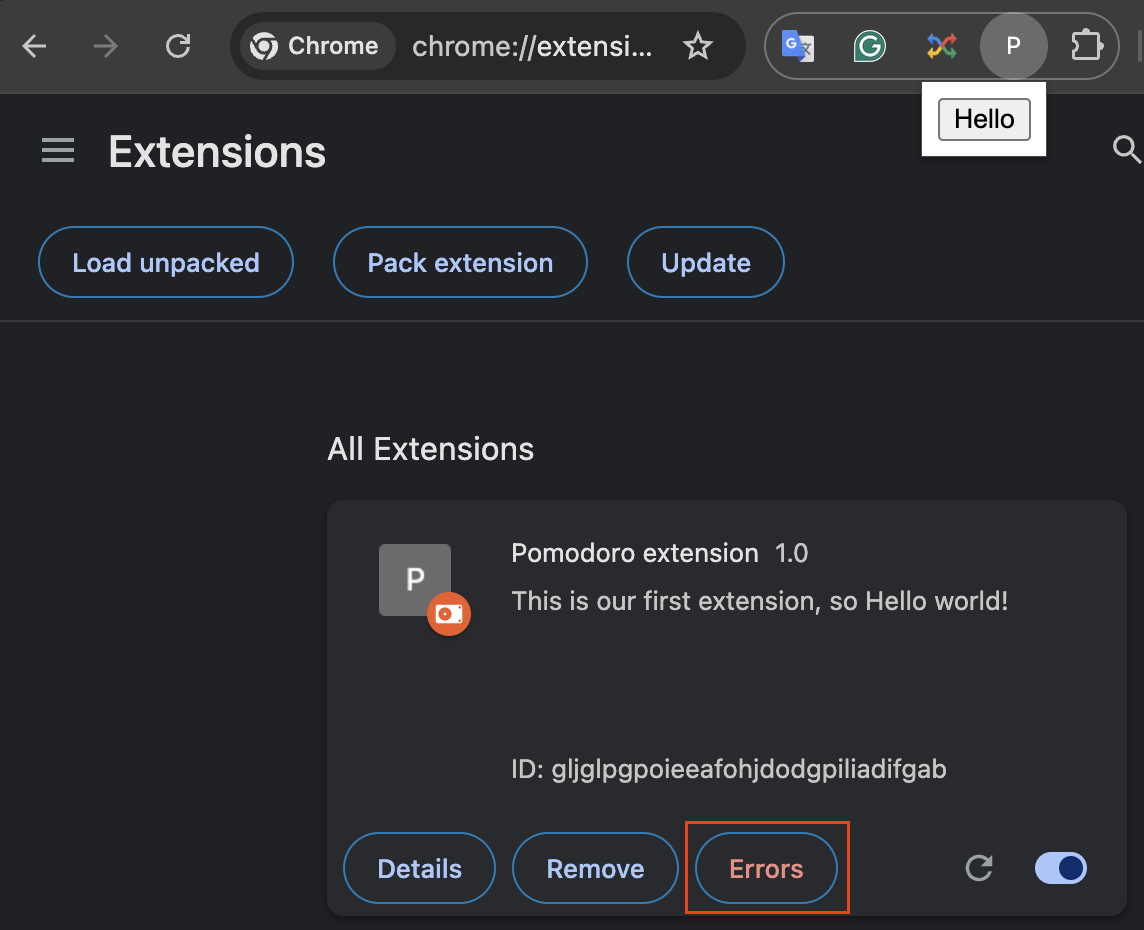
Don’t forget to press the reload button for the extension because we changed the manifest.json file. And here we go; when we click on the extension, we see the “Hello” button and, after pressing, it shows….nothing. But why?
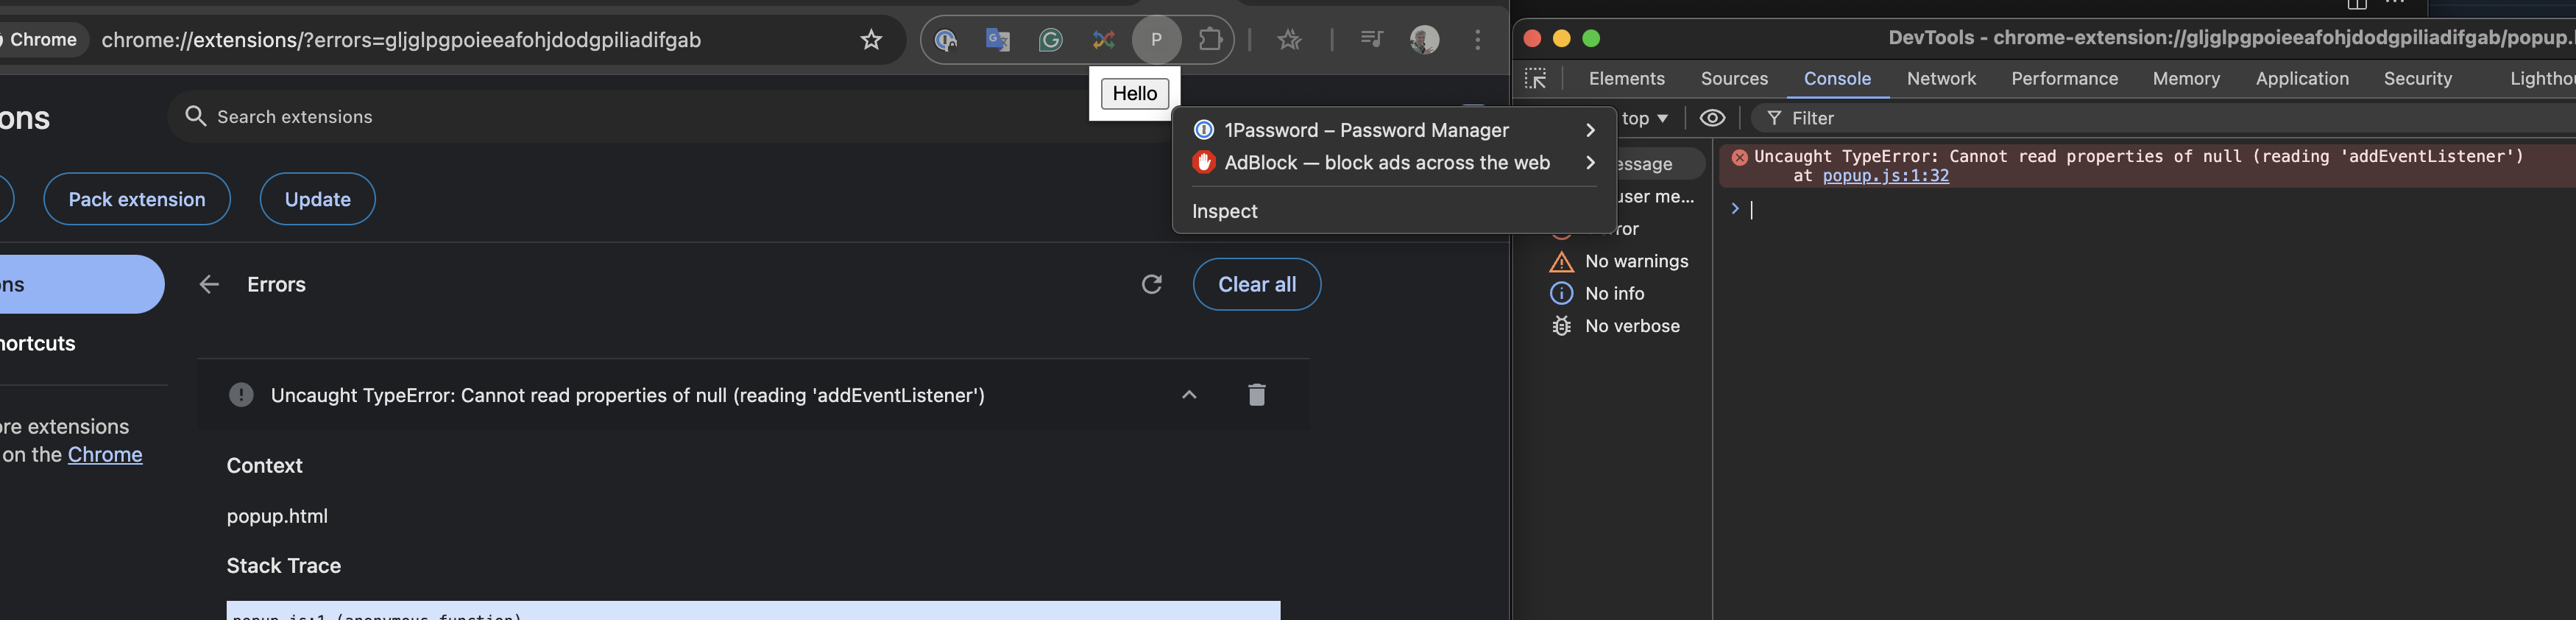
For debugging purposes, we can use the “Errors” button in our extension. When we press it, we can see the details—it shows we misspelled our test id in our popup.js.
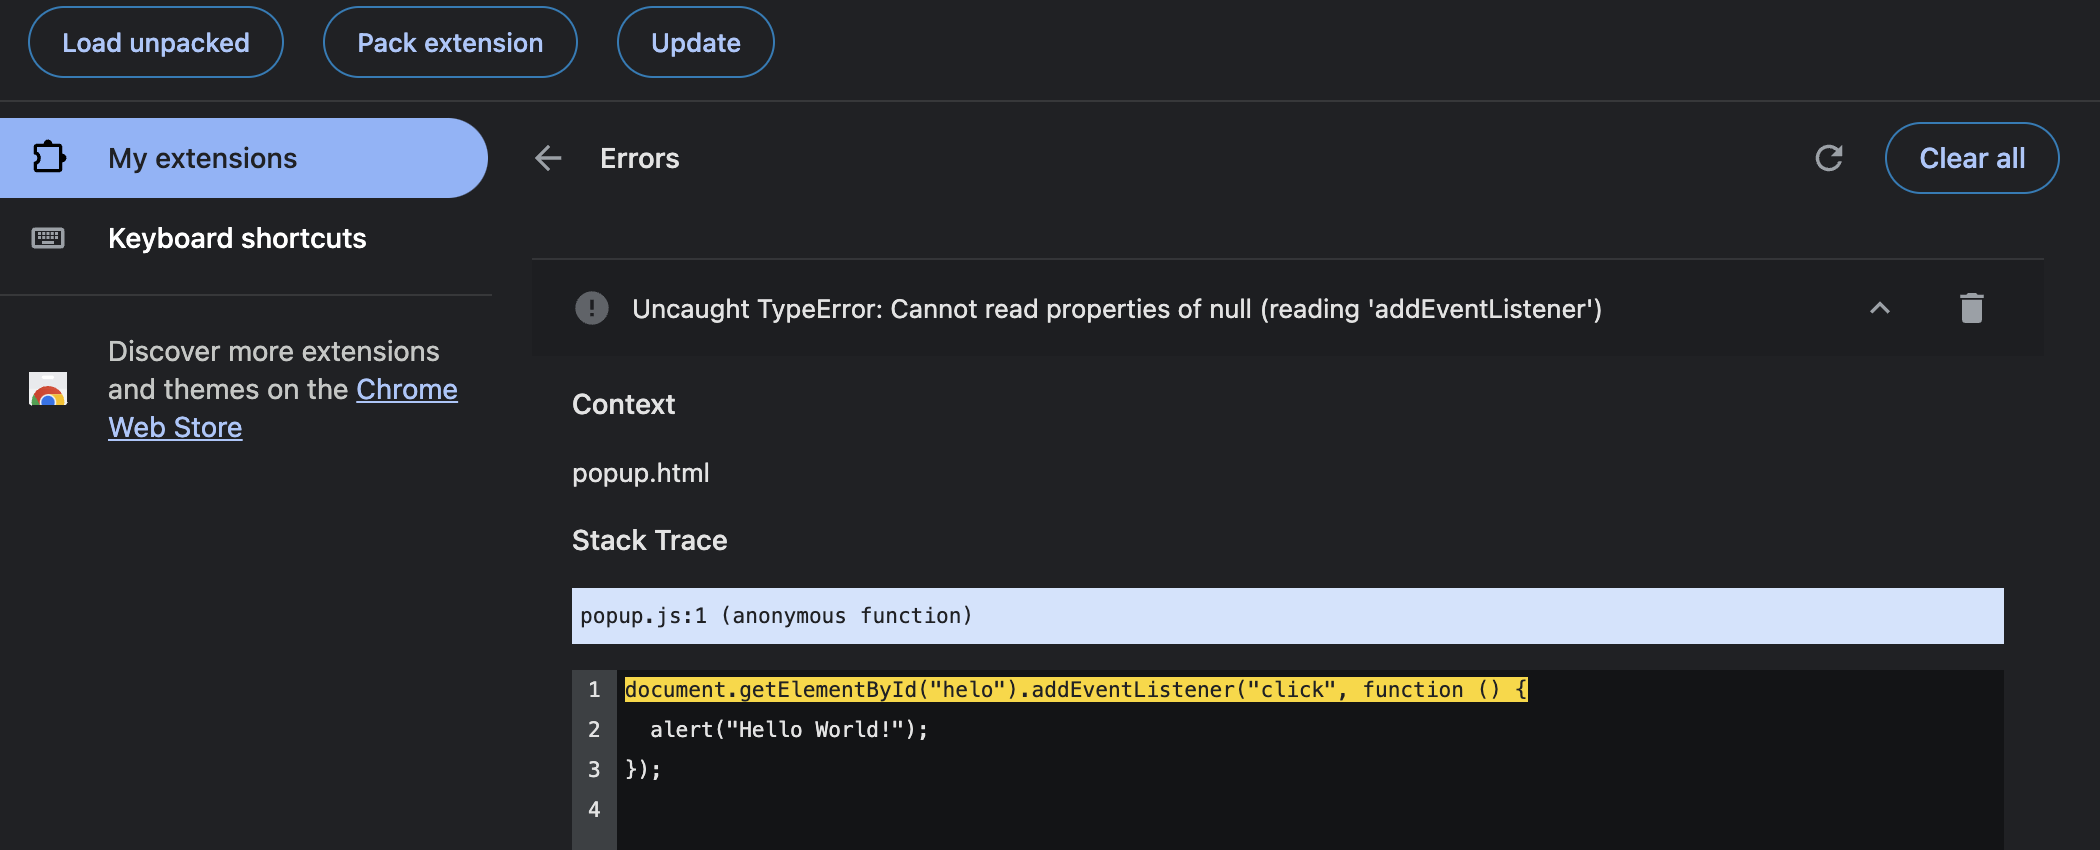
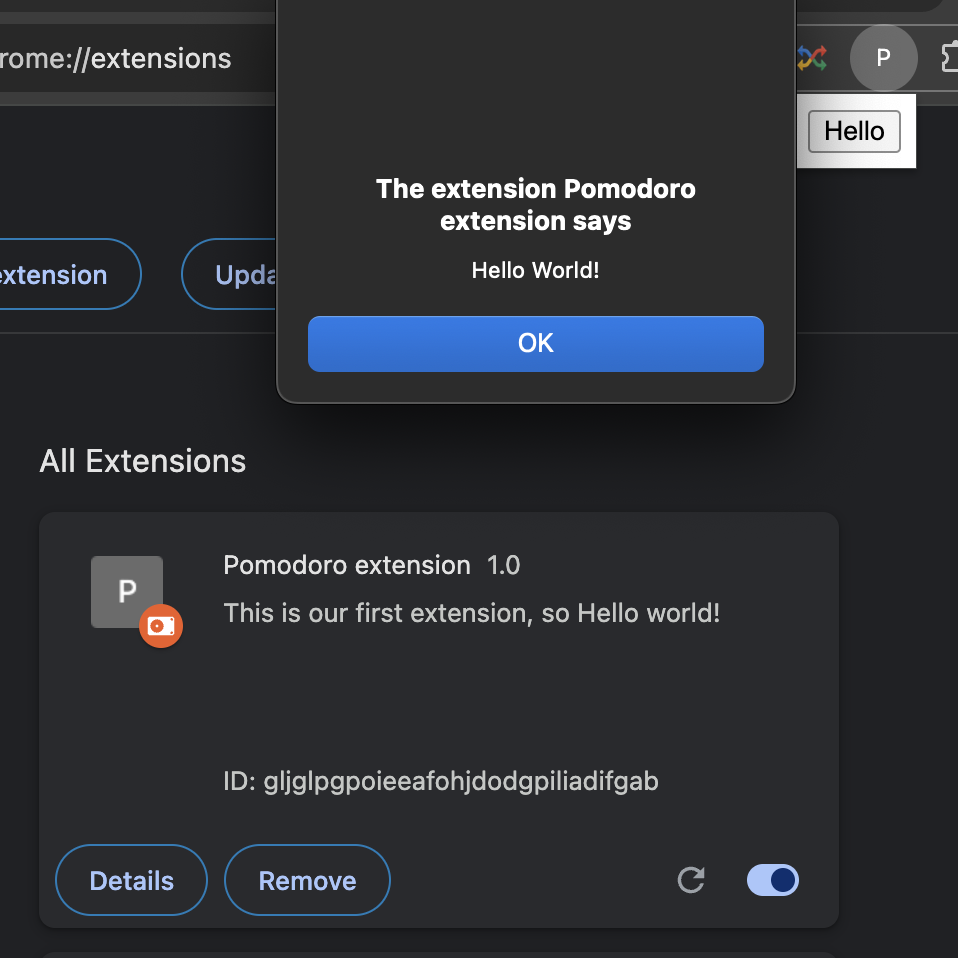
After fixing the id from ‘helo’ to ‘hello’, we can see the alert message:
Another way of debugging, which should be more familiar to us, is a developer console. To open it, we can press the right button on the extension app and click “inspect Popup” or open popup → right click → inspect. The developer console will appear, showing the same error.
Keep in mind that when the popup is closed, developer tools will be closed as well—its behavior is the same as that of a regular web page.
We already know how to see changes and debug—all the basic staff for development. Now, we can start working on our Pomodoro focus extension.
Developing Pomodoro timer step-by-step
First, let’s replace our extension icon (now we only have the letter P) with a nicer version. I found a website for generating icons with AI and created one.
To add an icon, we need to add it to our manifest.json with the field name icons . Let’s also create an assets folder to save images there:
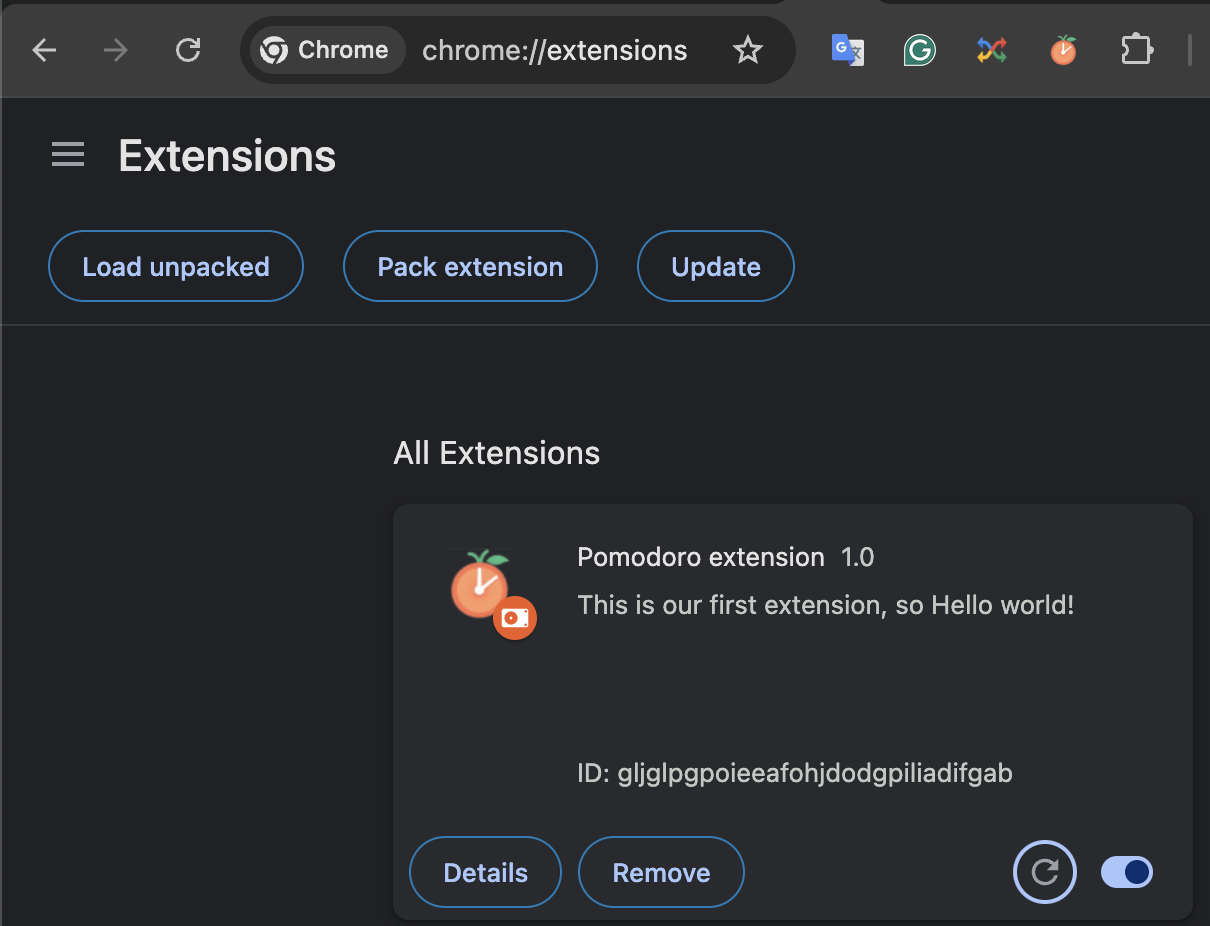
Reload the extension, and now we can see our nice icon:
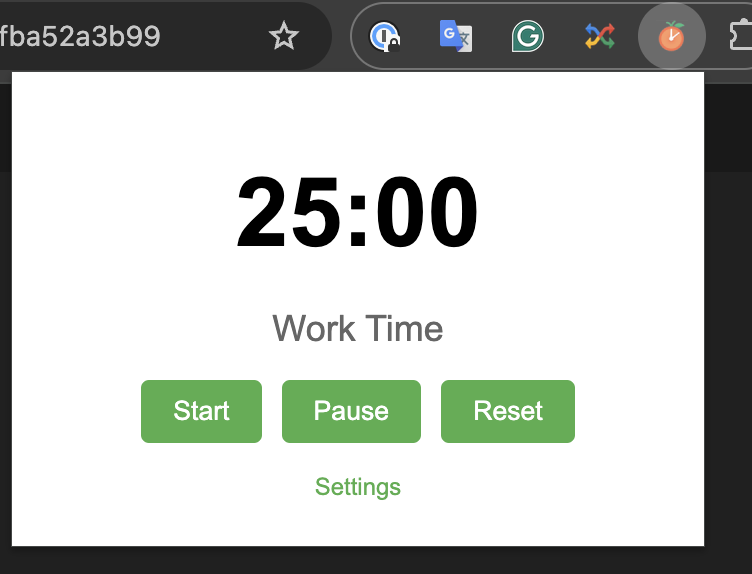
Creating a popup
Let’s create a nice design for our popup and group all files in one folder named “popup”: popup/popup.html
You can find the popup/popup.css file in the GitHub repo or add your own file.
Adding I18n (translations)
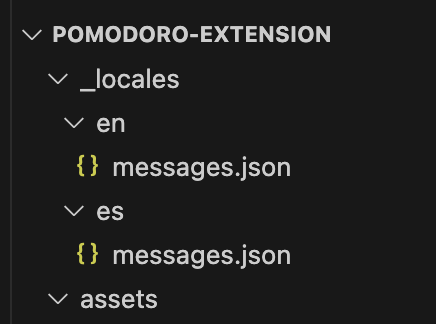
It’s looking fine, but we have a hardcoded text in our HTML file (Work time, Start, Pause, Reset). So, if we want to have a few languages, we need to set text values depending on the current locale. For the Chrome extension, we need to create a _locales folder in our root folder (Chrome docs). Create a folder for each locale, e.g., for “en” and “es”, and a messages.json file in each of that folder with the translations:
Now, let’s change the row for the label statusDisplay.textContent in popup.js to use our translations file by using chrome.i18n.getMessage API.
To use translation directly in our HTML file, we can create a translation pattern and use a = script that will be replacing our pattern with correct translations, e.g., __MSG_workTime__. Let’s create a utils folder and a translations.js file:
After we call this function in the popup.js file, we can use our translation pattern in the HTML file. It will be replaced by our translations automatically:
Don’t forget to add the property type= “module” to the script tag to allow imports in the popup.js file.
Let’s add a functionality for handling the button in the popup.js script:
We have a few specific Chrome API commands: chrome.runtime.sendMessage and chrome.runtime.onMessage. Chrome.runtime is like a bridge that connects all the extension’s components. With this API, we can control messaging between our components or any other extension lifecycle processes, e.g., sendMessage and onMessage are messaging methods to communicate between extension components.
Injecting content script
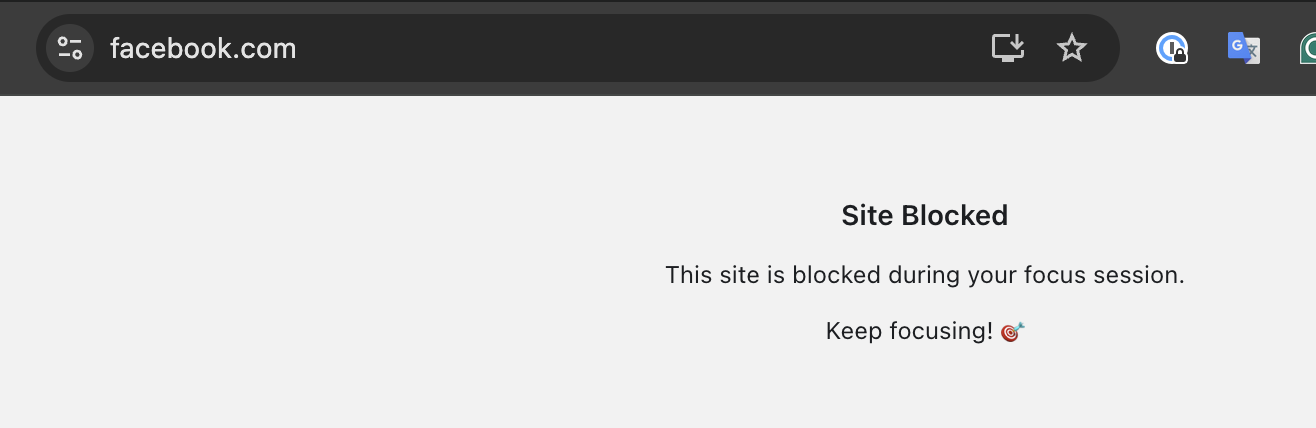
Now, we have a nice extension for focusing with timers and notifications. But we want to focus intensely and not be distracted by some sites unrelated to our focus time. To do this, we need to use a content script, which will be injected into our tab.
First of all, we need to define this script in our manifest.json:
In the example above, matches defines in which URL this script will be injected, but for our project, we need to inject it for all URLs.
Now, create a file content.js in the root folder with the content:
Reload our extension and try to open the Facebook website:
Using Chrome Storage API (saving data locally)
We blocked the site, so from now on, we will not spend too much time there. The thing is, we want to block websites only during work time and be able to visit them during breaks. Let’s fix that.
You may think we already have a broadcasting state in our background.js, so maybe we could add something like this:
And it makes sense because we’re sending messages from the background and receiving them here, but… We will not receive anything here because the Content script is not a part of the extension; it’s part of the tab content. We inject the script into the HTML of the page, so it’s not a part of the chrome.runtime. To send messages to the content script from the background.js, we should send events to the tab, e.g., with tabs API:
Then, we will receive this event and message and have the state to block only when the isWorkSession variable is true. It can work, but every second we will be sending two async messages to different streams, it can lead to some async issues. We can adopt a different approach using chrome.storage—it’s the same as Locale storage but only in the scope of the extension, and we can access it from every part of the extension event from the content script.
It’s worth mentioning that we have three types of sync, session, and local. The session storage is saved in memory and not saved to disk. The main difference between sync and local is that chrome.storage.sync will be accessible even from different devices where you logged in with your Google account. It’s a very powerful feature, but not every data should be synced, so sometimes we can use just chrome.storage.local for saving for the current device.
For demonstration, we will be using chrome.storage.sync, but if you want to try to sync with your mobile, you are free to use sync storage.
First of all, we need to request permission to our storage in manifest.json:
Then, we can change our background.js to set some value to the storage; we set it in switchSession function and also in the startTimer function:
After setting values for storage, we can read them in our content script. To make it more dynamic, we use the function to subscribe to any changes in the storage, so that we can block the site when our break is finished.
Perfect! Now, we can watch YouTube during our breaks.
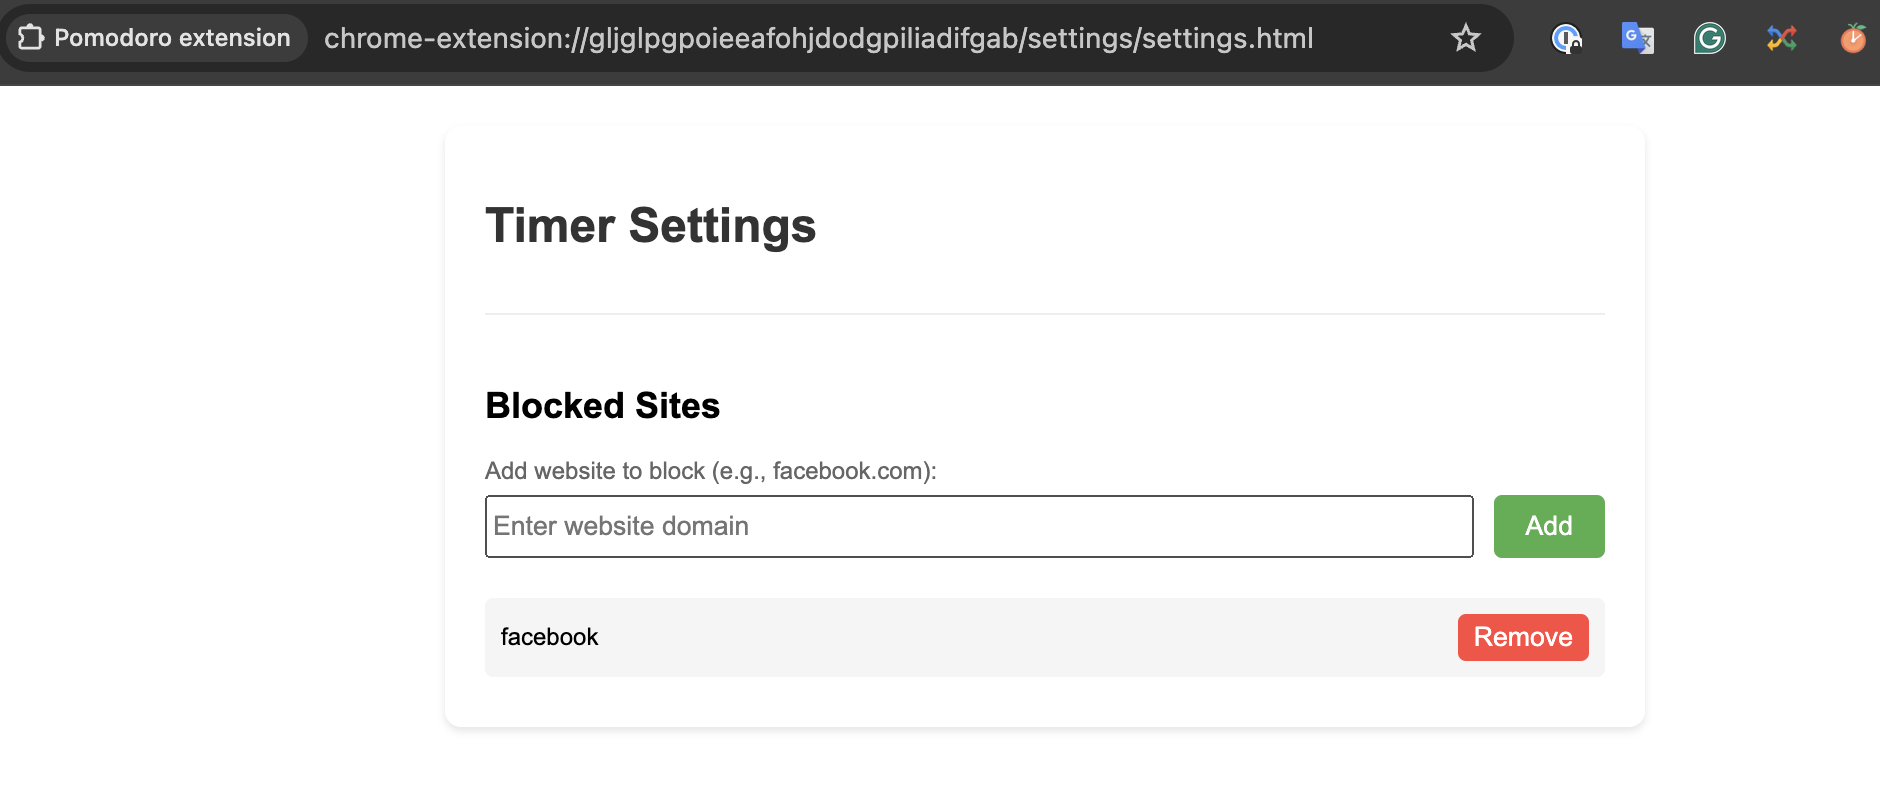
Blocking URLs on the settings page
Let’s also fix our hardcoded list of the blocked urls; it would be great to give users the possibility to set custom websites that should be blocked. For this, we will use the “settings” link in our popup. It will open the Settings page with input where we can set URL of any website that will be blocked. When the link is present, let’s create a settings folder with settings.html, settings.js, settings.css files in it.
Let’s also add a settings.js file (full code available in GitHub):
Now, we need to change content.js to get this data:
Taking and saving screenshots
We have a configurable list of websites that should be blocked. But if we don’t trust ourselves, let’s take screenshots of every session change to ensure that we are not visiting other unimportant sites after a break.
In the background.js file, create a takeScreenshot function:
Call it in startTimer and switchSession:
Saving screenshots to our download folder requires additional permissions, so let’s add it to our manifest.json:
Now, we will have a screenshot downloaded for every start timer or session switch.
Creating a side panel with Gemini AI
We also want to get some motivation during our working sessions, so we’ll build a side panel component for it. We’ll create two buttons: one that generates the motivation phrase and another to show a short motivation video.
First of all, to have permission to open the side panel, we should request permissions in our manifest.json (sidePanel permission) and set a path to our HTML file.
You can see that the manifest file also contains the aiLanguageModelOriginTrial permission and trial_tokens field. We need these fields to get motivational quotes from Chrome built-in AI Gemini model. With this AI, we will get a motivational quote with a prompt.
When we define the aiLanguageModelOriginTrial property, we request access to the built-in AI model. We need trial_tokens to access it; since the built-in AI is an experimental feature, the tokens are marked as “trial”.
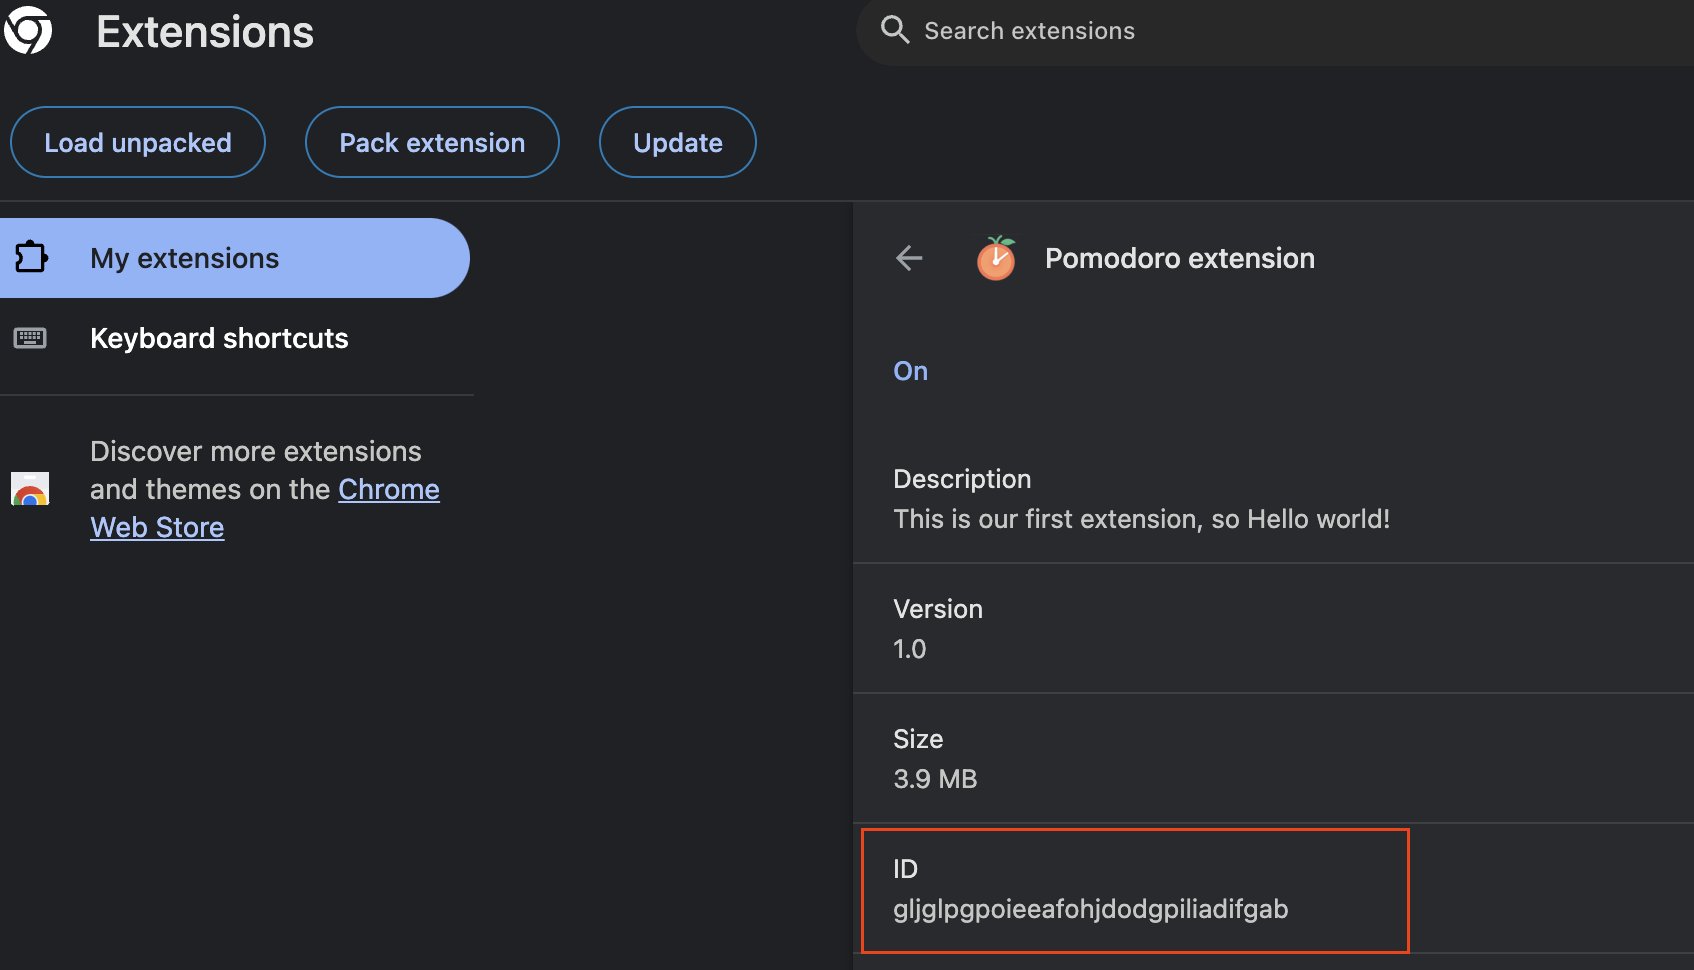
Instruction on how to get a trial token can be found here. The main point is that you should visit this link to register and enter the extension's web domain (it will look like chrome-extension://YOUR_EXTENSION_ID). The extension ID can be found on the extension page:
After we get and set up our trial token, we can start implementing our AI prompt.
In the sidePanel folder, create a file side-panel.html:
and side-panel.js:
We are using an aiOriginTrial API to create a session for prompts and then run this prompt with instructions to get a one-sentence motivational quote. Let’s check how it works in our extension.
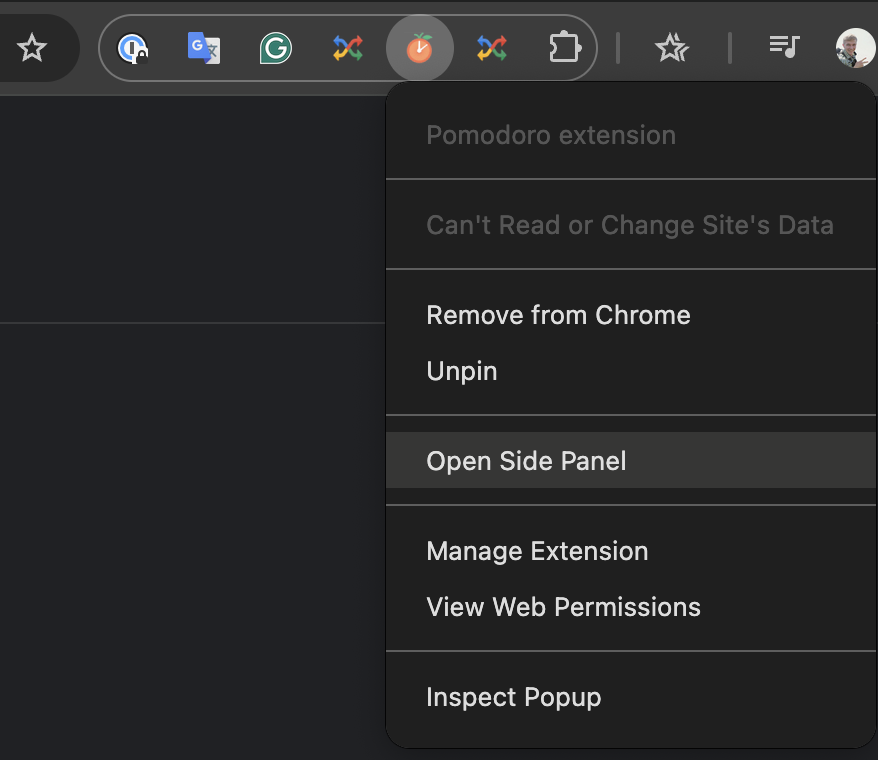
To open the side panel, you can click the right mouse button on the extension icon and then choose Open Side panel. You will see the panel with two buttons, and you can press the “Get Motivation” button:
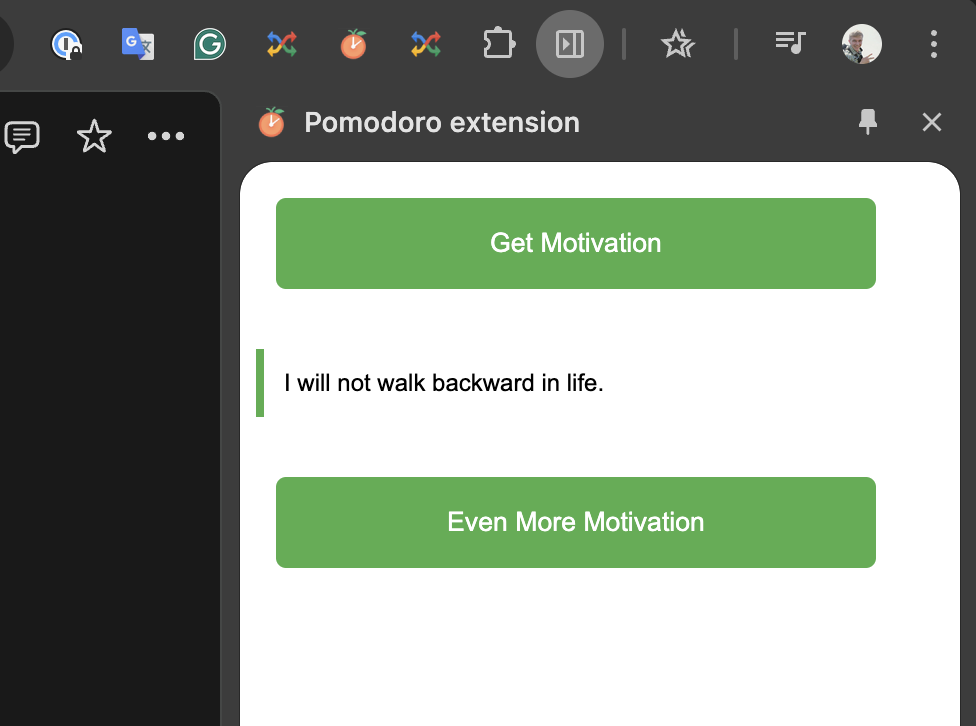
The AI motivational quote is showing. It’s a very simple example, but it’s a good one for experiments with built-in AI and prompts; only imagination is the limit.
Now, let’s add some code to make our “Even more motivation” button work. We will show a motivational video in this case.
Add code to side-panel.js:
We are sending an event to the current tab with the action SHOW_VIDEO. Now, let’s add a listener of this message in our content.js file:
We should also add a video do-it.webm to our assets folder; you can download it from the GitHub repo or use any video you’d like.
Now, we will be always motivated with Shia LaBeouf on our page.

Publishing your extension to the Chrome Web Store
For publishing to the Chrome store, you need a developer account, which you can create through the Developer Console. You need to pay $5 to access it, and you can read more about the registration here.
When you get access to the Developer account, you can press the New item button, and, in the modal, you should upload your zip archive with the extension. You need to archive your files, so manifest.json will be in the root of this archive.
Then, the main part that should be filled is the Privacy tab on the left side:
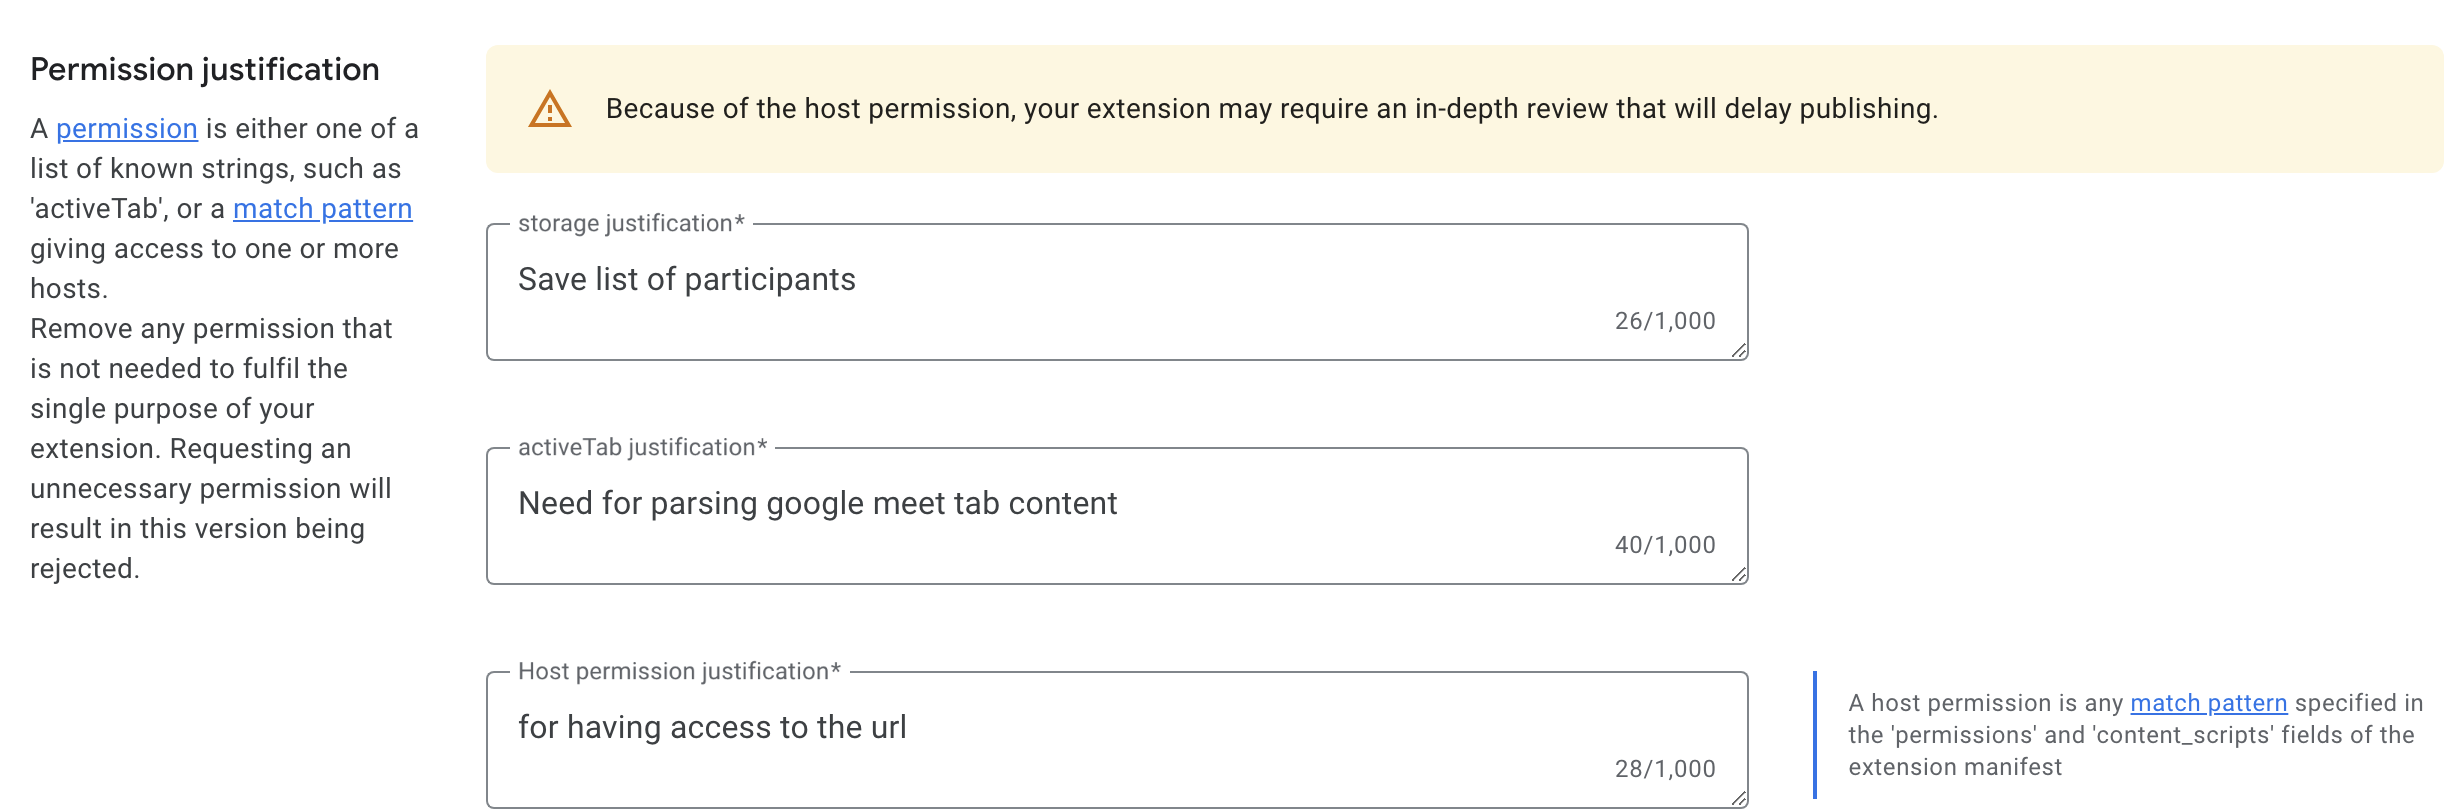
Fill in all required fields: explain the purpose of the extension, why you need any of the permissions, and add a link to your privacy policy document.
On the Store listing page, add a description, icons, and images for the extension, so that it looks nice in the Chrome Web Store and users can get to know it before the installation.
Tips for developing your own Chrome extension
Take advantage of the boilerplate
To avoid unnecessary work and configuration, it’s better to start work with existing boilerplates. In my opinion, this is the most useful boilerplate for developing the browser extension. It includes almost everything, so you can grab it and start developing without configuring your environment.
Chrome Extension Boilerplate comes with the following benefits:
- React—reusable components, speed, state management.
- Hot reload—you don’t need to reload your extension manually.
- Turborebo—fast and modular.
- i18n—ready-to-use translation in your component.
- All extension components are ready to use.
Use a custom storage like Zustand
For storage, you can easily implement your custom storage, e.g., Zustand. It’s only a matter of preference, but custom storage can be useful if you are familiar with some state management library and want to continue to use it in extension development.
Develop for Mozilla and Chrome
If you want to develop for a few browsers with the same codebase, you can use WebExtension browser API Polyfill because some APIs can be different across browsers. For example, Firefox uses browser.runtime, while Chrome uses chrome.runtime; this polyfill can combine all of them in one for easy use. FYI, it’s already present in the boilerplate mentioned above.
Earn trust for to publish with a new account
If your developer account is new, all your extensions can be marked as “Untrusted” in the store. It means that when users try to install an extension, they will get a warning it’s unsafe or not written following Chrome Store rules. This “untrusted” mark should disappear after 3 months following your account creation or once you receive more positive feedback from the users.
Therefore, it’s better to push your MVP to the store ASAP, granting access only to testers or specific groups. Not to mention that you should write an extension without any malicious code or requesting unnecessary permissions; these things will give you an “untrusted” mark.
Conclusion
Now, you should be able to create a Chrome extension from scratch, add interesting features, and publish it to the Chrome Store. You’re only limited by your ideas of what’s interesting and useful to your users.


Learn more about Desktop
Here's everything we published recently on this topic.


