This article is divided into two parts. In the first one, we will describe the preparation process including:
- The idea of testing React Native apps in the cloud,
- AppCenter configuration,
- and Test Run configuration.
In the second part of this short guide, we will describe the testing process including such steps as:
- Creating XCUITest suite,
- Submitting the app for testing,
- Checking the results,
- and Writing the actual test suite.
We hope that you'll find its guide helpful in your daily testing tasks.
Intro
When it comes to debugging and testing mobile applications, the first thing you need is a real device. That way, you can get closer to the actual environment that your users are running and increase the chances of actually reproducing the issue. While it is relatively easy to get your hands on the most popular Android and iOS devices, it can get really problematic when you start working on edge cases.
For example, how do you reproduce and work on an issue that is only specific to a very rare old Samsung device? Sure, you could always find one on eBay and get it delivered your way in a couple of days. However, such an approach wouldn’t scale.
React Native makes this particularly challenging, as your app can work on multiple platforms and many devices, giving you full coverage of the mobile market without much effort. When going to production and releasing your application to multiple markets, it is extremely important to be able to debug your issues quickly and supply your users with a fix.
That’s when the cloud comes into play!
The idea of testing in the cloud
The idea is very simple - rather than running your test suite on an actual physical device - you send it to the cloud, where it is subject to being tested on hundreds of devices, depending on your selection. You can think of it as loading your application into multiple parallel mobile phones to run the same test suite. The result is then aggregated and delivered your way.
There are at least two leading providers that let you test your app in the cloud. That is DeviceFarm by Amazon (which was the first tool of this kind, if I recon) and AppCenter by Microsoft. In this article, we will continue with the latter one, as we have used Microsoft’s AppCenter before when writing our Ultimate Guide to React Native Optimization.
The reason why you may have not heard of cloud-based tools like this is simple - they don’t have React Native support yet. However, you can test React Native apps with native frameworks (because it’s native after all). In this article, we will attempt to do so as well. You may find the code here useful in other use cases, such as when you need to test React Native with native code in general.
Let’s get started!
Setting up a blank project
Before we get into testing, we need to set up a demo project.
If you already have a React Native project, you can use that one instead. The steps that will be presented in this article will apply to it as well. Just make sure to pick one component (as we do later as well) and repeat the steps we make.
To do so, let’s run:
There are other ways to init a React Native app as well. Check the official docs for details.
Please keep in mind that running this command may take a while, depending on whether we run it for the first time or not. When ready, we should be all set.
Configuring AppCenter
Now that we have our project ready, let’s configure the Microsoft AppCenter. In short, we will need an account and later, to create a placeholder for our application.
If you don’t have an account yet, you can create one by visiting the official website. It is really simple so that we will not be covering it in this article.
Once you log in to AppCenter, the first thing we need to do is to create an application. To do so, go to appcenter.ms (or press the “Add new” button in the top right corner) and enter the necessary information.
In this article, we’re setting up tests for iOS. When doing the same for Android, make sure to create a separate application and choose “Android” from operating systems instead.
Make sure to choose “iOS” from the list of the operating systems and “React Native” from the available platforms. When ready, your choices should look as presented on the screenshot below:
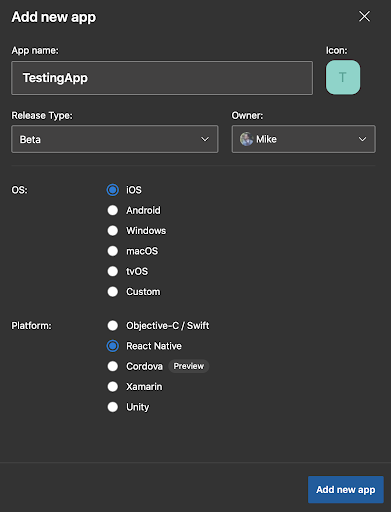
When creating an application, make sure to choose the correct platform and OS.
Once created, you will be transferred to the main page of the new application. You don’t have to follow instructions in the Getting Started section, as they’re needed for other parts of the AppCenter that we’re not covering today.
As you can see, there are quite a few features available, including Build, Distribute, and Diagnostics. We’re not going to be covering them in this article. However, you can learn more about them by reading our Ultimate Guide to React Native Optimization, where we have described them.
Let’s choose the “Test” from the sidebar - or type https://appcenter.ms/users/{yourName}/apps/{yourAppName}/test/runs link (make sure to fill in the missing placeholders).
Since it is the first time we’re visiting this screen, there is nothing handy for us there. Let’s press the “Start testing your app” button in order to begin our first configuration.
Configuring test run
The first and most important thing when configuring a new test run is to choose the devices that it will run on. Since we have selected “iOS” before, you will only see Apple devices available up there. Feel free to choose a few devices based on your preference, for example, like we did below:
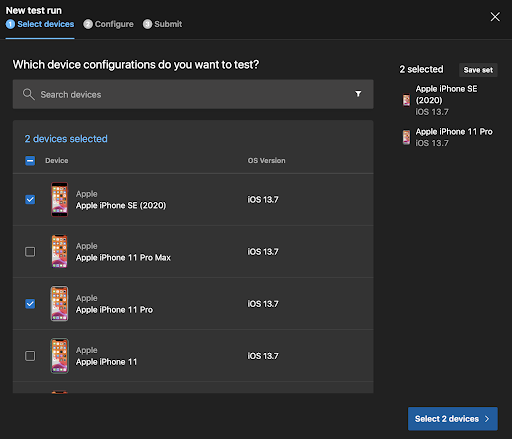
We have selected iPhone SE (2020) and Apple iPhone 11 Pro, both running iOS 13.7. When ready, press the button in the bottom right corner to choose selected devices and proceed to the configuration.
In the next screen, we are able to specify the details that will be needed for our tests to run. That includes choosing the framework that our tests are written with (or will be in case of this article).
At this point, it is completely up to you to make your choice. We’re going to go with XCUITest as it will be the easiest to set up, compared to e.g. Appium.
As you can see, Detox support is not available. For the sake of this article, we will use XCUITest, which is a built-in native framework for iOS. Note that while Appium itself is supported, its JavaScript version is not. We hope to see some improvements around that in the future.
You can compare your choices with ours on the screenshot below:
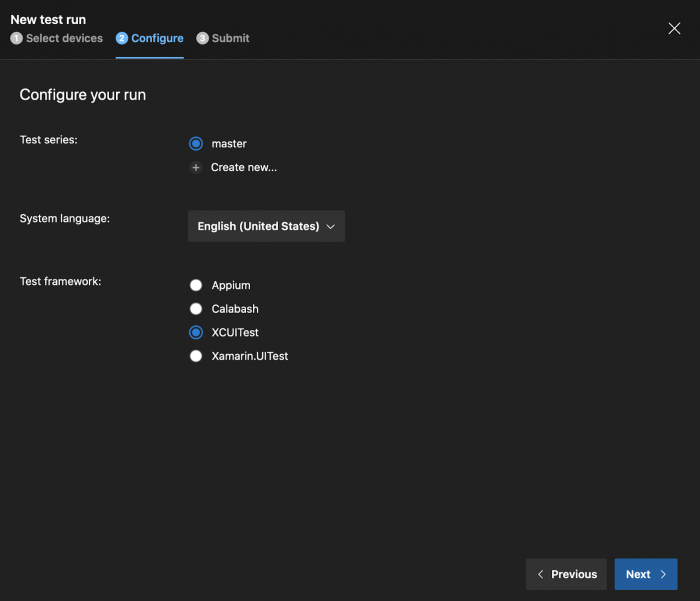
We’re going to use Appium for testing our application.
When ready, press the “Next” button in the bottom right corner and proceed to the last step where we will be able to run our test suite.
In the last step, you need to save your configuration, in other words - a device set. You can do so by pressing the gray button (we have to admit - not the best UX out there Microsoft).

After our device set is saved, we are good to go to the next steps - creating XCUITest suite, submitting your application for testing, checking the results, and writing the actual test suite. These steps will be described in the second part of this guide which will be published next week.
In order not to miss the second part of the guide, follow us on Twitter, Facebook, and LinkedIn to stay updated!

Learn more about Testing
Here's everything we published recently on this topic.