I spend most of my time on my laptop in 3 apps, a browser, a code editor and a terminal emulator, so I want things to look pretty and be useful in my terminal. After a lot of tweaking, I think I finally have a decent terminal configuration using Zsh which I’ll share in this article.
Zsh is an interactive shell similar to bash (the default shell on macOS and Linux systems). What’s great about Zsh are the features such as autocompletion and the customization options available. For someone like me who forgets and mistypes commands all the time, autocompletion is a life-saver. It’s because of autocompleting that nobody knows how terrible I am at coding.
Switching to Zsh
Zsh is installed in the default installation on macOS but installing via brew ensure that we have the latest available features and bug fixes. To install Zsh on macOS, run the following if you already have Homebrew:
For other Operating Systems, it should be available to install from the default repositories.
To change the default shell to Zsh, you can use the <rte-code>chsh<rte-code> command, However, you need to add Zsh to your shells list first:
Then run the following to switch the shell to Zsh:
I’ve spent a lot of time configuring Zsh to have a great autocompletion experience. Sure, I could use the Fish shell instead, but Zsh’s syntax is much closer to bash, which is a big reason I prefer Zsh.
When I searched the web on how to configure Zsh, most of the guides I found used Oh My Zsh. While it provides a great set of default configuration and plugins, it’s so bloated that it’ll reduce the startup time of the shell by several seconds. I was using it for a while, but I don’t think I even used 1% of what it has, all I wanted was a good autocompletion and few other niceties. It was unreasonable to use Oh My Zsh to spend seconds staring at the terminal while it starts up every time.

So I decided to switch to antibody to manage my Zsh plugins. While it’s not as feature-rich as Oh My Zsh and I will need to configure things manually, it’s much faster – and while it took a fair amount of time to tweak the config, the actual amount of config needed isn’t that much. The speedup was totally worth it.
Ok, enough blabbering. Now, let’s configure our shell. Note that I didn’t cover any aliases or plugins providing aliases here since they are not specific to Zsh and aliases are more like personal preferences. All the code I have mentioned below need to be added to the <rte-code>~/.zshrc<rte-code> file.
Enabling autocompletion
The first thing we want is autocompletion. To initialize the completion system, we need to load <rte-code>compinit<rte-code>. However, loading the completions every time can slow down the startup time. Fortunately, we can use a cache for faster startup. To load <rte-code>compinit<rte-code>, let’s add the following to the <rte-code>~/.zshrc<rte-code> file:
Next thing we need to load is the <rte-code>complist<rte-code> module. It provides a menu list from where we can highlight and select completion results. To load it, we just need to add the following:
Configuring Zsh
By default, Zsh doesn’t save the history to the disk for the commands we have typed. Since the history is often useful and can be used to provide autosuggestions, we would want to save the history. To do it, we just need to specify the number of entries to store and a file name where to save the history:
We might also want to configure some more options to improve how the history is saved, for example, eliminating duplicate entries from the history:
A cool feature in Zsh is the ability to navigate to a directory without typing cd. For example, if we type projects and there’s a directory named Projects, Zsh can automatically cd to the directory unless projects is a command available in the path. I use this feature all the time and miss it a lot when I ssh to a server where I don’t have it. To enable it, we can do the following:
I make typos all the time. Zsh can autocorrect those typos and ask us to run the correct command when we try to run a wrong command. To enable it, we can do the following:
When we type a command and press the tab key, Zsh shows a list of completion items. We can tweak a few things to improve the autocomplete menu:
We can also tweak the UX of the autocompletion menu to match even if we made a typo, and enable navigation using the arrow keys:
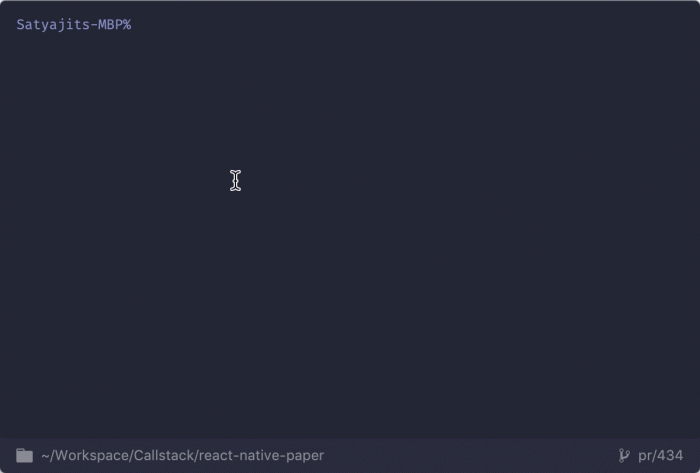
Now we get autocompletion with a list of suggestions from where we can select the options with the tab key or the arrow key:
One issue with Zsh is that the delete key doesn’t work as expected and inputs ~ instead. To work around this, we need to add the following keybindings:
Plugins
The next step is to install some plugins to improve the experience even more. To install the plugins, we are going to use antibody. You can follow the installation instructions on the website. I use the following plugins:
zdharma/fast-syntax-highlighting
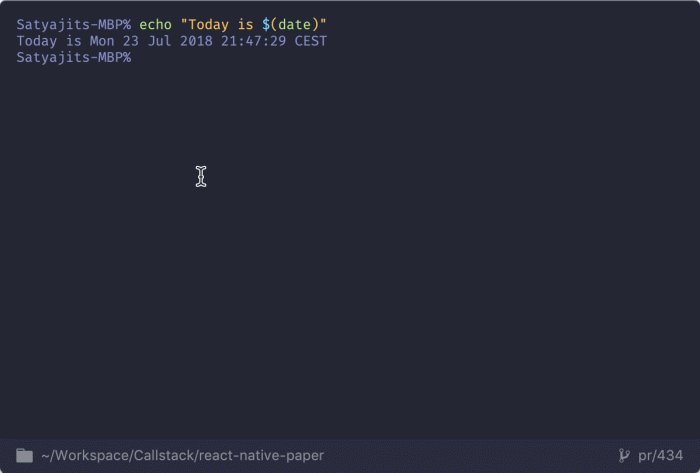
This plugin provides syntax highlighting for the commands we type in the Terminal. In addition, when we’re typing a command, it’ll be highlighted in red if it’s invalid and in green, if it’s valid.
This plugin is also needed by the <rte-code>zsh-users/autosuggestions<rte-code> plugin, which we’ll install next. To use it, add the following to your <rte-code>~/.zshrc<rte-code>
zsh-users/zsh-autosuggestions
This plugin will suggest commands as you type, which you can select with the right arrow key (➡). The suggestions are based on the history.
To use it, add the following to your <rte-code>~/.zshrc<rte-code>
zsh-users/zsh-history-substring-search
This plugin allows you to type part of a command which exists in the history, and then select matching commands with specific keys, for example, to select with up and down arrow keys, we need to add the following configuration:
To use it, add the following to your <rte-code>~/.zshrc<rte-code>
zsh-users/zsh-completions
This plugin provides additional completions not available in Zsh yet. To use it, add the following to your <rte-code>~/.zshrc<rte-code>
marzocchi/zsh-notify
This plugin shows a desktop notification when a command takes a long time to finish or fails if the Terminal tab is inactive. Unfortunately, it doesn’t work with Hyper on macOS which I use. But it should work if you use one of the supported Terminals, or you’re on Linux.
To use it, add the following to your <rte-code>~/.zshrc<rte-code>
If you’re on macOS, you also need to install <rte-code>terminal-notifier<rte-code>
buonomo/yarn-completion
Being a web developer, I work with yarn every day. This plugin provides autocompletion for yarn commands and scripts, which is a huge help. In addition, we can see all the available scripts without having to open the <rte-code>package.json<rte-code> file directly in the terminal.
To use it, add the following to your <rte-code>~/.zshrc<rte-code>
Customizing the prompt
I like a minimal prompt with a little info such as the current directory and git metadata. But if you prefer a different style, there are tons of prompts available on the internet.
For my setup, I used the spaceship prompt with the following setup:
Since I already have the folder and git information in the status bar in Hyper, I conditionally removed them from the prompt when using Hyper.
Note that you’ll need to install and configure the powerline fonts to be able to display additional symbols in the spaceship prompt. Personally, I use Fira Code, which supports these symbols.
Another similar prompt is pure, but I didn’t use it because of the lack of customizability.
Open new tabs in same directory
If you’re using Terminal.app on macOS, opening a new tab doesn’t preserve the current working directory when using Zsh. To make it work, we need to add the following:
Wrapping up
To make it easier to copy/paste, here is the complete configuration with all above tweaks:
You can copy the whole config and paste it to your <rte-code>~/.zshrc<rte-code> file after installing <rte-code>antibody<rte-code> and it should work without any changes. Let me know if you have any questions and I’ll try to answer them. Note that I’m no expert at this and might be missing crucial config options. Most guides on the internet use Oh My Zsh or don’t explain much, so I was left to figure things out by reading various configs. If I’m missing something, please leave a comment and I’ll try to update the guide.
Also, if you’re curious, I have used Hyper with the hyperminimal plugin and the hyperterm-palenight theme in the screenshots above.


Learn more about Developer Experience
Here's everything we published recently on this topic.

