
The perfect app is an app that is accessible to everyone. This means that every functionality, every option and every new feature should be designed the way that it is accessible regardless of the user’s disability level.
For the past few weeks, I and my team have worked on adjusting and fixing a couple of accessibility issues in one application. The level of complexity of the problems varied. Sometimes the solutions that we implemented required quite a while of our work. I’ve decided to collect a few and briefly describe them to make other developers aware of potential problems that they might face.
If you would like to learn more about accessibility, read why is it important and how to implement it in your apps.
React Native accessibility API
Finally, React Native’s Accessibility API is awesome. The version <rte-code>0.60.0<rte-code> comes with updated <rte-code>AccessibilityInfo<rte-code> along with many improvements to <rte-code>Accessibility<rte-code> such as additional accessibility roles, states and accessibility actions. Check the React Native blog post for more info.
One new method called <rte-code>isScreenReaderEnabled()<rte-code> can be especially helpful to distinguish whether the screen reader is currently active to rearrange the screen or disable some animations.
Accessibility tools
Working on accessibility without a physical device is not an issue. However, in contrast to iOS, Android emulator doesn’t have the screen reader app installed by default. To install it, you can download <rte-code>Android Accessibility Suite<rte-code> from Google Play or download <rte-code>TalkBack <rte-code> file and drag the downloaded <rte-code>.apk<rte-code> on a simulator according to React Native documentation.
<rte-code>Android Accessibility Suite<rte-code> is a collection of accessibility services that help you use your Android device eyes-free or with a switch device.
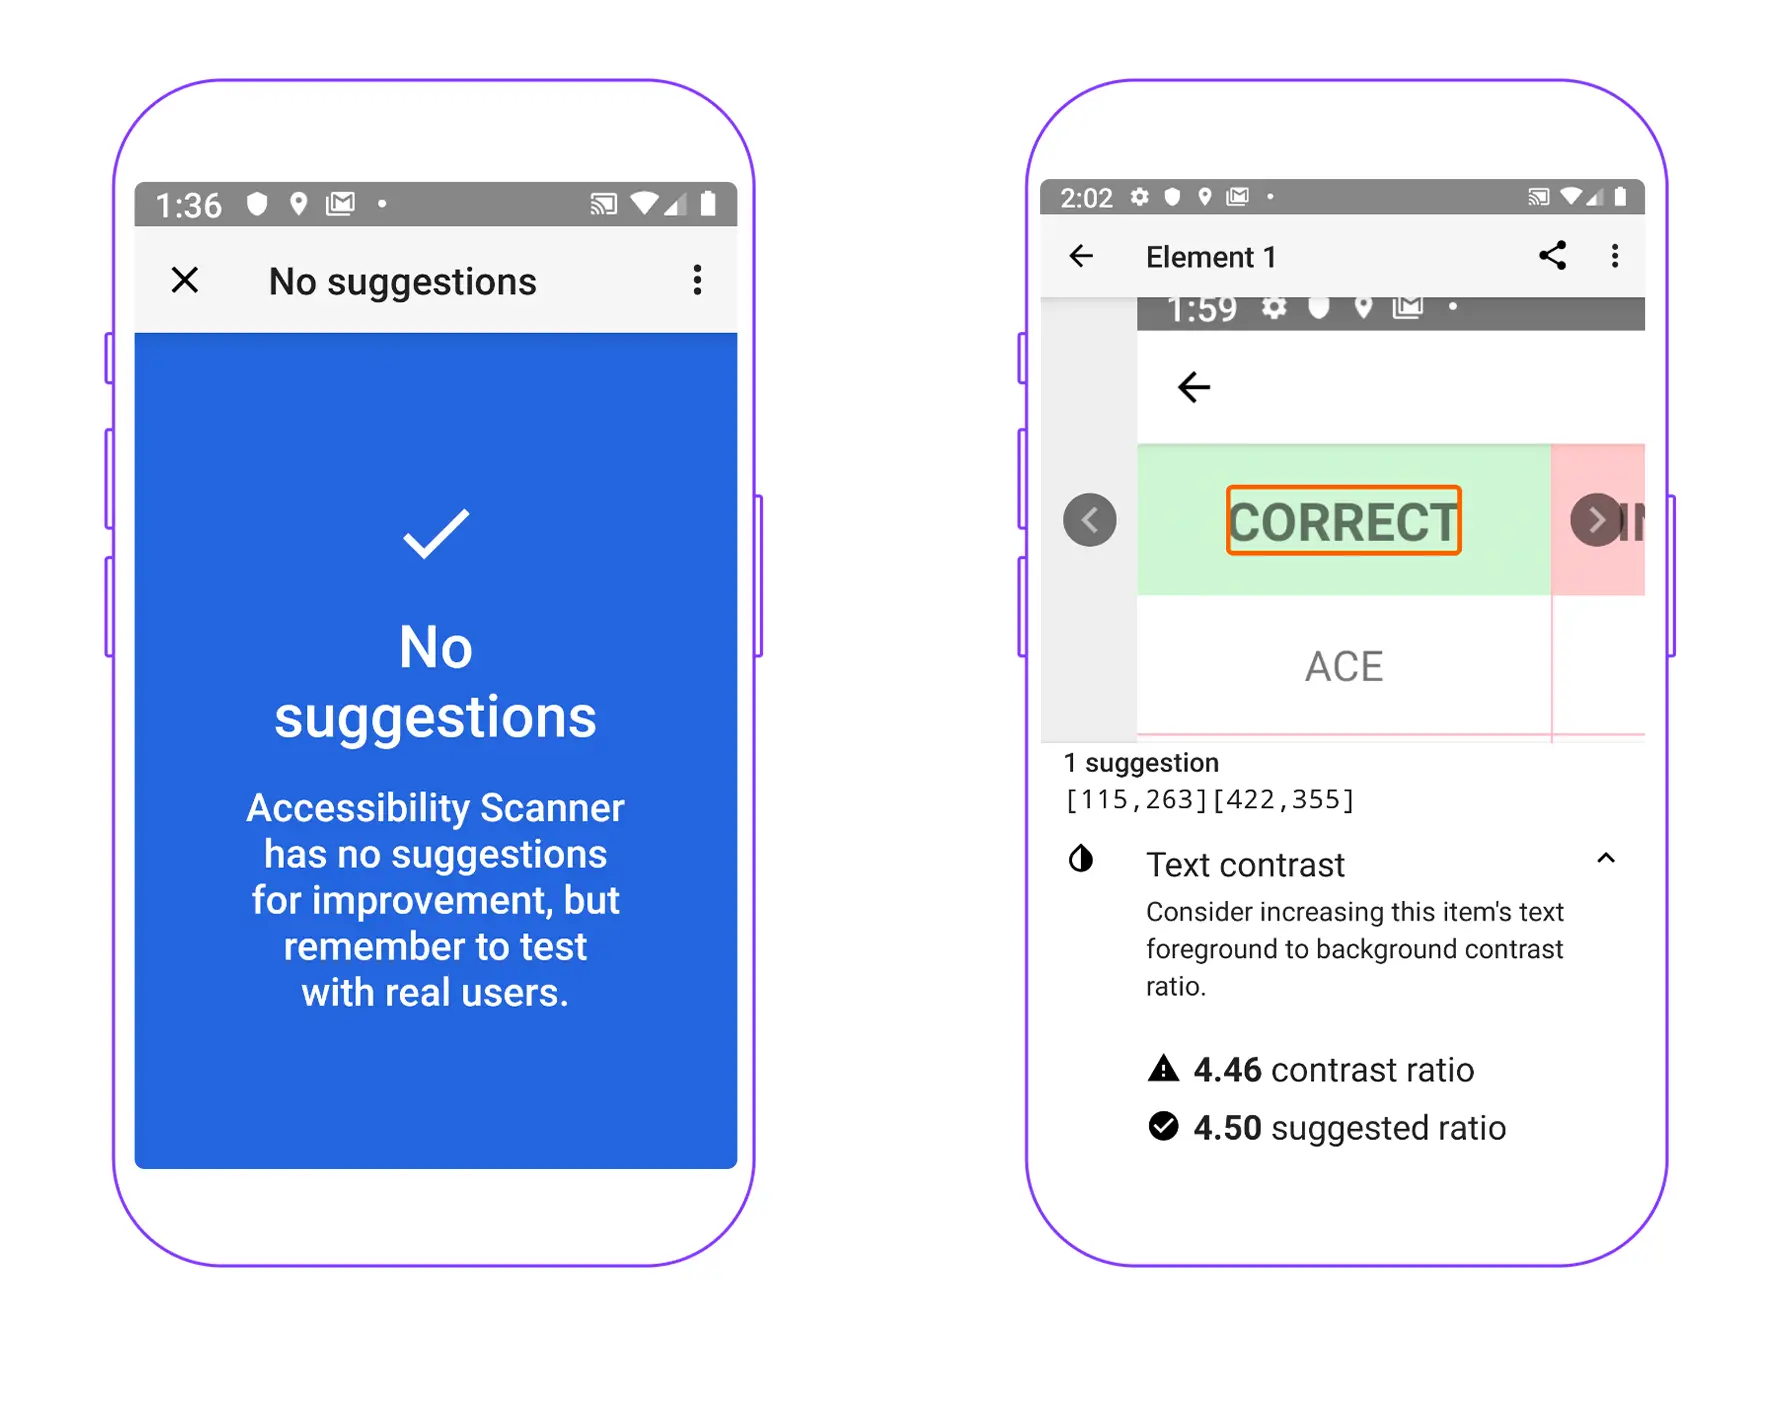
Another helpful app available on the store is <rte-code>AccessibilityScanner<rte-code>. It scans the current screen and suggests some hints to improve the accessibility level of your app.
When the app is fully accessible
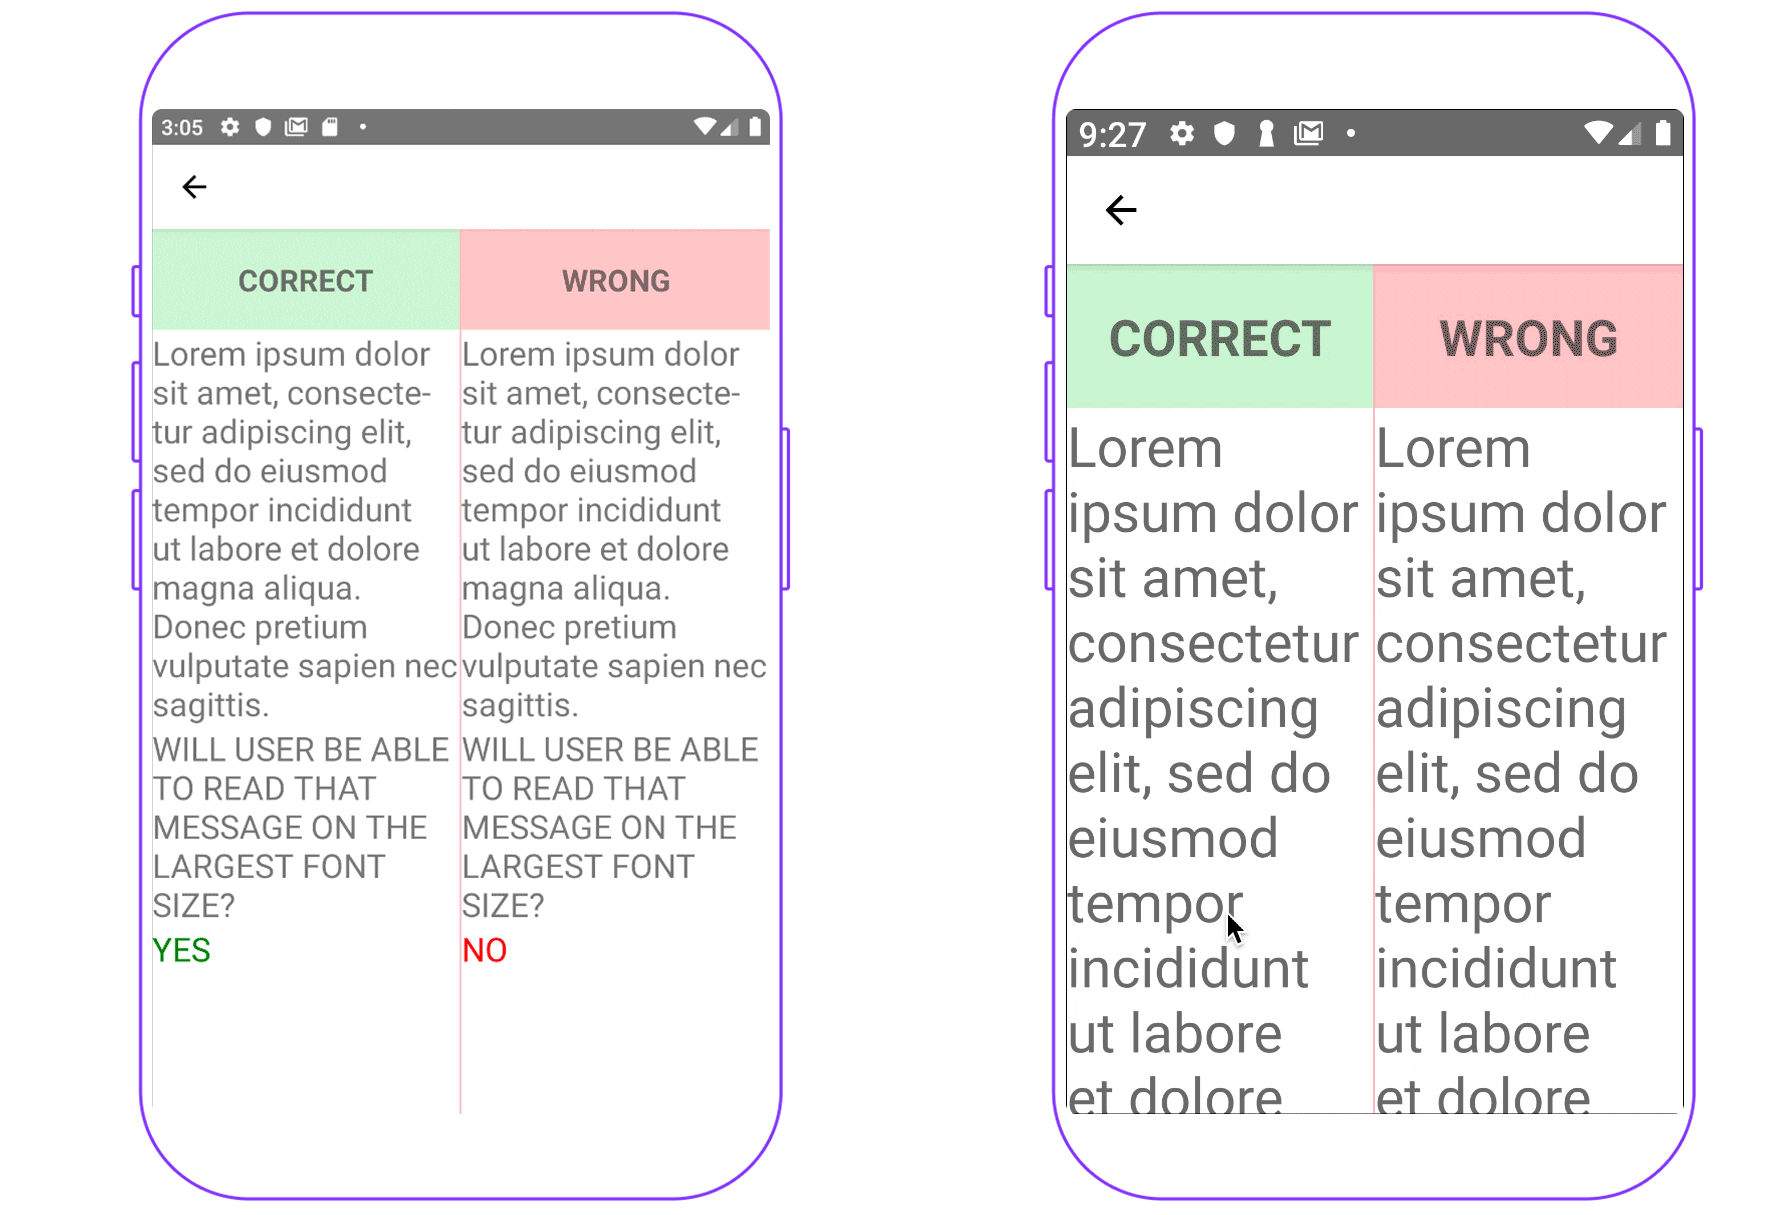
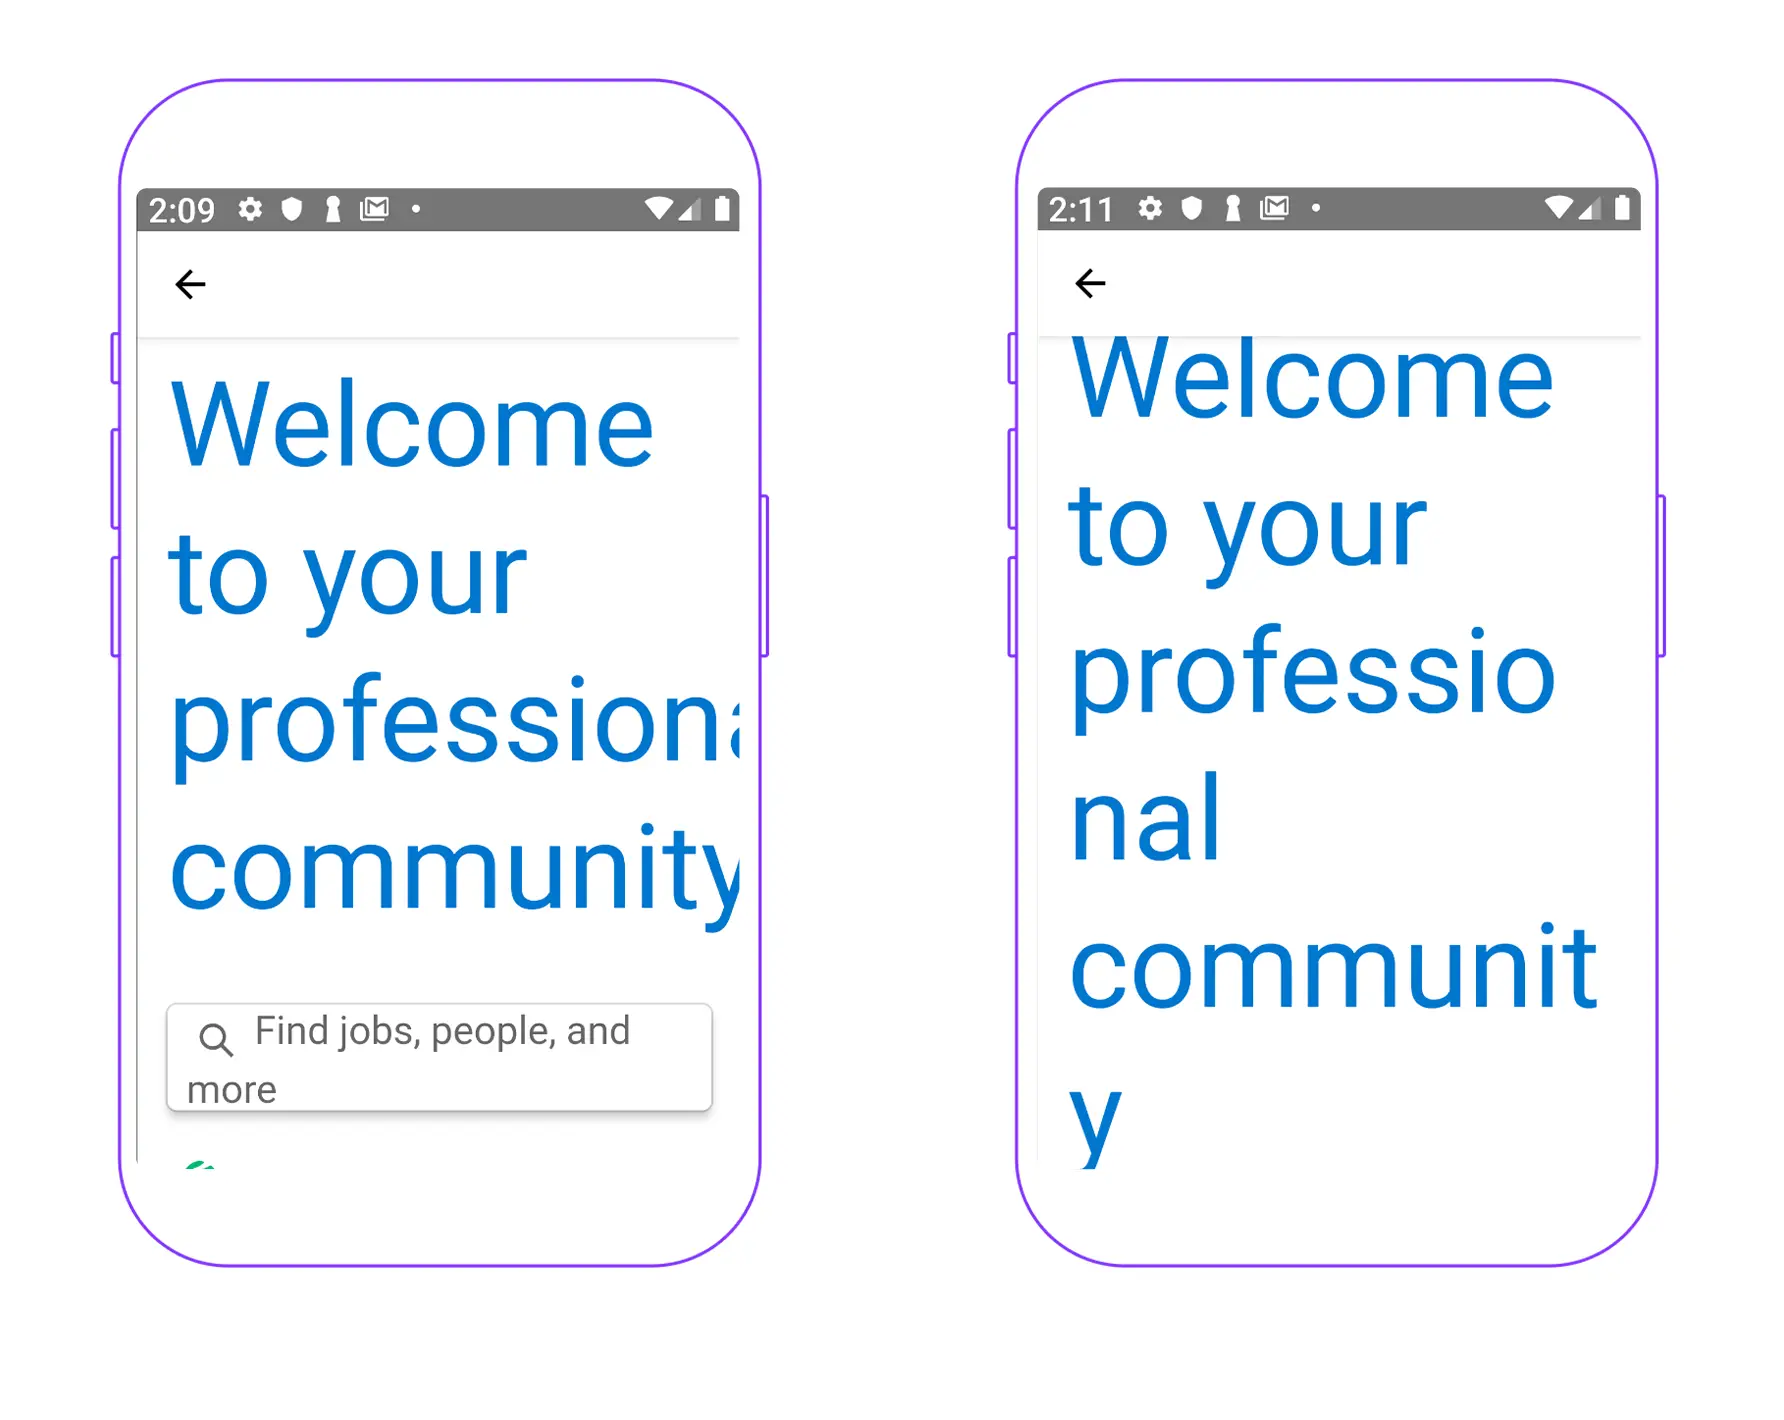
Are you sure about that? I am aware it’s quite hard to test the app on all available Android devices, however, I would advise you to pay special attention to enabling the largest font size along with the largest display size and test the app one more time on devices with an 18:9 (or 18,5:9) aspect ratio. Popular representatives of these proportions can be Xiaomi Redmi 5 Plus or Samsung Galaxy S8.
Wait, but why is it so important? The answer is simple! Items that fit on the default screen and font sizes can be truncated or remain off-screen because mentioned devices provide a taller screen with slimmer bezels on the sides. There is no reason to worry because in most cases it can be easily fixed by setting <rte-code>flexWrap<rte-code> or <rte-code>flexShrink<rte-code> properties to get the right layout.
What are my tips?
Well, I think it’s about time to dive into examples. Check out the first one!
Inline Text Link
Let’s start with the problem when a link that opens the provided url is located between two parts of a sentence. An example is pretty simple, look at my activity on the Callstack's webpage.
We expect that first, the screen reader reads the whole sentence and then it tells what accessibility role it plays. In this case, it is a link so on double-tap (double-tap gesture is used to activate the selected item when TalkBack is on) it will open a browser installed on the device.
To achieve it, there is a need to wrap everything in one parent <rte-code>Text<rte-code> component with an <rte-code>accessibilityRole=”link”<rte-code> and <rte-code>onPress<rte-code> function dependent on the method <rte-code>isScreenReaderEnabled<rte-code> from <rte-code>AccessibilityInfo<rte-code>.
It should look like this:
I'm sure that you've also come across cases where the sentence contains two inline links e.g. on my GitHub space.
My advice at this point is again to take advantage of <rte-code>isScreenReaderEnabled<rte-code> method to rearrange the view and split the phrase into two.
Views differences
We should keep in mind that each time the font and the display sizes are increased, the screen content will also visually enlarge. Consequently, it may not fit on one screen height, therefore, potentially large content should be placed within <rte-code>ScrollView<rte-code> rather than <rte-code>View<rte-code> where the layout is static, not scrollable.
Icon size
Icons are usually presented along with a label to clarify action or attract attention. Once the font or display size is increased SVG icons or icons build on the top of the <rte-code>Text<rte-code> components should be scaled as well. That’s the case when <rte-code>PixelRatio<rte-code> module comes in handy. More precisely, getFontScale() method is going to be the multiplier to the initial font size.
<rte-code>PixelRatio.getFontScale()<rte-code> is specific to the Android platform (on iOS it will always return the default pixel ratio).
.webp)
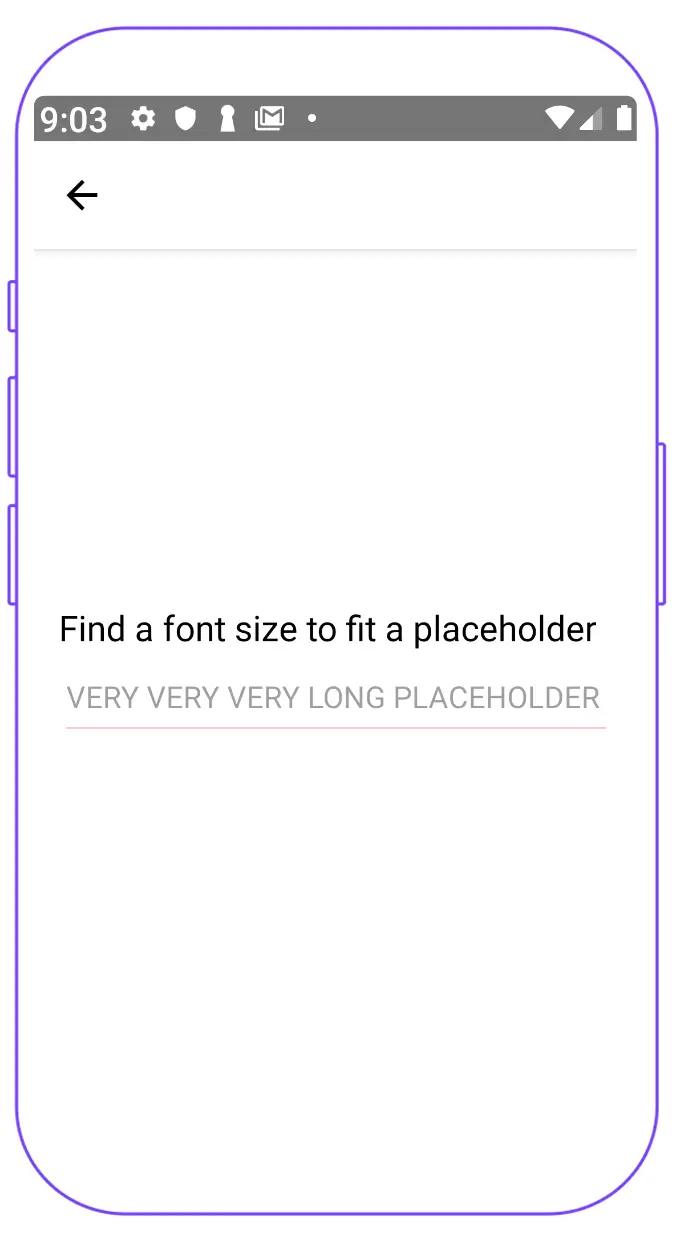
Text Input Placeholder
The placeholder should specify a short hint that describes what is the expected value of an input field. An issue arises if the placeholder message isn’t short and on the largest font size it remains off the screen. A good practice is to first discuss the problem with the designer and try to rephrase the message or redesign screen a little.
However, if you cannot change anything, I propose to find a fitting font size, based on recursive calculations and accurate text measuring before laying it out. You can do that using react-native-text-size library.
In this approach, the goal is to calculate a font size at which the placeholder message is displayed correctly. To achieve it, I’ve created a method called <rte-code>calcFontSize<rte-code> which accepts three arguments such as:
- <rte-code>fontSize<rte-code> — an initial font-size value, that is going to be decreased,
- <rte-code>containerWidth<rte-code> — text input container width, that has to fit a placeholder,
- <rte-code>text<rte-code> — placeholder message.
Within the function, the font size will be constantly reduced by one until a placeholder width is smaller than the width of the container.
That method is called within the <rte-code>onLayout<rte-code> prop
in <rte-code>TextInput<rte-code> component
Pretty easy, isn’t? The font size will be decreased a bit, but the whole message will be displayed and the user will not be confused.
If you are afraid of the flash during placeholder changes you can add one more field to the state called e.g. <rte-code>measured<rte-code> that will be set to true after calculation and make <rte-code>placholderTextColor<rte-code> conditional to the measured value, like in the example below:
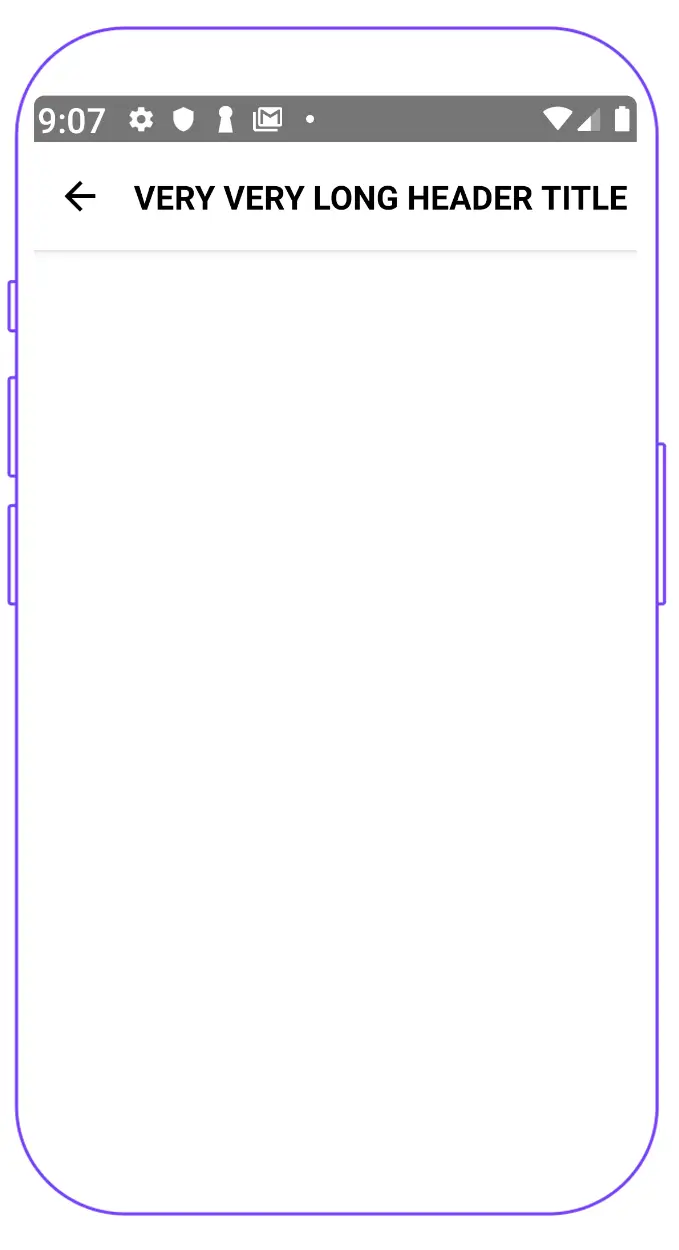
Navigation header
The logic presented in point 4 can be fully adopted also in the case when the header title is too long and your requirements are saying that it cannot be wrapped into two lines. Hiding some part of the title can lead to misunderstanding, so my recommendation is to shrink the font size and display it completely. To accomplish that reuse the previously created function <rte-code>calcFontSize<rte-code> within <rte-code>onLayout<rte-code> prop in custom-made navigation header based on <rte-code>Text<rte-code> component, which can simply look like:
and then use it inside the <rte-code>navigationOptions<rte-code>
Styling in WebView
A page displayed inside <rte-code>WebView<rte-code> is an integral part of your app. Keep in mind that some websites may not be adjusted to be accessible. Generally, it's not your fault, but in my opinion, if there is a possibility to fix it from point of view of your code, you should do it.
In that case, a prop called <rte-code>injectedJavaScript<rte-code> can be helpful. It allows you to inject some JavaScript code into the web page when the view loads.
To easily find an element that you need to adjust, check the Google guide how to easily debug <rte-code>WebView<rte-code> pages on Android using Chrome Developer Tools or react-native-webview documentation.
To illustrate the problem, take a look at the header on Linkedin webpage that on the largest font size remains slightly off the screen, instead of being broken to prevent overflow. That case can be fixed by adding <rte-code>word-break<rte-code> style property into <rte-code>h1<rte-code> tag.
Some styles that you want to change can have <rte-code>!important<rte-code> rule applied, but no worries, you can overwrite it! The <rte-code>CSSStyleDeclaration.setProperty()<rte-code> method comes in handy. It is used for setting a new value for a property on a CSS style declaration object.
Let's assume that you have to correct the width of the image to get <rte-code>width: 100%<rte-code>. What you need to do is to set a proper value along with the priority and then inject it into the webpage, like in the example:
Abbreviations and Acronyms
Do you think that the screen reader is able to distinguish between an abbreviation or an acronym and a regular word that are written the same way? Take, for example, ICE which stands for In Case of Emergency, but means frozen water at the same time. Screen reader, unfortunately, doesn’t care about the capitalization, so in both cases, we are going to hear /ʌɪs/. What we can do about that is to interject whitespace between characters. How?
To achieve that firstly we need to use <rte-code>regex<rte-code> to find an acronym, then use a <rte-code>split()<rte-code> method on it and finally, join <rte-code>substrings<rte-code> with the <rte-code>whitespace character<rte-code>.
Now all that remains to do is to use <rte-code>replace()<rte-code> function within <rte-code>accessibilityLabel<rte-code>:
Acronym in AppName
Did you wonder what if your app name contains acronym? The app name is located in a file <rte-code>strings.xml<rte-code> so, there’s some wiggle room. The solution is even simpler than manipulations on a string from the previous example, but the approach is the same — characters have to be separated, only for the screen reader. There can’t be any visual effect so a must-have in that case is Unicode Character ‘ZERO WIDTH NO-BREAK SPACE’ — \<rte-code>uFEFF<rte-code>.
Well, sometimes one space is not enough, especially if your app name starts with a vowel and … you are using Samsung devices. It’s not a joke, TalkBack on Samsung devices acts differently than on other Android devices and has a serious problem with reading app names such as my example name AAT (Accessibility Android Tips).
In such circumstances, you have two double number of no-break space characters. Look at the final app name result:
Conclusion
Everyone wants to deliver a 5-star-rated UX application, but remember that your app is perfect when 100% of users can use and enjoy it. Don't forget about people with disabilities, because all the users deserve the same level of availability. I hope I drew your attention to the accessibility problem and some of the tips that I shared in this article come in helpful and will make your work easier.
I would like to say a special thank you to Weronika Czekalska, Kacper Wiszczuk and Jakub Kłobus.
Discover services offered by our React Native development company.

Learn more about Accessibility
Here's everything we published recently on this topic.


