If you like to stay up to date with the latest trends in web development (or you’re React Native geek like me 😅), you probably heard something about React Hooks. They leverage the ability to write functional components by providing an ability to use state or life cycles without writing the class that is extending <rte-code>React.Component<rte-code>. If you want to learn more about them, make sure to read this ReactJS article.
The idea behind hooks sounds excellent, and it should clean up a lot of boilerplate from our React codebases. It’s not different when we are speaking about React Native apps — they heavily depend on React and encapsulates its patterns as well.
If you are the early adopter and tried to use hooks in React Native application some time ago, you could get disappointed by the fact that the newest releases of React Native don’t support this feature yet.
But lately, (as many other things in the universe) it has changed! The next release of React Native (0.59) supports React 16.8, and obviously hooks!
Functions like <rte-code>useState<rte-code> or <rte-code>useEffect<rte-code> are now in place, waiting for us to use them in our freshly written functional components. That’s great! But what if you want to write your custom hook? For example, you want to provide a cool way to consume your module in functional components. Be patient! You’ll learn that in the next few minutes.
Preparing the app
Let’s start with initializing the app. My app will be called NativeHookTester, but you can choose any name you want.
NOTE: At the moment the next version is at 0.59.0-rc.2, but this tutorial should work with any RN ≥ 0.59.
While using classes in your modern React apps are perfectly fine, and you shouldn’t invest much time into refactoring existing codebases to functional components using hooks, in our case, I’d like to do that to consume our hook. Let’s change the following lines:
into:
Not only did we turn our class into the function, but also we played a bit with rendered content. Now instead of a welcome message, we have a fancy <TextInput /> ! 🤑

NOTE: Remember to fix imports as well! If you wonder what’re the input styles: <rte-code>{width: 150, height: 30, backgroundColor: ‘white’, borderColor: ‘black’, borderWidth: 1}<rte-code>
Writing a custom hook for native module
Custom hooks for native modules aren’t different from any other hooks. You can use the same pattern to encapsulate communication with some service, database or any other action. Since it’s not an article on writing native modules, I’ll use something that is available with React Native. I chose Clipboard API, but you can write your ow native module following these articles on GitHub (iOS / Android).
Let’s start! 🚀 I created the file called <rte-code>useClipboard.js<rte-code>, I expect it to return the tuple that contains a value stored in the Clipboard, and a function to set the value in the Clipboard. It should look like this:
and our App() function should consume it in the following way:
So far, so good, we need to move further and import a <rte-code>NativeModule<rte-code> called <rte-code>Clipboard<rte-code>. If you take a closer look at what’s available under that module, you’ll see that it contains two methods that could potentially fit our needs. The first one is called getString() and the second one setString(). To consume them we could write code like this:
It looks good, but it won’t work… 😢 I mean, technically it will, but not the way we want it to work. If we dig deeper into <rte-code>Clipboard<rte-code> code, we’ll discover that getString() function is <rte-code>async<rte-code> and we need an <rte-code>await<rte-code> statement to assign the value returned from promise to our <rte-code>contentsvariable<rte-code>.
But we don’t really want to make our hook an asynchronous function. We want to keep it as simple as possible, so ideally calling:
in App() function body should do the job. To achieve that we’ll need some state inside our hook. Guess what — we can use the state hook inside our hook! 🤯

Consider the following code:
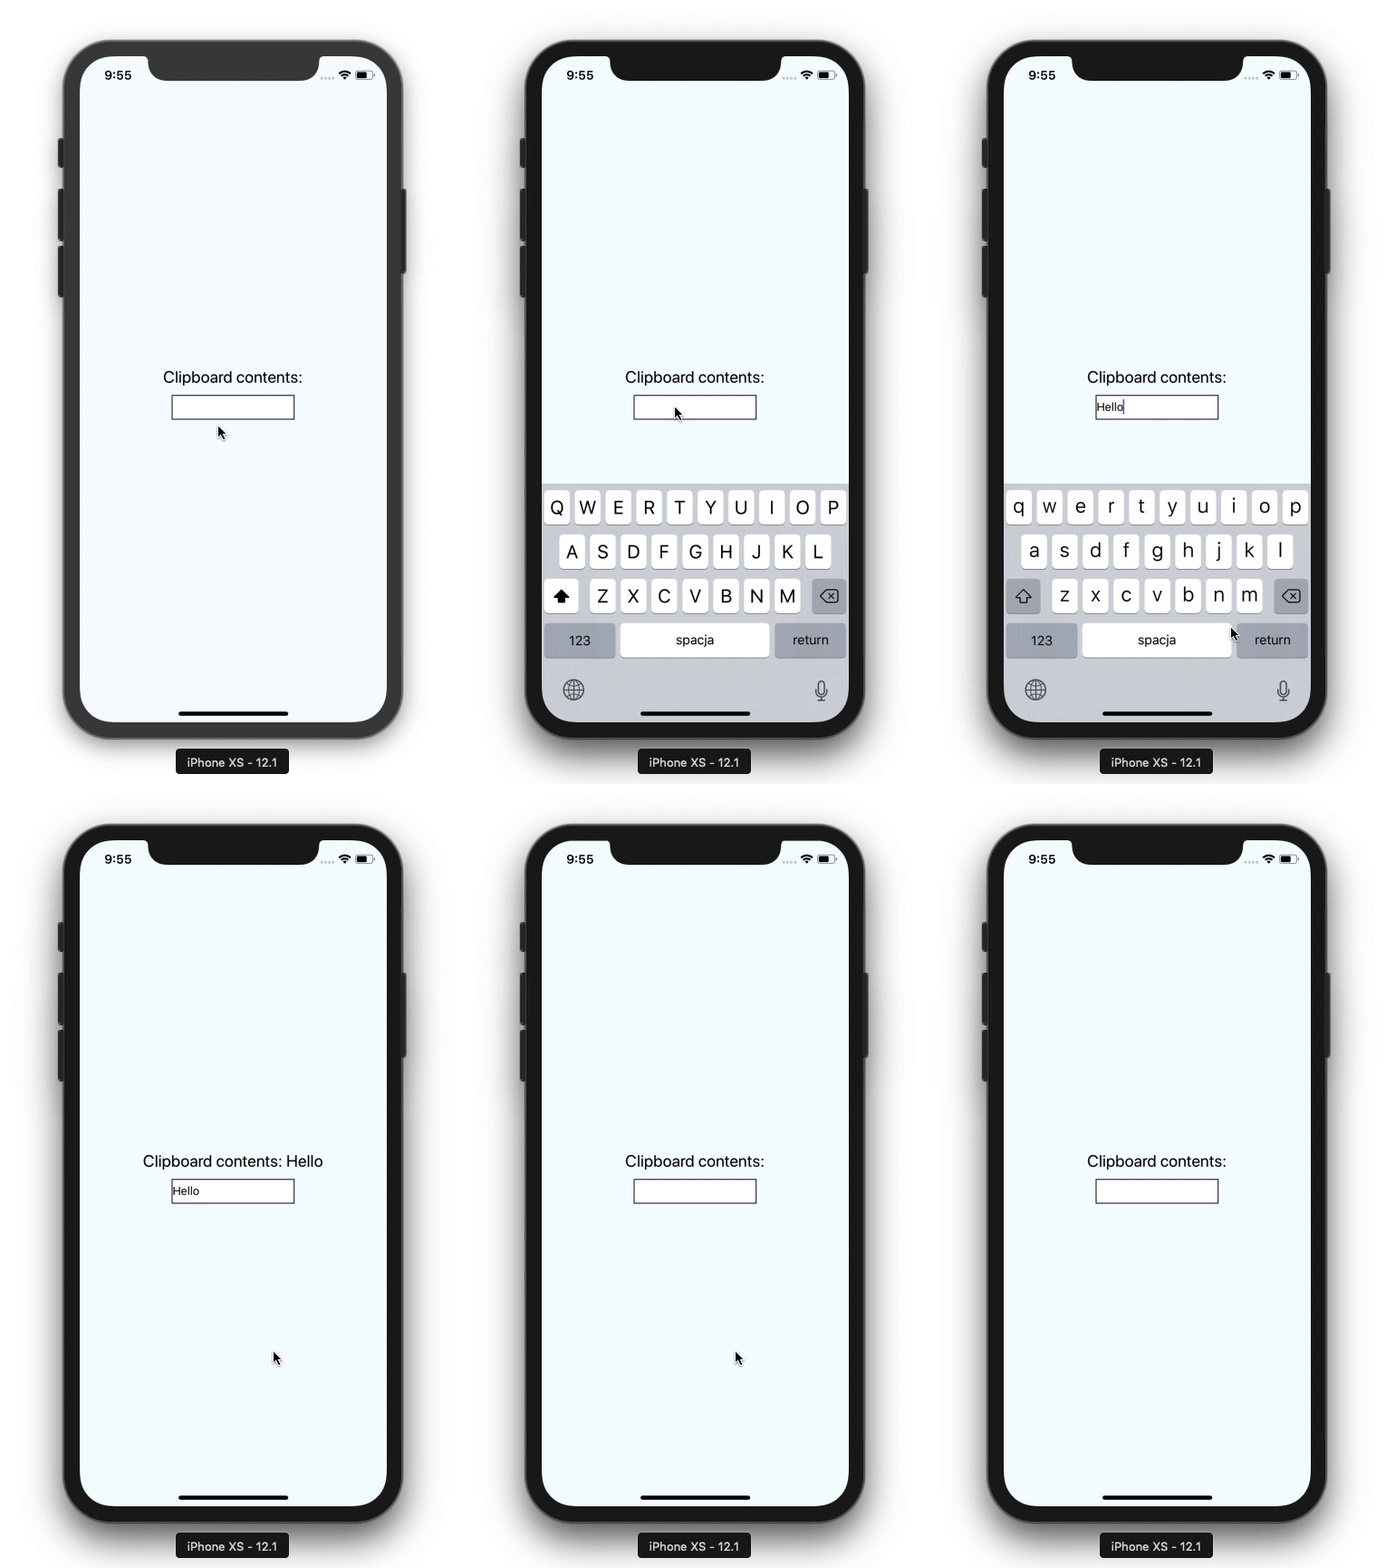
Looks good, hmm? Now we can set value from our input to the clipboard. After that, we should be able to read its value from the state.

But it’s not exactly what we want to do. As you can see after we refresh the app, we are not able to look at the contents of the clipboard. That’s because we are not precisely reading it. It sounds like it’s the time to deal with async stuff.
It turns out that our savior, in this case, will be no different. Asynchronous communication is some side effect, and yet another great hook will save us from oppression. This time we’ll use useEffect.
Currently <rte-code>clipboardContents<rte-code> is correctly filled with the data from <rte-code>Clipboard<rte-code>.

That’s it! If you want to see the whole code, please check out this GitHub repo.


Learn more about React Native
Here's everything we published recently on this topic.
We can help you move
it forward!
At Callstack, we work with companies big and small, pushing React Native everyday.
React Native Performance Optimization
Improve React Native apps speed and efficiency through targeted performance enhancements.
New Architecture Migration
Migrate confidently to React Native’s New Architecture to keep shipping features, unlock new platform capabilities, and stay fully compatible with upcoming releases.
Code Sharing
Implement effective code-sharing strategies across all platforms to accelerate shipping and reduce code duplication.
Mobile App Development
Launch on both Android and iOS with single codebase, keeping high-performance and platform-specific UX.


