Developing an Android Brownfield App With React Native in an Easy Way
Let's start with answering the question: what is a brownfield application?
The term "brownfield" implies something built with already existing elements. Originally used in urban planning to describe areas that can be repurposed, it was later adopted in mobile app development. A brownfield app is basically an app which is not built from scratch.
What does it mean in practice? It means that we want to run a React Native application as a part of a native app that is already developed with technologies like Java or Kotlin. In other words, we want to integrate React Native in an existing app.
How does it work?
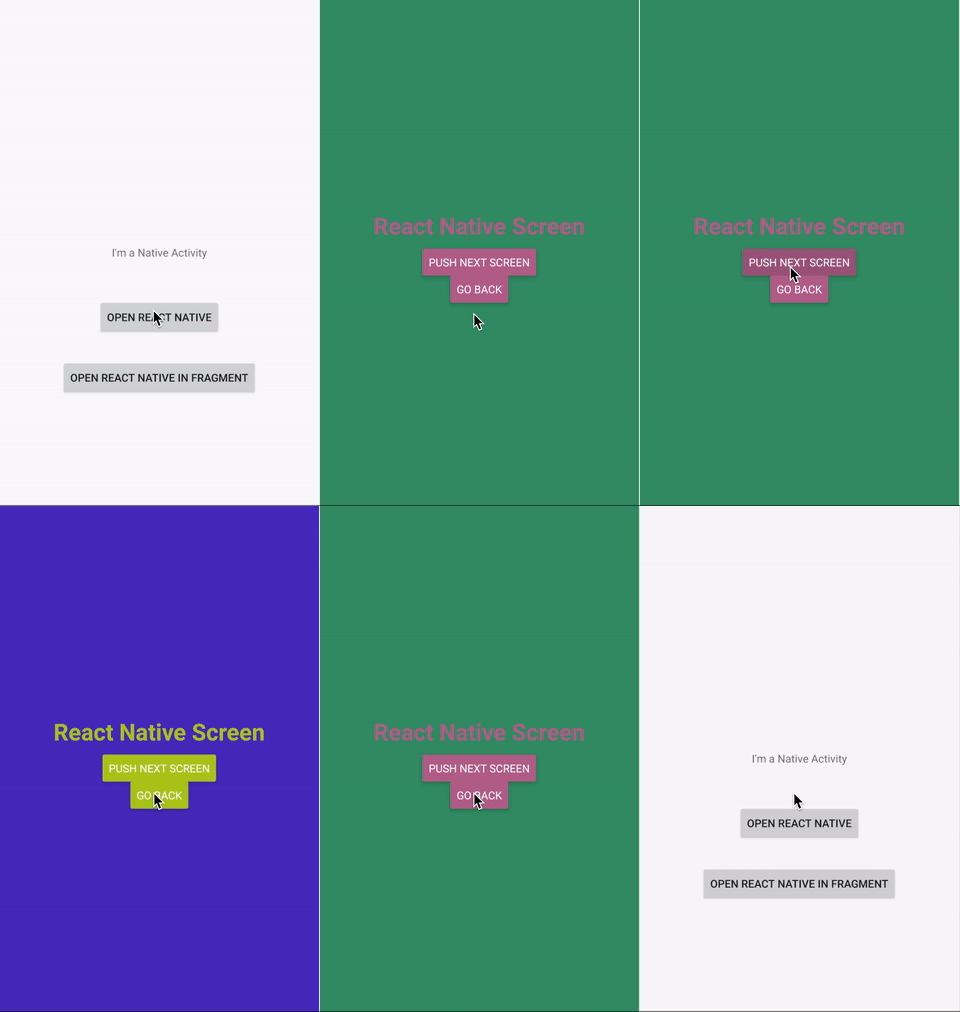
Let’s assume that we have a native Android application where we want to create a new screen using a React Native app that is already implemented. That screen will navigate to another screen inside the React Native application.

In order to make it work, we need to do a few things.
Add React Native to the project
- First of all, we need to add an entry for the local React Native maven directory to the project's <rte-code>build.gradle<rte-code>. Let's add it to the all projects' block, above other maven repositories
- Add react-native from <rte-code>node_modules<rte-code> (thanks to change from the previous point) as a dependency to app's <rte-code>build.gradle<rte-code>
- Add autolinking command to at the end of app's <rte-code>build.gradle<rte-code>
Run a React Native app
In order to run our React Native app we are going to:
- Create an Activity that implements <rte-code>DefaultHardwareBackBtnHandler<rte-code> interface and uses <rte-code>Theme.AppCompat.Light.NoActionBar<rte-code> theme because some React Native UI components rely on it
- Create <rte-code>ReactRootView<rte-code> instance inside onCreate method
- Create <rte-code>ReactInstanceManager<rte-code> instance with needed parameters
- Start react-native application within created root view using <rte-code>startReactApplication<rte-code> method where the second parameter is the same string as in <rte-code>AppRegistry.registerComponent()<rte-code> in index.js file
- Set react-native root view as activity content view
Now we are able to run our react-native app by starting <rte-code>ReactNativeActivity<rte-code> but we need still add some code to get all things to work. :)
- Pass activity lifecycle callbacks to the <rte-code>ReactInstanceManager<rte-code> and <rte-code>ReactRootView<rte-code>
- Pass the back button events to avoid closing <rte-code>ReactNativeActivity<rte-code> when hardware back button is pressed and support hardware back button on JS side
Even with this change we don't have a mechanism to back to native screen w/o using hardware back button. This issue could be solved by react-native native module which will expose the method to JS that will finish <rte-code>ReactNativeActivity<rte-code>.
Additional points
- In debug mode, we need packager to serve JS bundle. To make it possible we need internet permissions. Add the following line to the <rte-code>AndroidManifest.xml<rte-code> file
Starting with Android 9 (API level 28), cleartext traffic is disabled by default. This prevents your application from connecting to the React Native packager. To solve this we need to add <rte-code>usesCleartextTraffic<rte-code> option to your Debug <rte-code>AndroidManifest.xml<rte-code>
- To enable Dev Menu in react-native app add <rte-code>DevSettingsActivity<rte-code> to <rte-code>AndroidManifest.xml<rte-code>
All of the additional points are required only for debug builds where we reload JS code from the development server, so you can strip this in release builds.
I think that all of those steps above are repeated in almost all react-native brownfield android app. But can't it be done a bit simpler? Do we really need care about passing onPause, onDestroyetc?
Of course, it might be easier. :) We can use react-native-brownfield package which will help us with navigation's issues and provide a nice API to run a react-native application.
How does it work with React Native brownfield?
We want to achieve exactly the same effect as before but we will use react-native-brownfield library:

Adding React Native to the project
The theory is the same as I described in the previous part of this article but with some facilities. In order to run our react-native app in native one using react-native-brownfield we need to add that package as a dependency to <rte-code>package.json<rte-code> using:
or
Next, we need to add react-native app as we did in Add react-native to project point.
Additional steps
All additional steps are needed to be added here as well and only for debug builds.
Running a React Native app
And now the fun begins. :) Instead of creating a root view and instance manager by ourselves we can simply use <rte-code>ReactNativeBrownfield<rte-code> package. Since autolinking script to <rte-code>build.gradle<rte-code> and <rte-code>react-native-brownfield<rte-code> are added we can use that package without additional effort.
- Add <rte-code>ReactNativeActivity<rte-code> to <rte-code>AndroidManifest.xml file<rte-code>
- Initialize react-native app with context as a first parameter (this in the snippet below)
- Start react-native app
- Create <rte-code>ReactNativeActivity<rte-code> Intent with context and <rte-code>moduleNam<rte-code>e as parameters and star activity
And voilà! We are ready to go. :) We don't have to worry about passing activity lifecycles, back button events or native module that enable to back from react-native to native screen. All of those things are handled by react-native-brownfield package.
Conclusion
Lastly, it is a popular thing to use react-native within existing native apps especially by larger organizations that have multiple teams working on the same app for multiple platforms. Thanks to <rte-code>react-native-brownfield<rte-code> the integration is easier, enjoyable and some issues that exist in every <rte-code>react-native brownfield<rte-code> app are solved.
Working examples of using React Native brownfield are inside an example directory.
As part of The React Native Show, we released a podcast fully dedicated to future of Brownfield Development with React Native.


Learn more about Brownfield
Here's everything we published recently on this topic.


